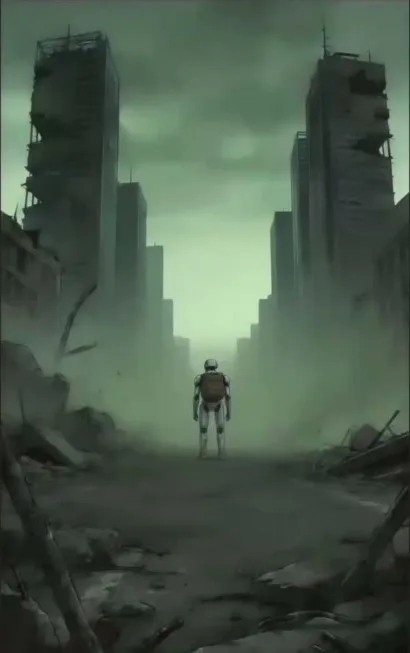
To create an AI film, transition from a written script to a visual storyboard using image generators before animating those stills into video clips. Austin Zartman, creator of the AI series ASHES, uses this exact workflow for ai filmmaking video generation. He treats image generation as a mandatory storyboard phase to ensure visual consistency. This prevents wasting credits on expensive video generation for shots that do not align with the story.
The visual elements of the story must remain identical across different generated shots before moving to the animation phase. By locking in the visual style early, you protect your budget and your timeline. The ai requires explicit instructions and reference images to maintain continuity.
What you will learn
You will learn the exact steps to master ai filmmaking video generation and convert a written script into a comprehensive visual shot list.
- Break down a written script into a comprehensive visual shot list.
- Generate consistent storyboard images using tools like Layline and Magnific.
- Animate still images into video clips using appropriate AI models and reference frames.
- Apply negative prompting and end frames to control complex camera movements and character actions.
- Avoid wasting credits on expensive video generation by selecting older models for simple tasks.
- Maintain visual consistency across different aspect ratios like 9:16.
Breaking Down a Script into a Storyboard
Generate still images to build a visual storyboard that establishes the story before spending credits on ai filmmaking video generation. This storyboard phase acts as a safeguard against visual inconsistencies. You establish the visual foundation of the project here.
Step 1. Upload your script into a tool like Layline. Layline automatically generates a shot list with specific shot types and descriptions. This provides a mental outline of your establishing shots and close-ups. You must know exactly what each shot requires before generating any images. The breakdown process organizes the narrative into manageable visual components.
Step 2. Enter prompts for each shot into an image generator. Specify the exact visual style in your text prompt. For example, prompt 'an ant crawling down an old man's face' and explicitly specify '1980s anime style'. Do not rely on platform presets. The text prompt must contain all visual details to guide the ai accurately.
Step 3. Review the generated images sequentially. Check the sequence for visual inconsistencies. Look for changing art styles, shifting character details, or incorrect clothing colors. You must fix these errors in the still image phase before moving to the expensive video generation phase. A minor error in a still image becomes a major distraction in a moving video.
AI Filmmaking Video Generation Steps
Animate your storyboard stills into short video clips by using your images as starting frames to maintain visual style and character details. The ai filmmaking video generation process requires precise control over models, prompts, and reference frames.
Step 1. Upload your storyboard image as the starting frame. Upload your image into your video generator. This establishes the visual style, characters, and scene for the model. The starting frame anchors the video generation process to your established storyboard. It acts as the primary reference point for the ai.
Step 2. Write a prompt describing the action. Include the visual style and camera movement instructions in the text prompt. Specify the aspect ratio, such as 9:16 for vertical video formats. Explicitly state if you do not want the camera to move. The prompt must guide the animation of the starting frame without contradicting the visual information already present.
Step 3. Select an appropriate model. Choose a model based on the complexity of the shot. Use older models like WN 2.5 for simple shots, such as a spinning tire. Use newer models like Seed Dance 2.0 for complex actions. This model selection strategy prevents wasting credits on expensive video generation for basic movements. Match the tool to the task to optimize your workflow.
Step 4. Add an end frame for specific movements. Upload an end frame if the shot requires a highly specific movement. This is crucial for actions like a character exiting through a specific door. The end frame ensures the character does not walk through a wall. It forces the ai to calculate a path between two known visual points.
Step 5. Use negative prompting to restrict unwanted behaviors. Tell the model exactly what to avoid. Use negative prompting to stop the ai from shifting the camera, panning across a room, or inserting new objects into the scene. Negative prompts act as boundaries that keep the video generation focused on your intended action.
Key terms
Understanding the vocabulary of the ai filmmaking video generation process ensures you can execute each step accurately.
Script Breakdown. The process of taking every line of a script and turning it into a specific shot with character descriptions. This includes defining wide shots, medium shots, and close-ups to build a complete shot list.
Storyboard. A sequence of generated images representing every shot in the script. This ensures visual consistency before video generation begins and serves as the blueprint for the final film.
Visual Consistency. Ensuring characters and art styles remain identical across different generated shots. This includes maintaining specific details like tie colors or choosing strictly between a 1980s anime style and a Pixar style.
Video Generation. The process of animating still storyboard images into short video clips. These clips capture specific segments of the story and require careful prompt engineering.
9:16 Aspect Ratio. A vertical video format. Creators commonly use this format for mobile-first content and social media platforms.
Starting Frame. A reference image provided to a video generation model. It establishes the visual style, characters, and scene at the beginning of a clip, preventing the ai from guessing the initial state of the shot.
End Frame. A specific reference image used at the end of a video generation prompt. It guides the model on exactly where a movement or action must conclude, which is vital for complex character blocking.
Negative Prompting. Specifying elements or movements to avoid in a generation. Examples include stopping the model from shifting the camera or inserting a new wall into the background.
Model Selection. Choosing between older, cheaper models for simple movements and newer, expensive models for complex, multi-element shots. Proper selection manages the budget of the project.
Timeline. An editing interface where generated video clips are sequenced together. This forms a complete episode or film from the individual generated components.
Common mistakes to avoid
Avoiding standard errors in the ai filmmaking video generation workflow saves credits and maintains visual quality.
- Skipping the storyboard phase and moving directly to video generation. This leads to expensive visual inconsistencies that ruin the final product.
- Using the most expensive, newest video model for simple shots. Animating a spinning tire with Seed Dance 2.0 wastes credits when an older model like WN 2.5 can handle the task perfectly.
- Failing to include the visual style description in the video prompt. Relying solely on platform presets instead of typing '1990s hand-drawn anime' causes style shifts between clips.
- Not using an end frame for highly specific character movements. This causes the ai to hallucinate the character walking through walls or interacting with objects incorrectly.
- Assuming a camera movement that is easy to film in real life will be easy for an AI model. Panning across a corner is often impossible for current models to generate accurately, resulting in distorted backgrounds.
Frequently asked questions
How to break down a script for ai filmmaking video generation?
Break down your script by generating a sequence of consistent still images to act as a visual storyboard. This step ensures the story looks correct and gives a clear sense of the narrative before you move into the expensive video generation phase. Use tools like Layline to automate the initial shot list creation.
How to use starting and ending frames in ai filmmaking video generation?
Provide a starting frame to establish the visual style, characters, and scene for the AI model. For highly specific character movements, you must also use an end frame. Without an end frame, the ai might hallucinate actions, such as a character walking through walls. The two frames act as anchors for the animation.
How to reduce costs during ai filmmaking video generation?
Reduce costs by completing a full still-image storyboard to lock in visual consistency before generating video. Avoid using the newest, most expensive video models for simple shots like a spinning tire. Older models like WN 2.5 handle these efficiently without wasting credits.
Why do AI video models struggle with simple camera pans?
AI video models often struggle with camera movements that are easy to film in real life, such as panning across a corner. You might assume these physical camera moves are simple, but the ai can find them impossible to generate accurately because it lacks a true 3D understanding of the space.
How to maintain visual consistency in ai filmmaking video generation?
Maintain visual consistency by including your specific visual style description directly in the video prompt. Typing '1990s hand-drawn anime' works better than relying solely on platform presets. Using your storyboard images as starting frames also locks in the characters and scene for the duration of the clip.
Comments
Sign in with your Leyline account to join the conversation.