Editing and Sound Design for AI Microdramas
Cohort 1, Session 5 — taught by Austin Zartman, creator of the AI short-film series ASHES.
To make a film with AI, you generate individual video clips and still images and then assemble them in a non-linear editor like DaVinci Resolve or CapCut. In the editor, you refine the sequence by trimming clips, adding camera movement, and fixing continuity errors. The final step is layering sound design, including consistent character voices, sound effects, and royalty-free music to create an immersive experience.
What you will learn
- Assemble generated video clips into a cohesive episode using a non-linear editor.
- Manipulate clips by trimming, extending, reframing, and adding effects like zooms and camera shake.
- Apply the "cutting on action" principle to create smoother transitions.
- Layer voiceover, sound effects, and music to build atmosphere and convey emotion.
- Generate consistent character voices using external tools like 11 Labs.
- Source and legally use royalty-free audio assets for your projects.
Assembling a Rough Cut in an External Editor
Move your generated clips into a non-linear editor (NLE) to organize them in a media pool and arrange them on a timeline. This gives you more control and stability than a generation platform's built-in editor.
Step 1. Download all generated video clips and image assets from your generation platform.
Step 2. Organize your assets into folders on your computer by type (e.g., Videos, Images, Voiceover, SFX, Music).
Step 3. Open your chosen editing software, such as DaVinci Resolve or CapCut.
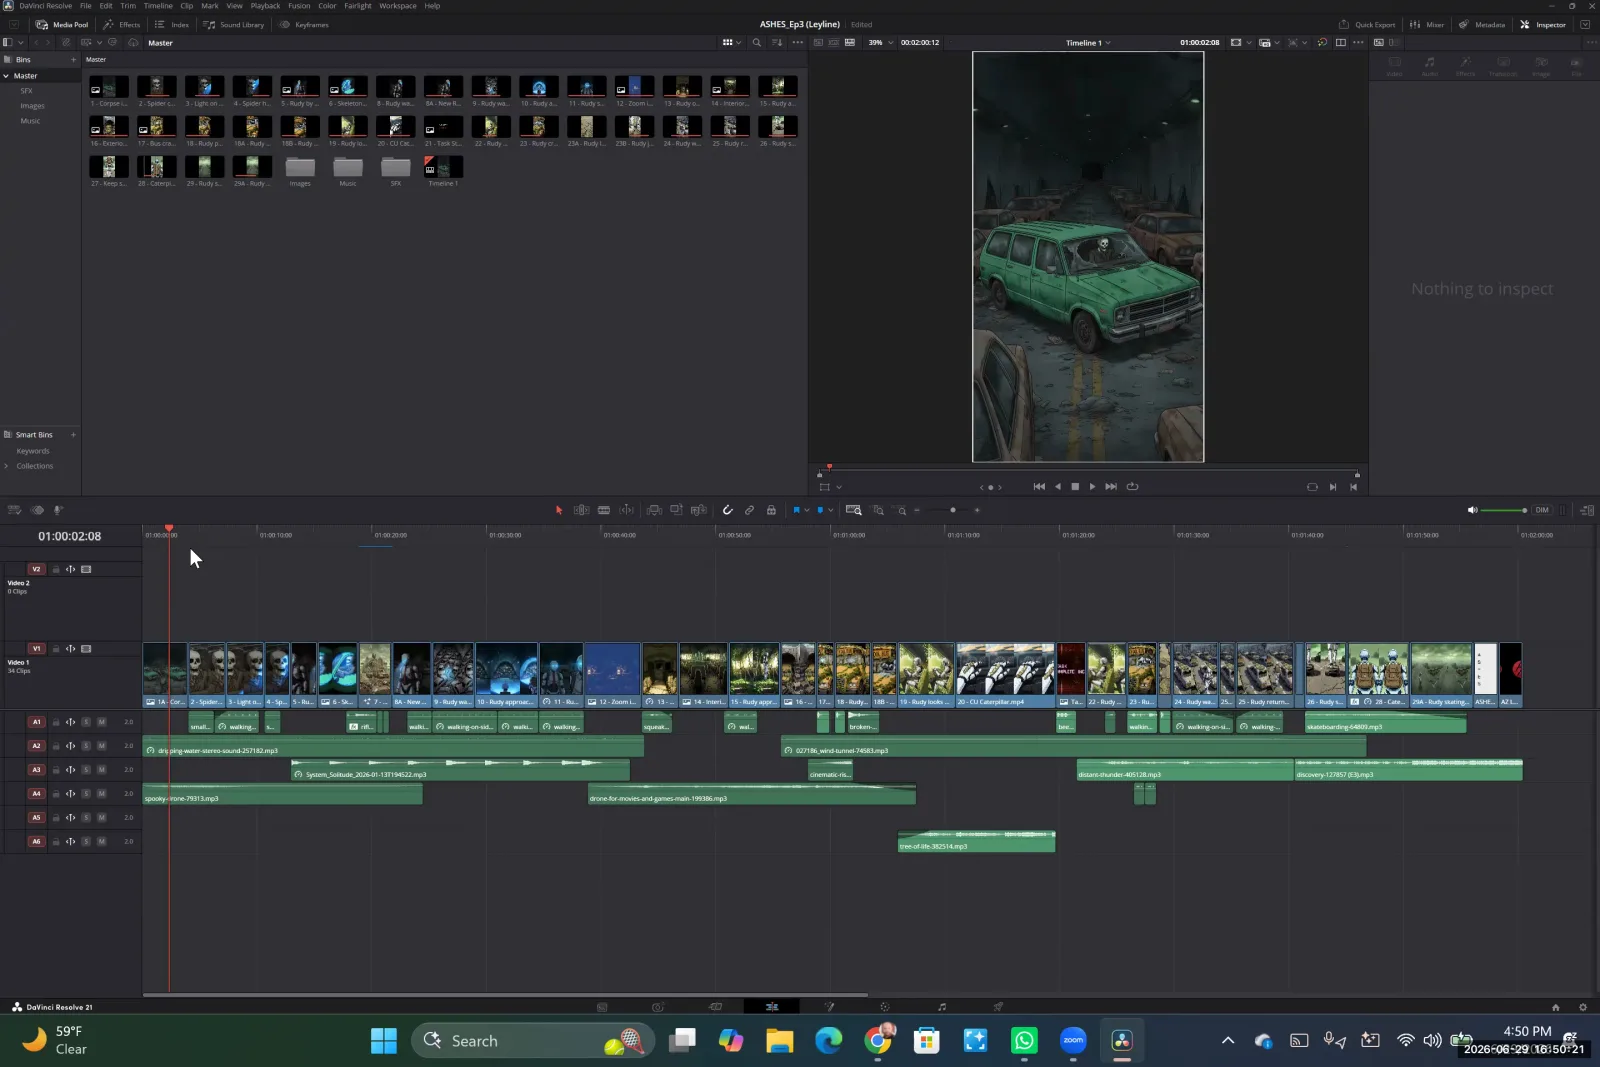
Open your project in a video editing program like DaVinci Resolve to begin assembling your clips.
Step 4. Import all your asset folders into the editor's media pool or 'bin'.
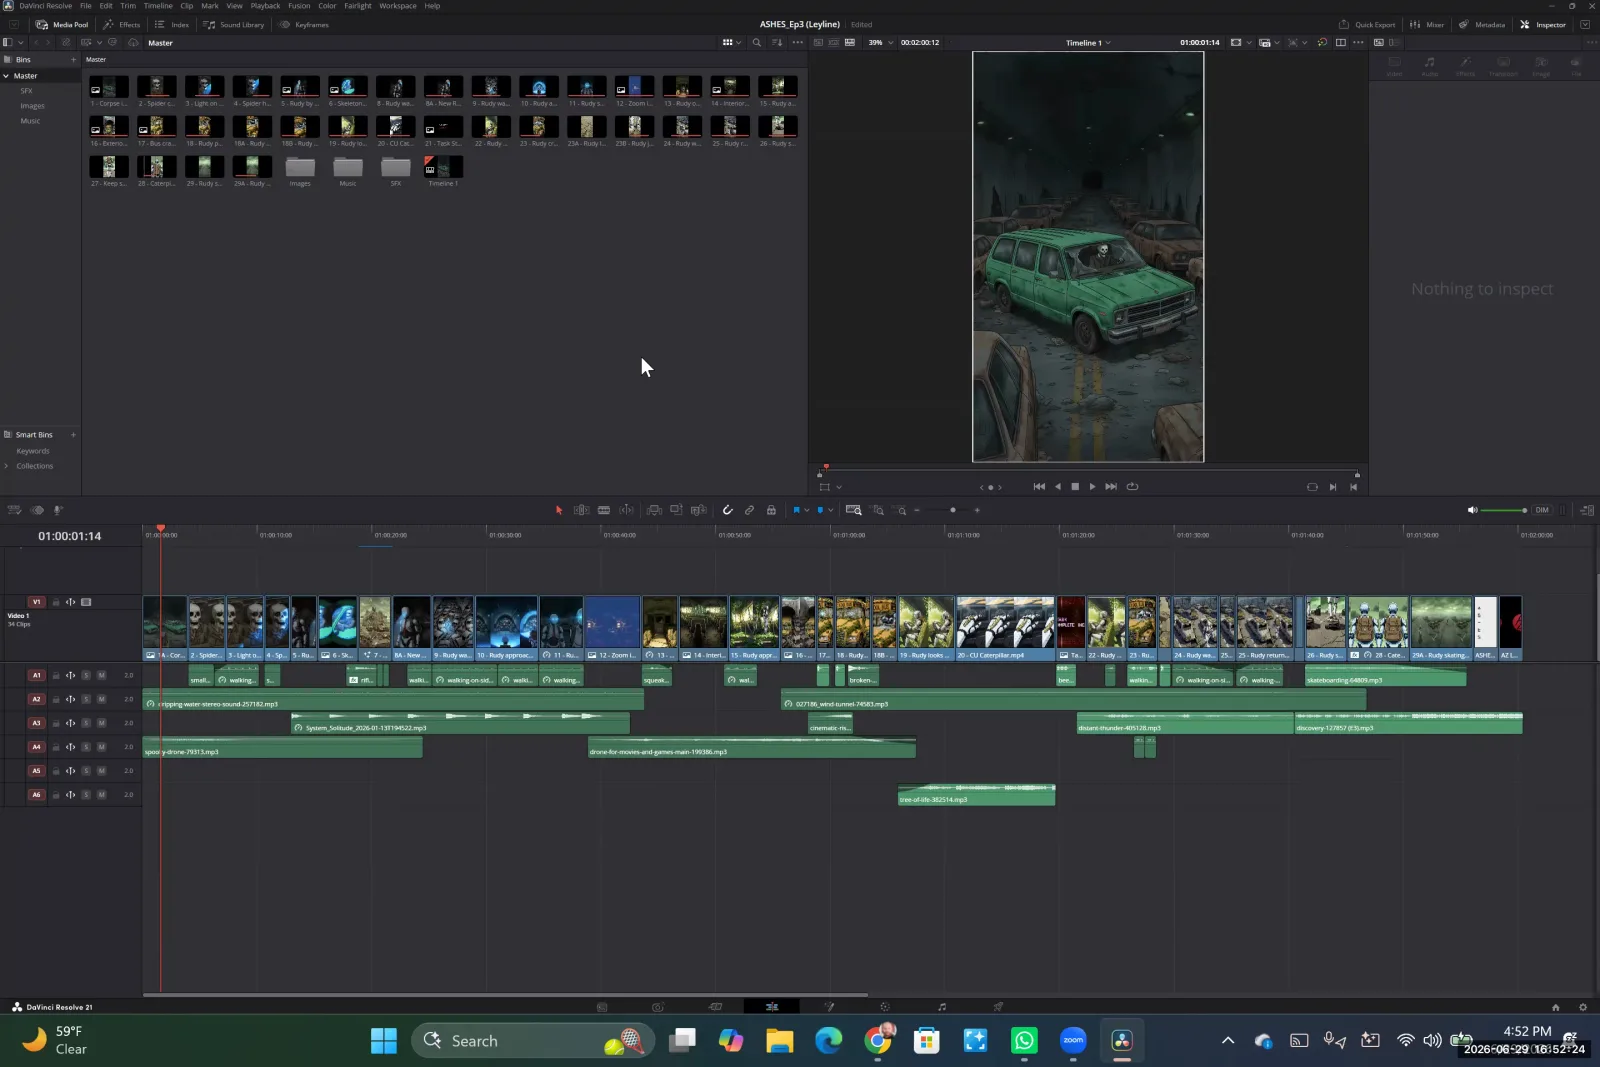
The Media Pool displays all your imported assets, organized into bins for easy access.
Step 5. Drag and drop your video clips and images onto the timeline in the correct story order.
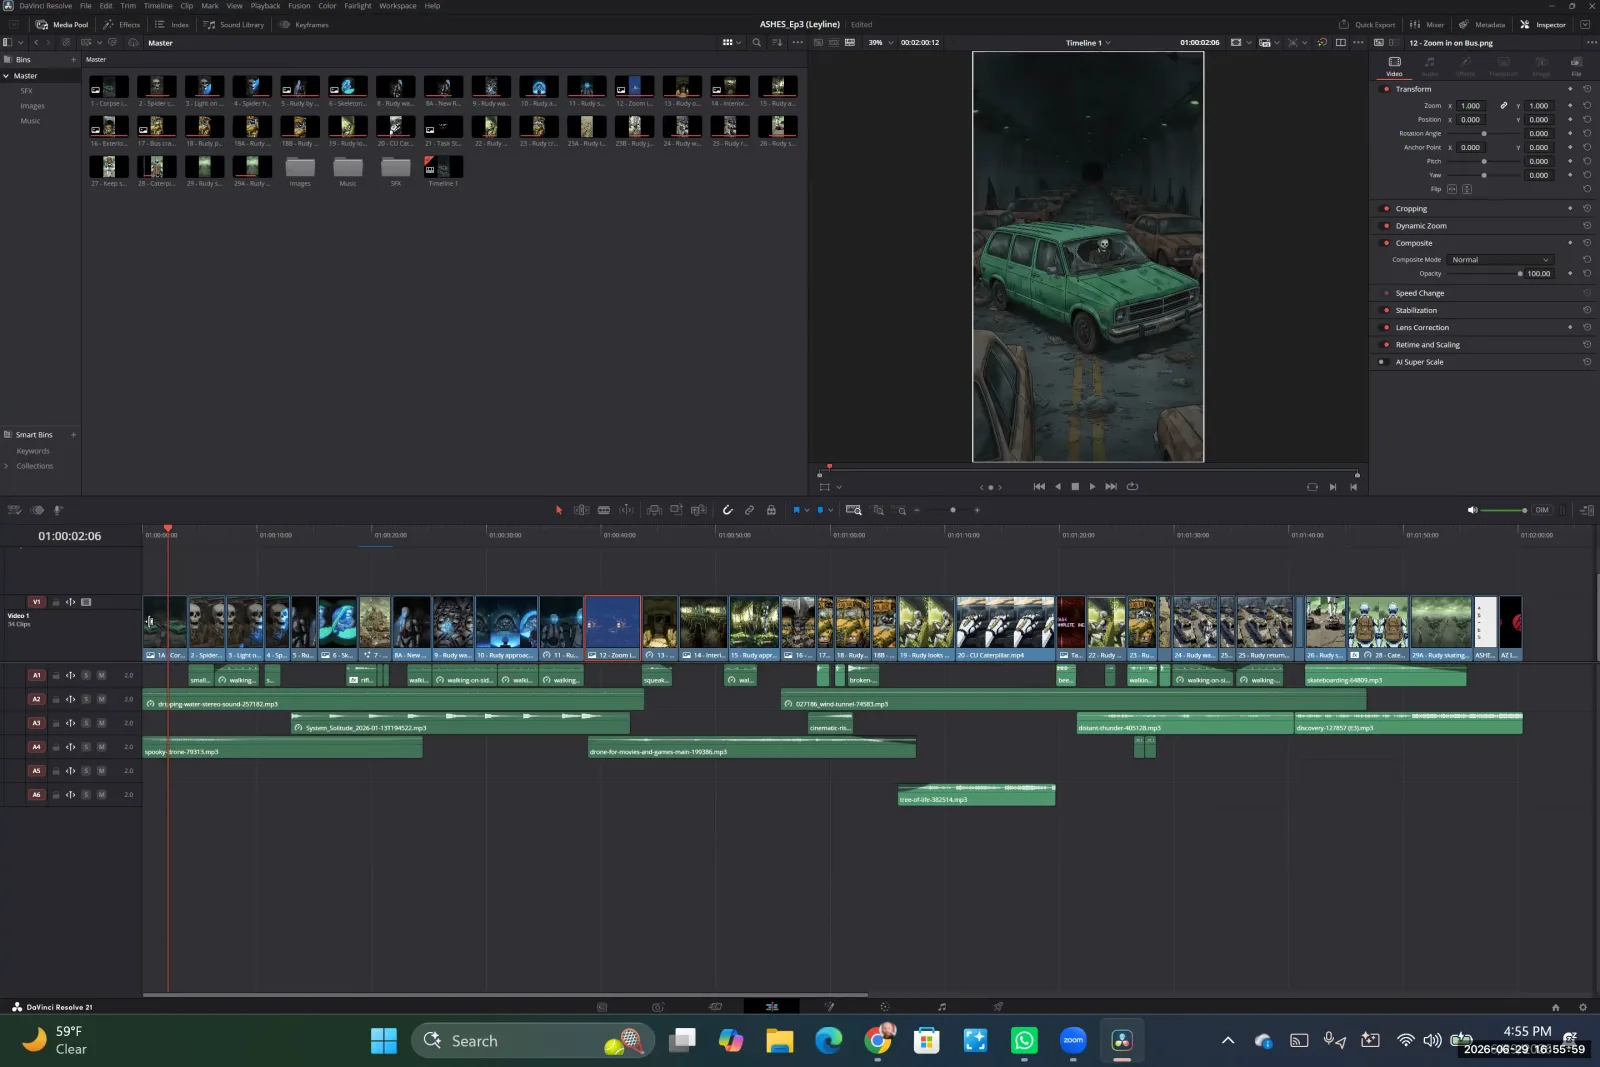
Drag your clips from the Media Pool and arrange them sequentially on the timeline to build your edit.
Refining Clips and Adding Camera Movement
Once your clips are on the timeline, you can manipulate them individually to improve the film's rhythm and visual interest. This involves trimming shots for pacing and adding simple effects like camera shake without re-generating.
Step 1. Select a clip on the timeline and trim its beginning or end to use only the most effective portion.
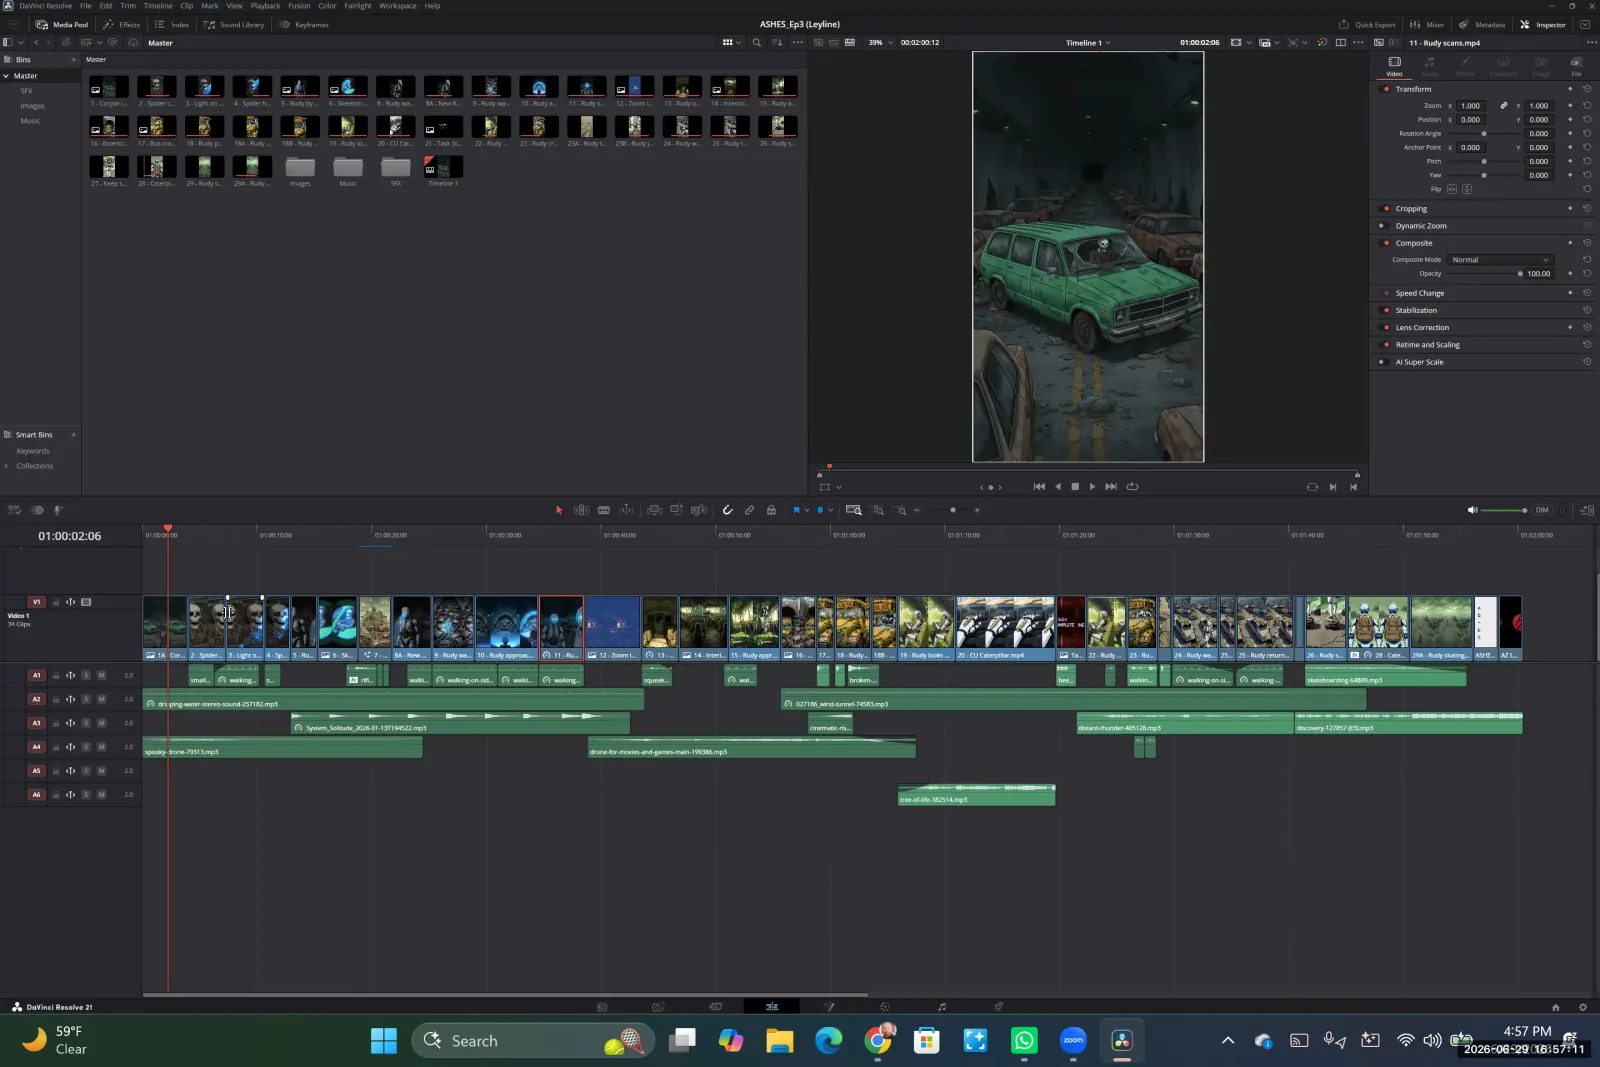
Select a clip on the timeline to trim its beginning or end by dragging its edges.
Step 2. Use the 'inspector' or settings panel to zoom in or reframe the shot.
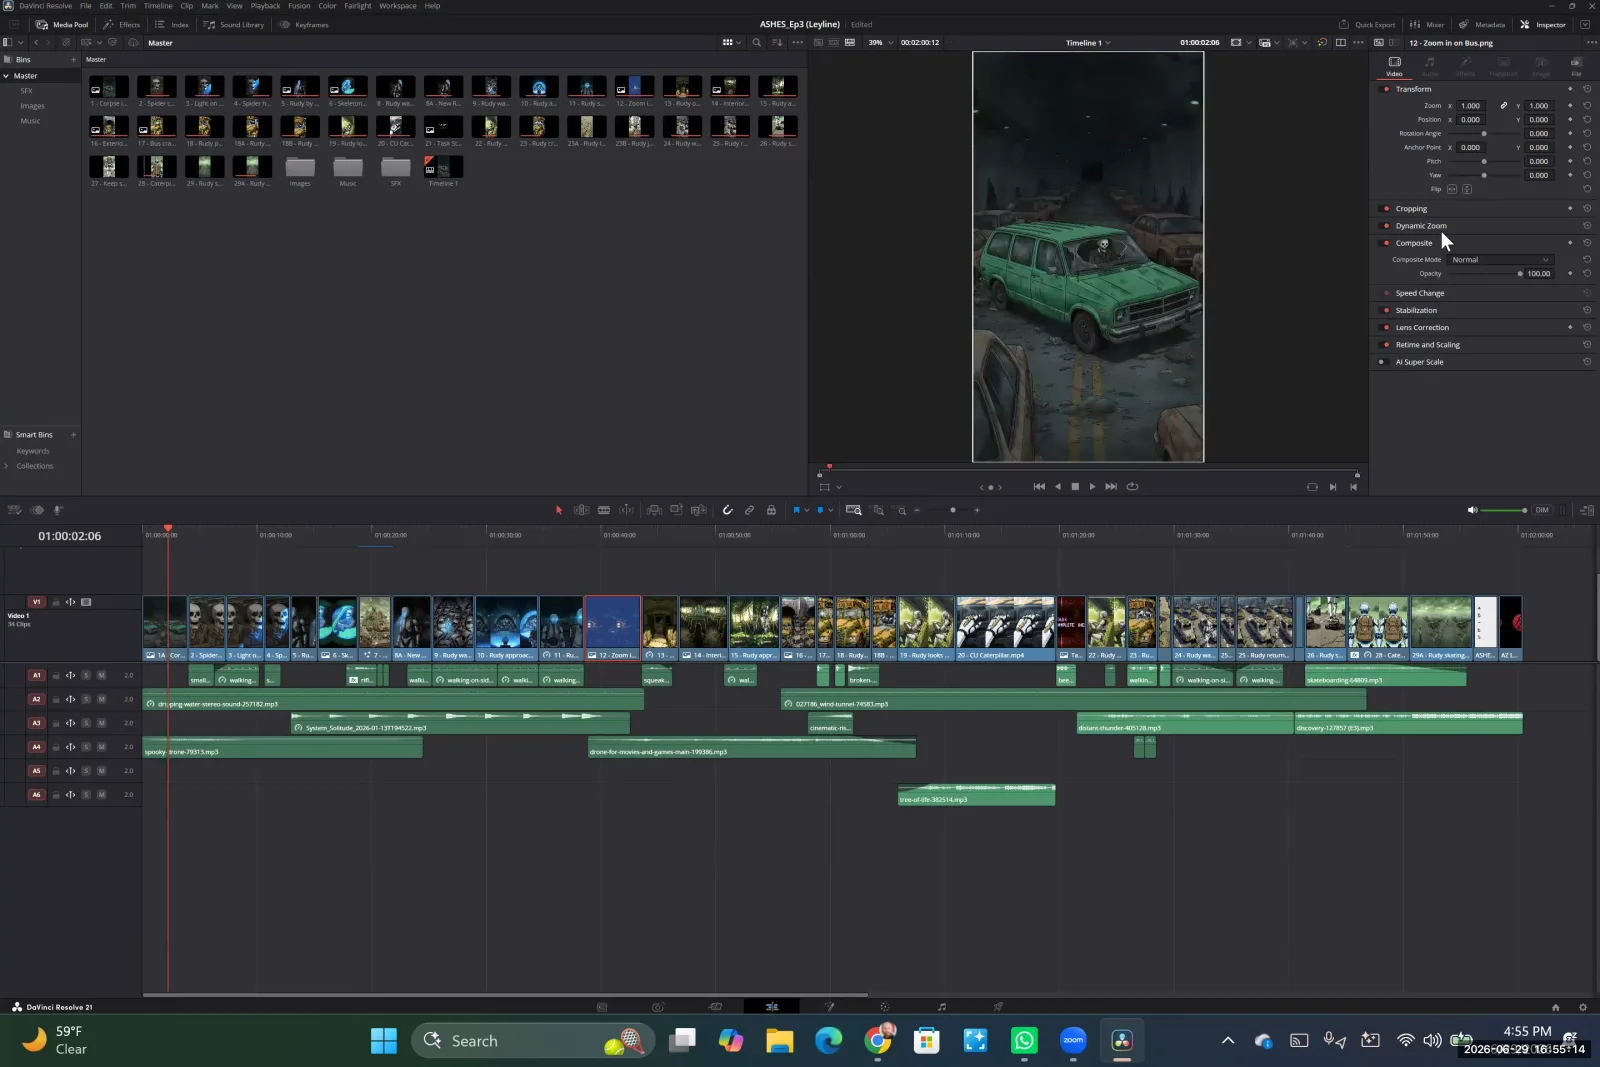
In the Inspector panel, use the Transform and Dynamic Zoom controls to reframe or add movement to a shot.
Step 3. Apply a dynamic zoom or pan effect to create camera movement on a static shot.
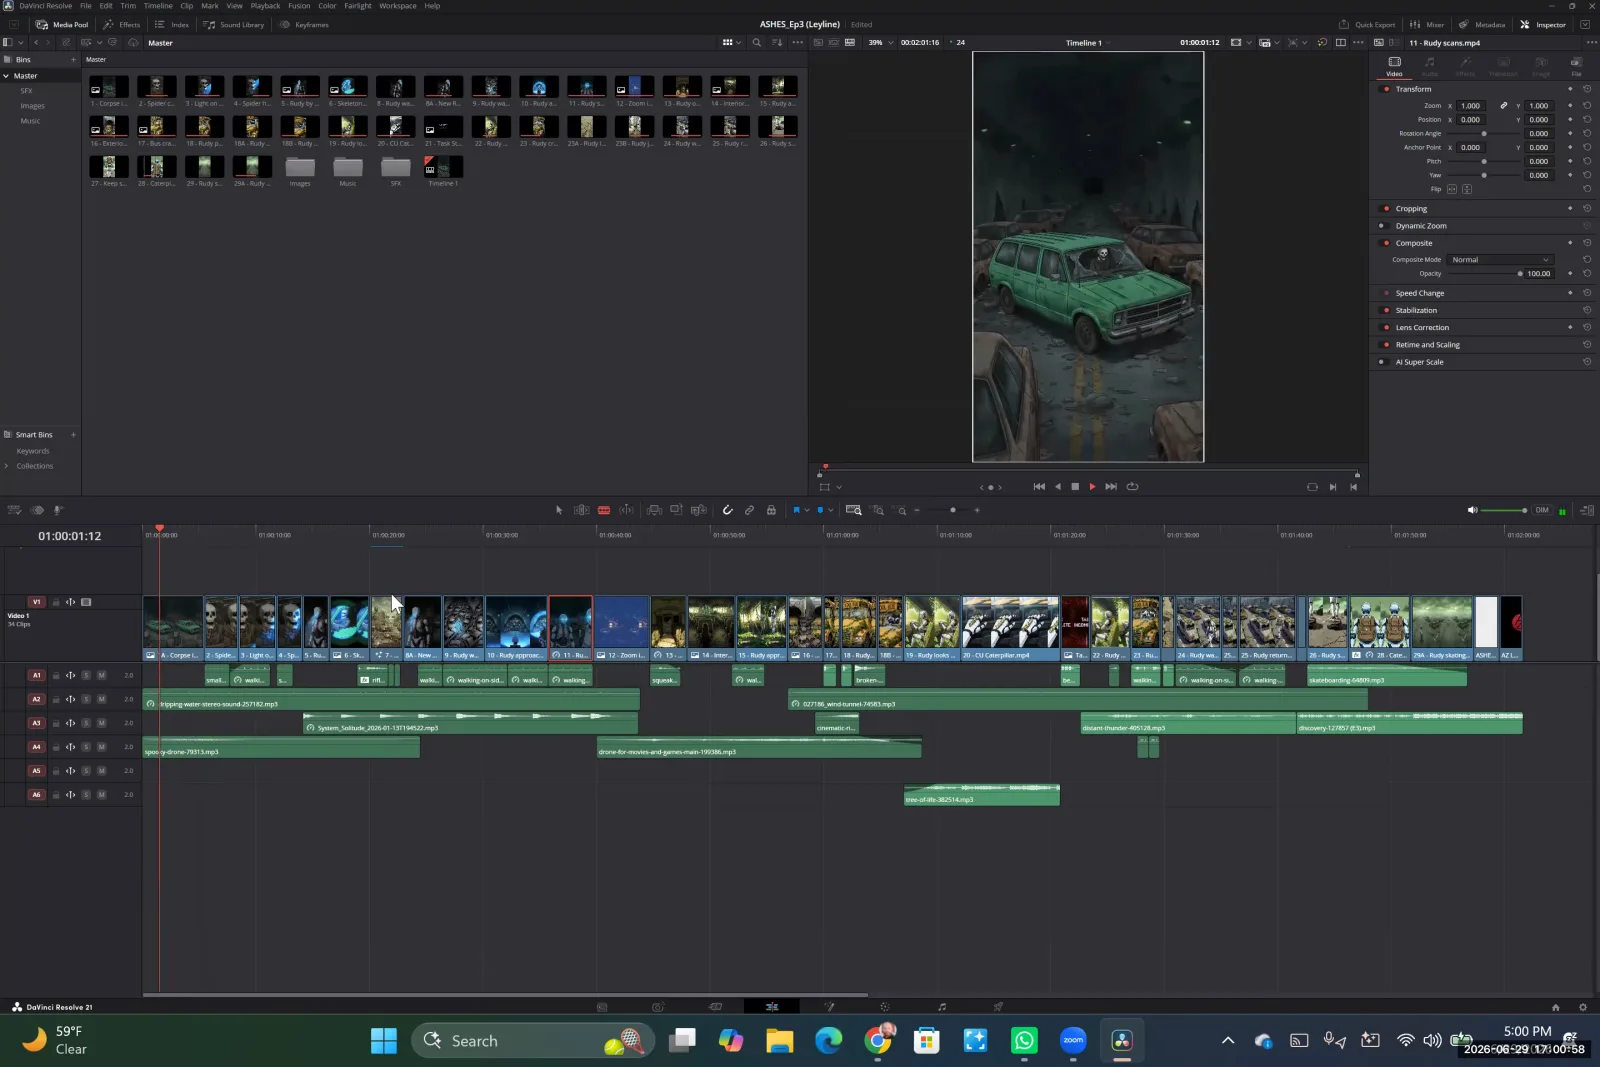
With a static clip selected in the timeline, you can find the Dynamic Zoom and Transform controls in the Inspector panel.
Step 4. Add a 'camera shake' effect to a static clip to imply movement or impact.
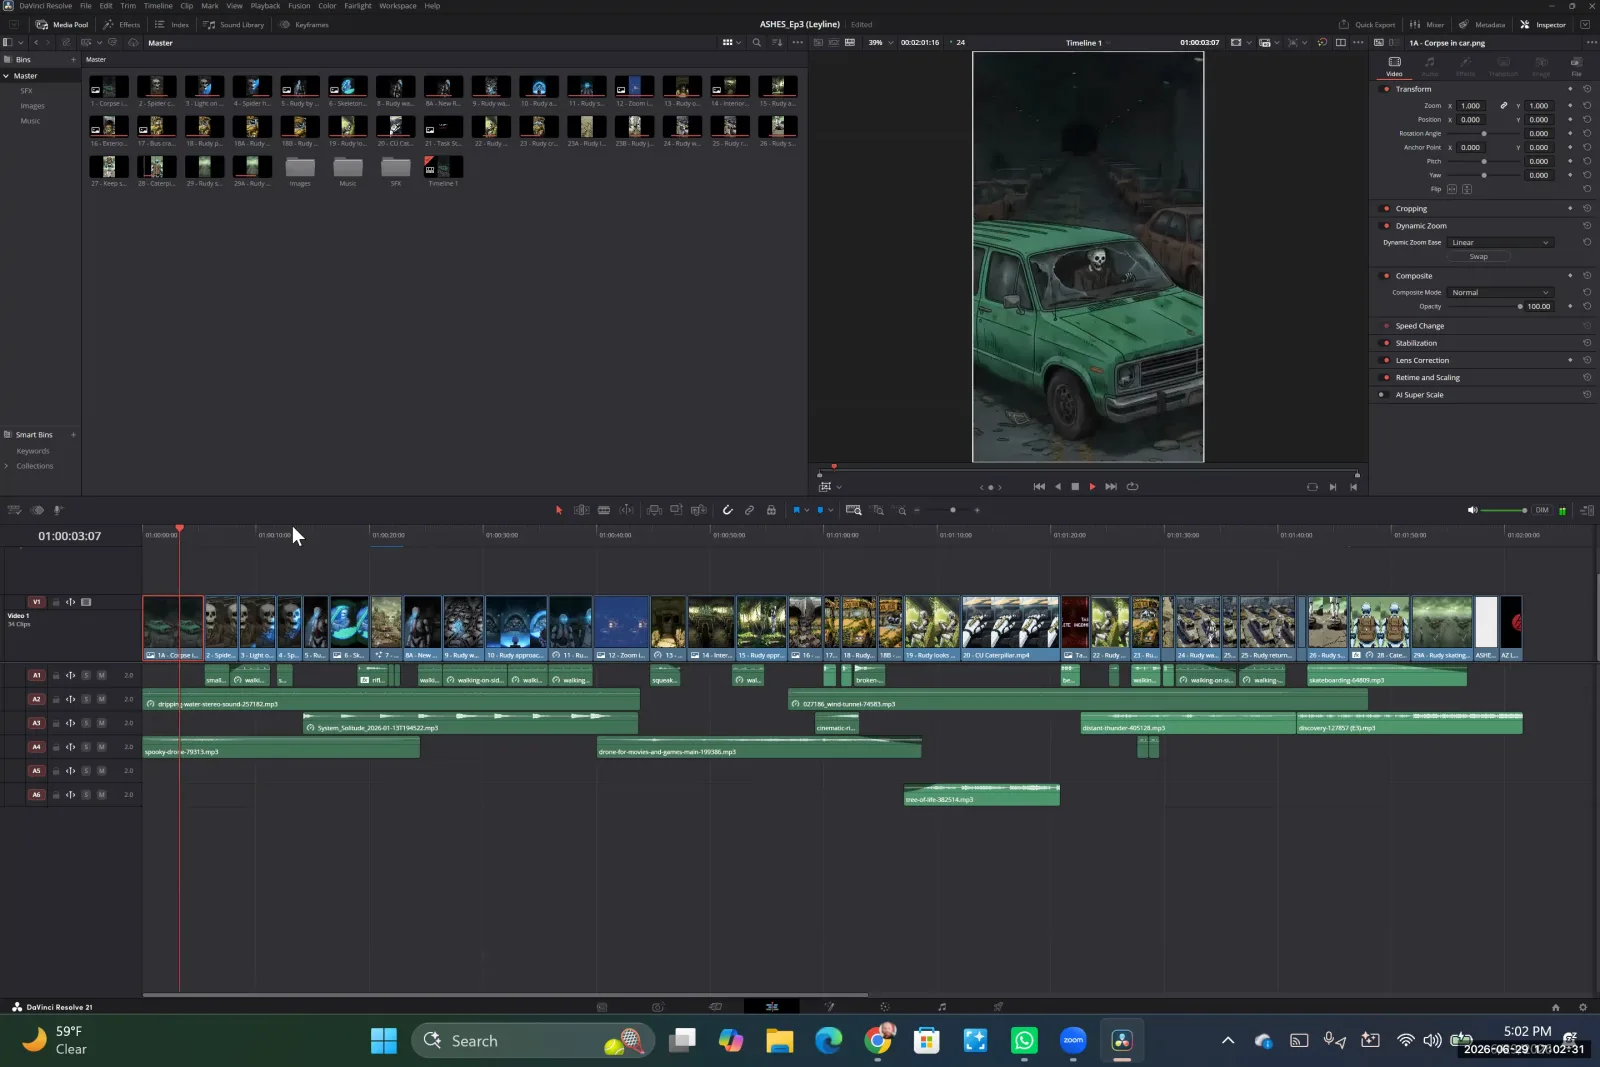
Select a static clip in the timeline to prepare for adding a camera shake effect.
Step 5. Flip a clip horizontally to change a character's screen direction for better continuity.
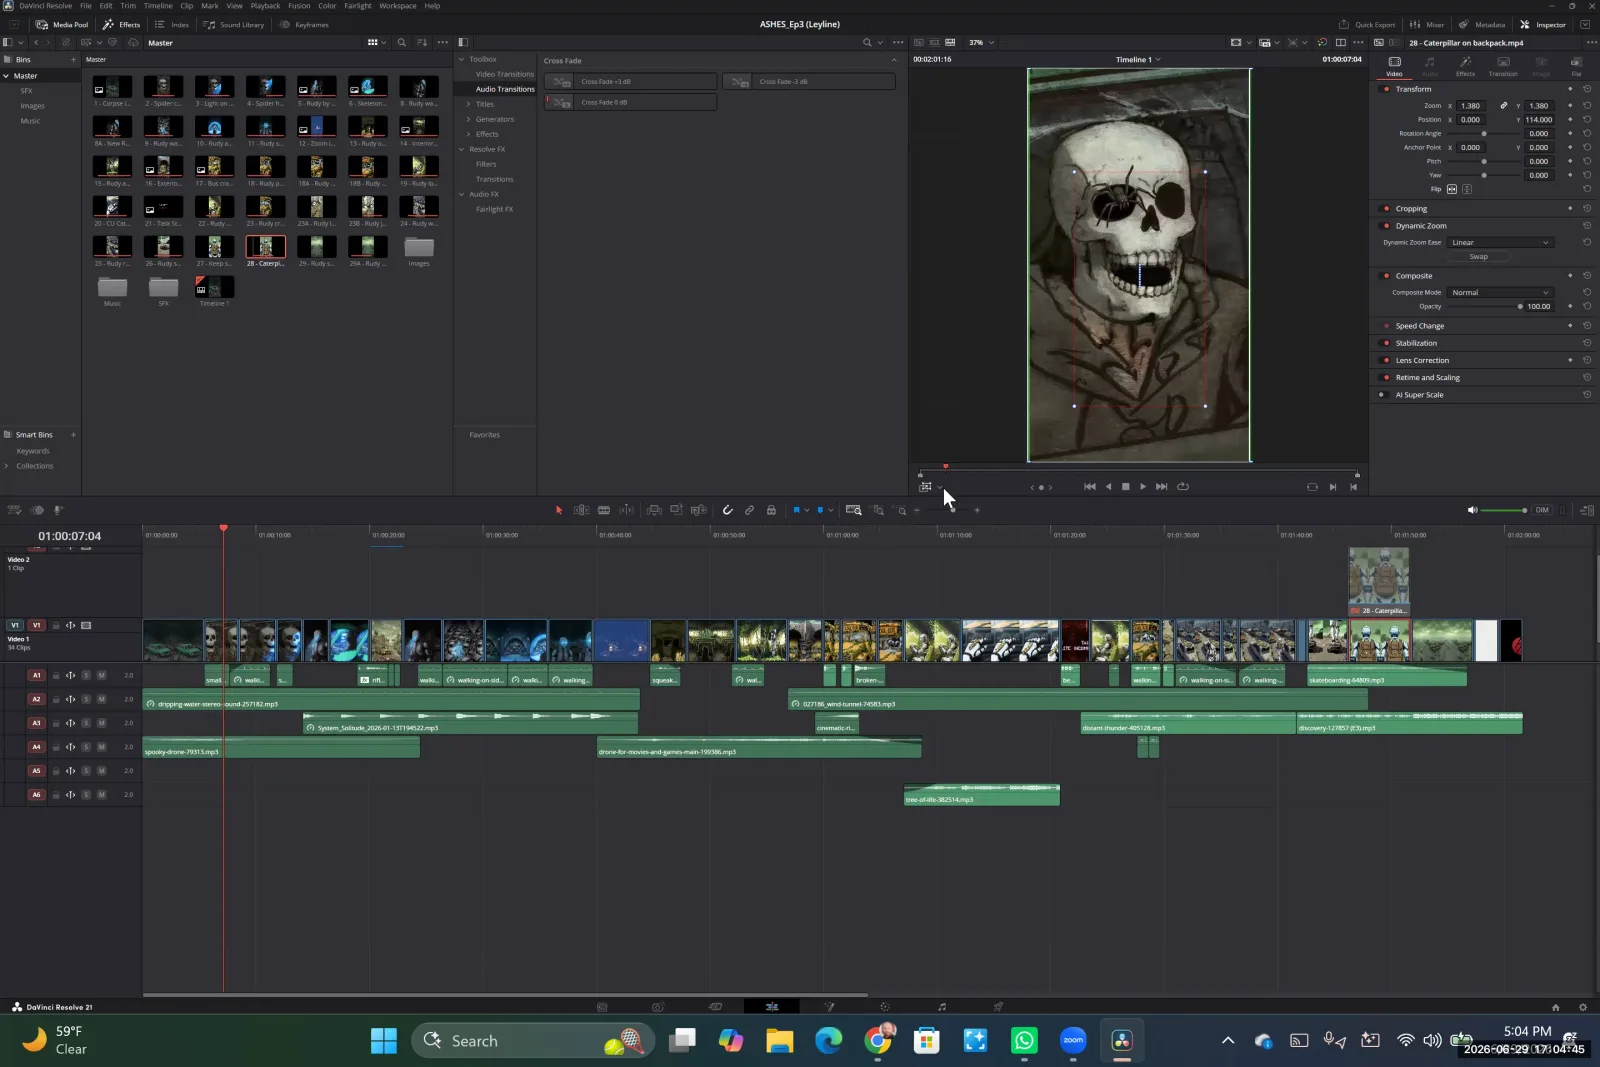
In the Inspector, use the Flip button under the Transform controls to reverse the clip horizontally.
Step 6. Adjust the speed of a clip to make it faster or slower to match action or sound.
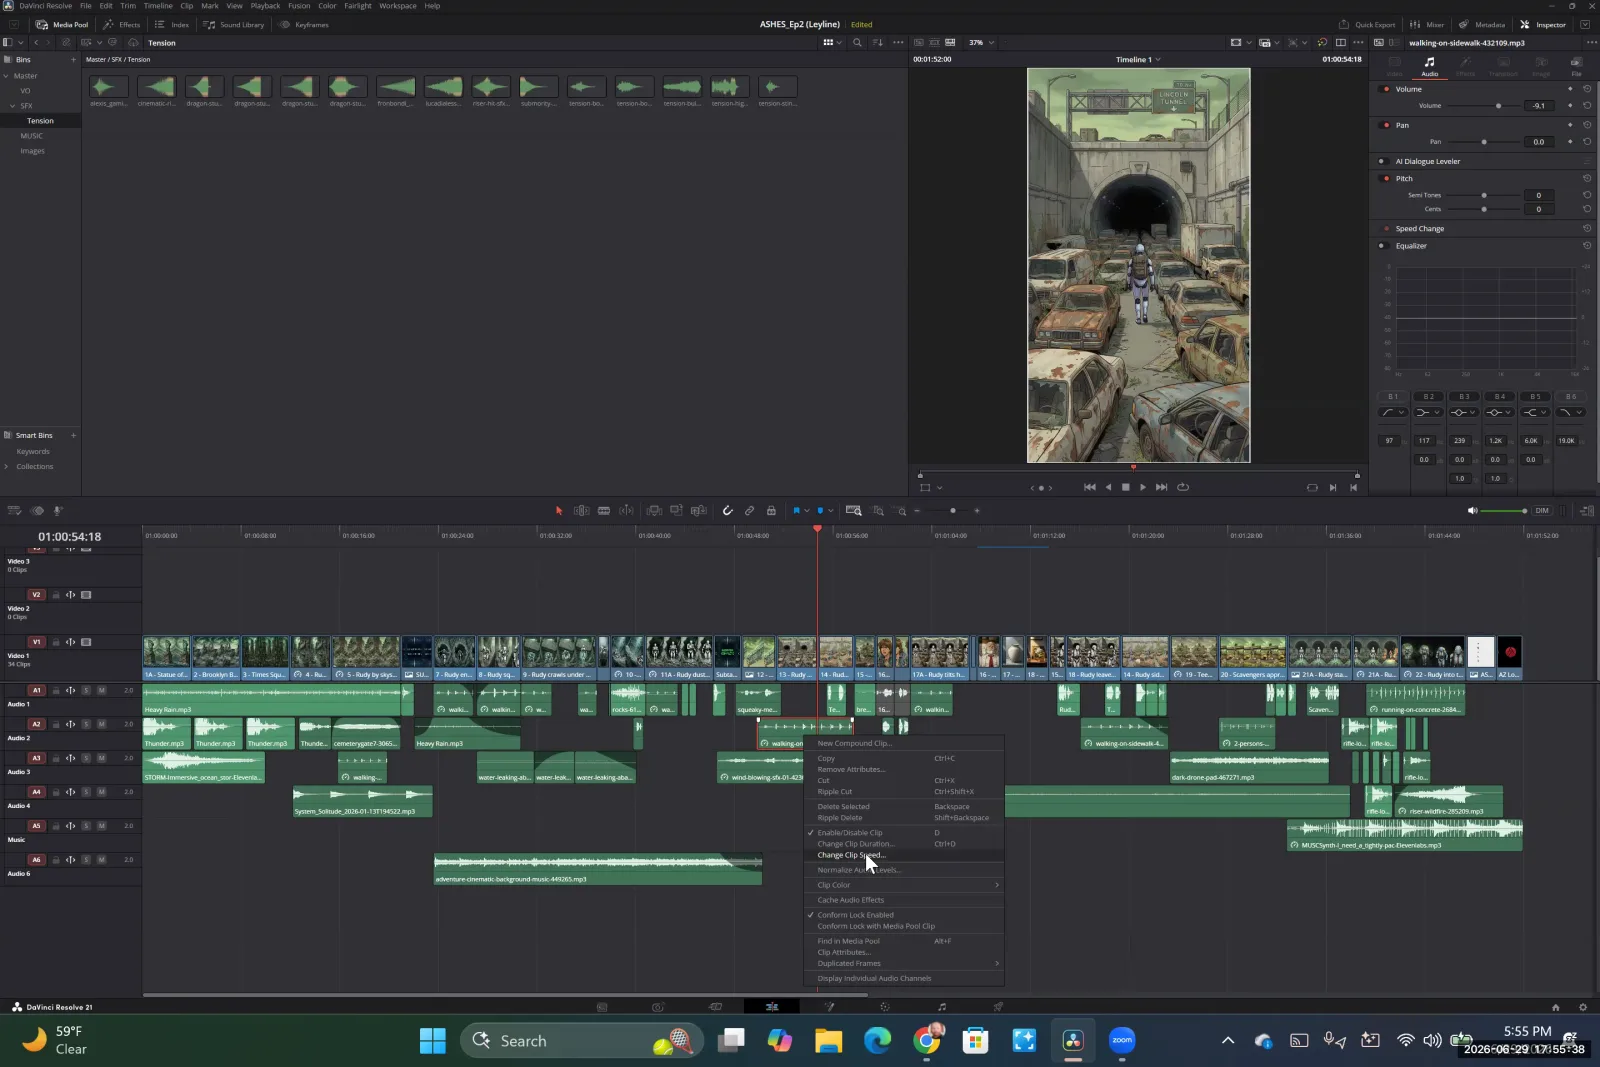
Right-click a clip in the timeline and select 'Change Clip Speed' to open the speed adjustment settings.
Fixing Continuity with Frame Grabs
When the end of one clip doesn't match the start of the next, you can fix the jumpy cut using a frame grab. This technique ensures a smooth, seamless transition between your generated shots.
Step 1. Place the two mismatched clips next to each other on the timeline to identify the jump cut.
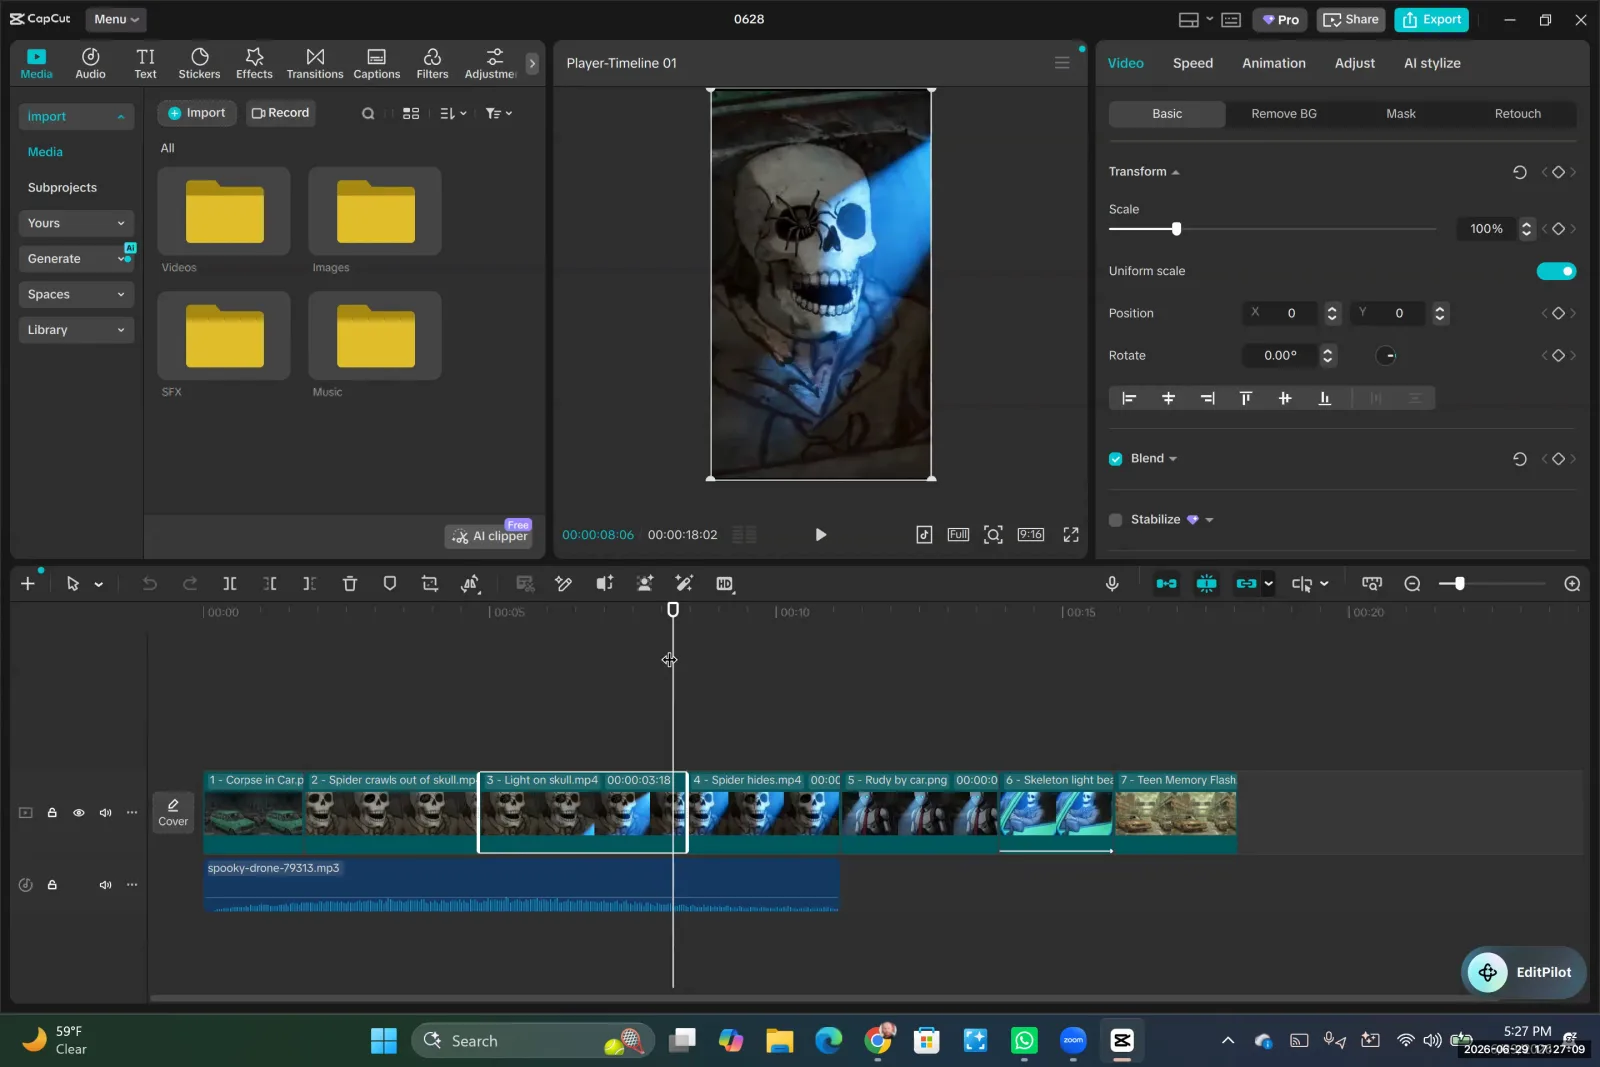
Place two clips adjacent to each other on the timeline to identify the jump cut between them.
Step 2. Navigate to the last frame of the first clip in the preview window.
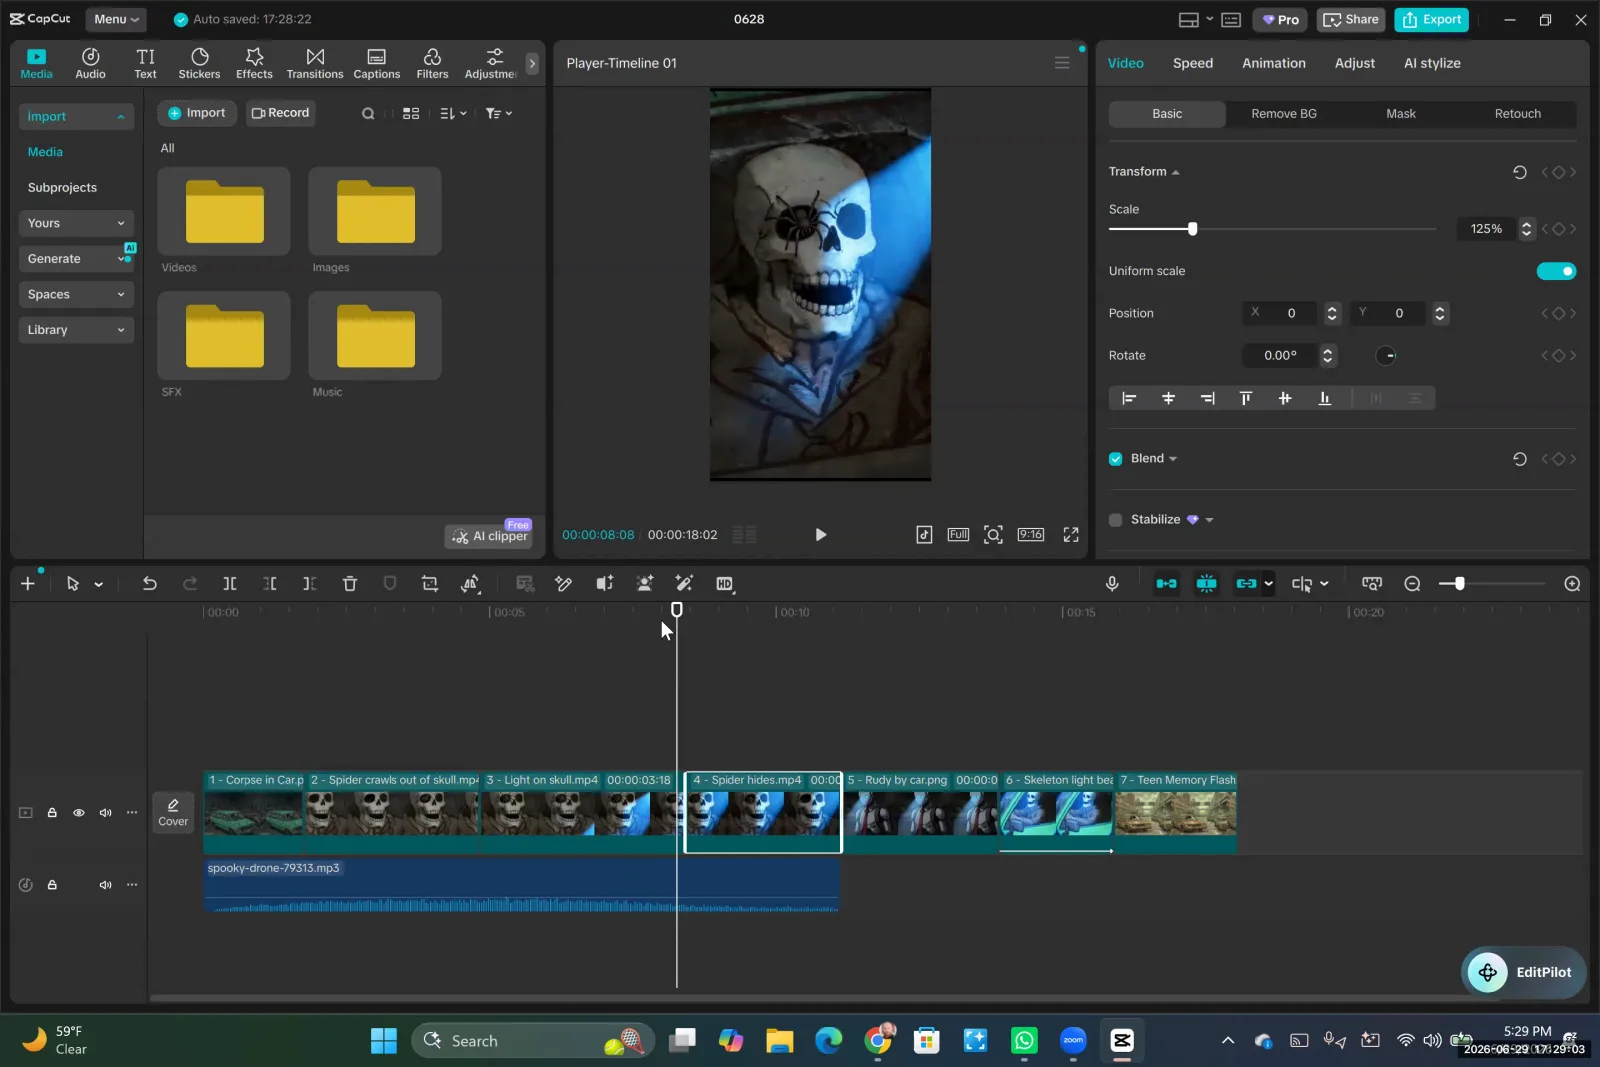
Position the playhead at the very end of the first clip, right where it meets the second clip.
Step 3. Use the editor's function to save or export the current frame as a still image.
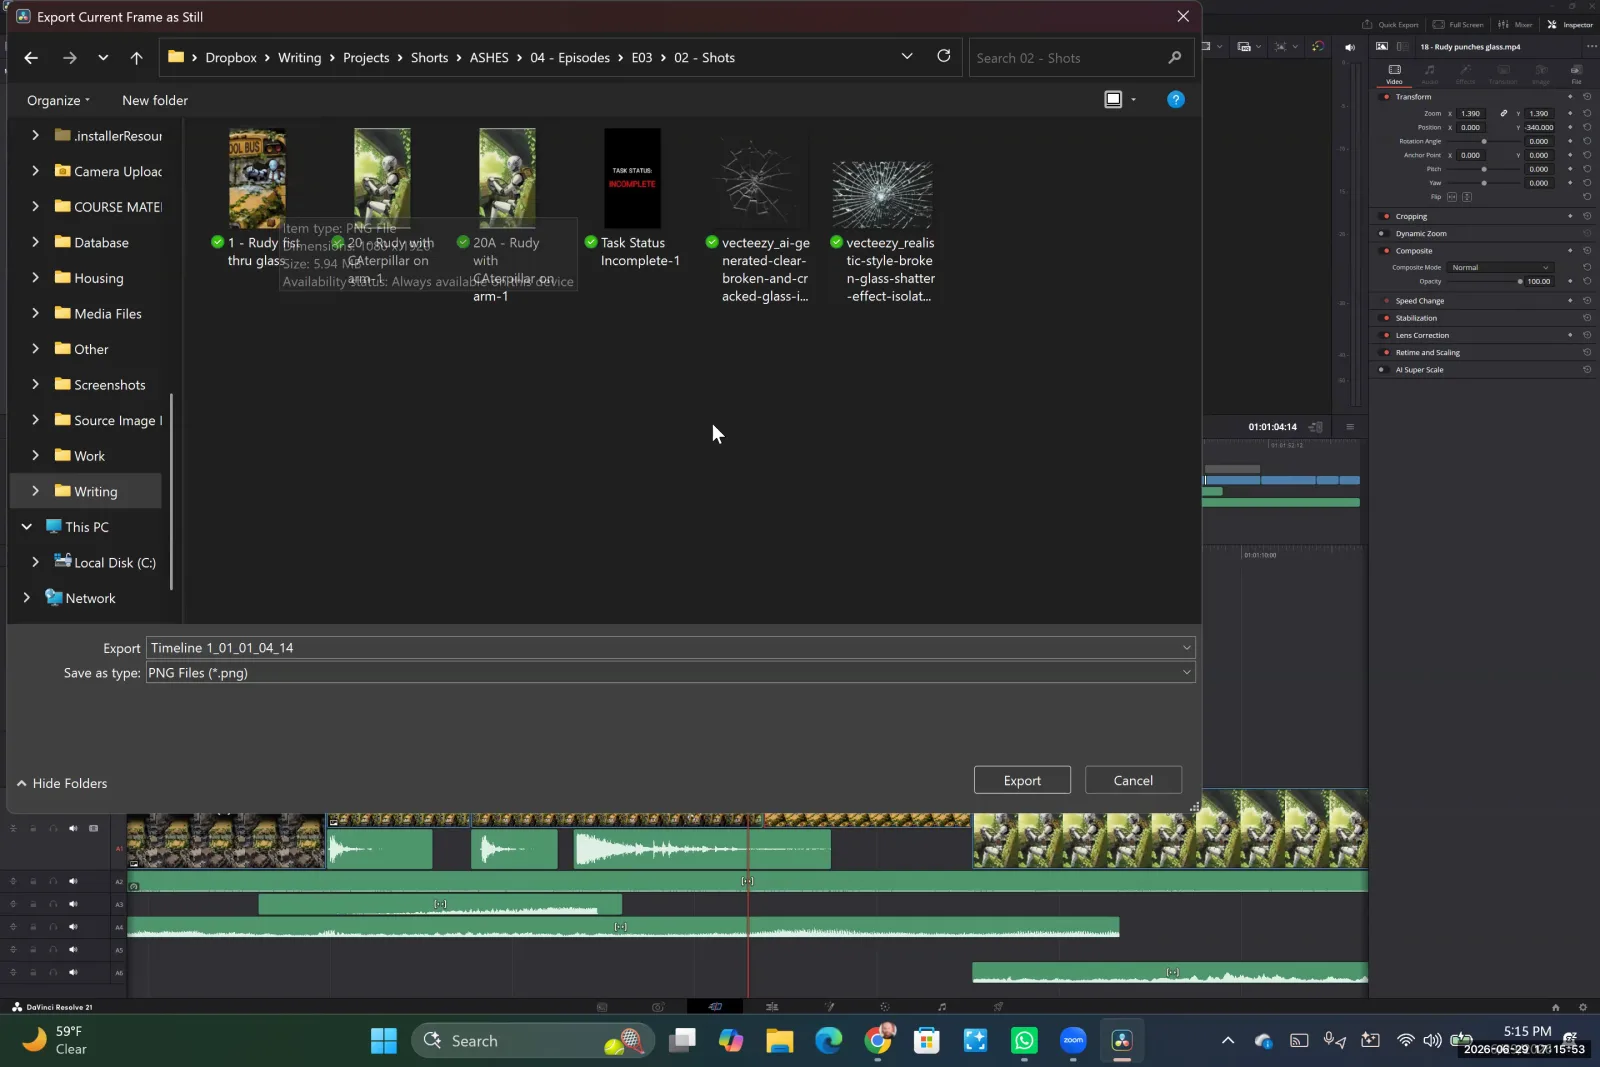
Use the 'Export Current Frame as Still' dialog to name your file, choose a save location, and export the image.
Step 4. Return to your video generation platform and use the exported image as the new 'start frame' to generate the second clip again.
Step 5. Download the newly generated clip and replace the old one on your timeline.
Layering Sound Design
Sound design transforms a sequence of clips into an immersive story. You will build the audio experience by layering essential elements like dialogue, background room tone, specific sound effects, and music.
Step 1. Assemble the visual story first on the video tracks of your timeline.
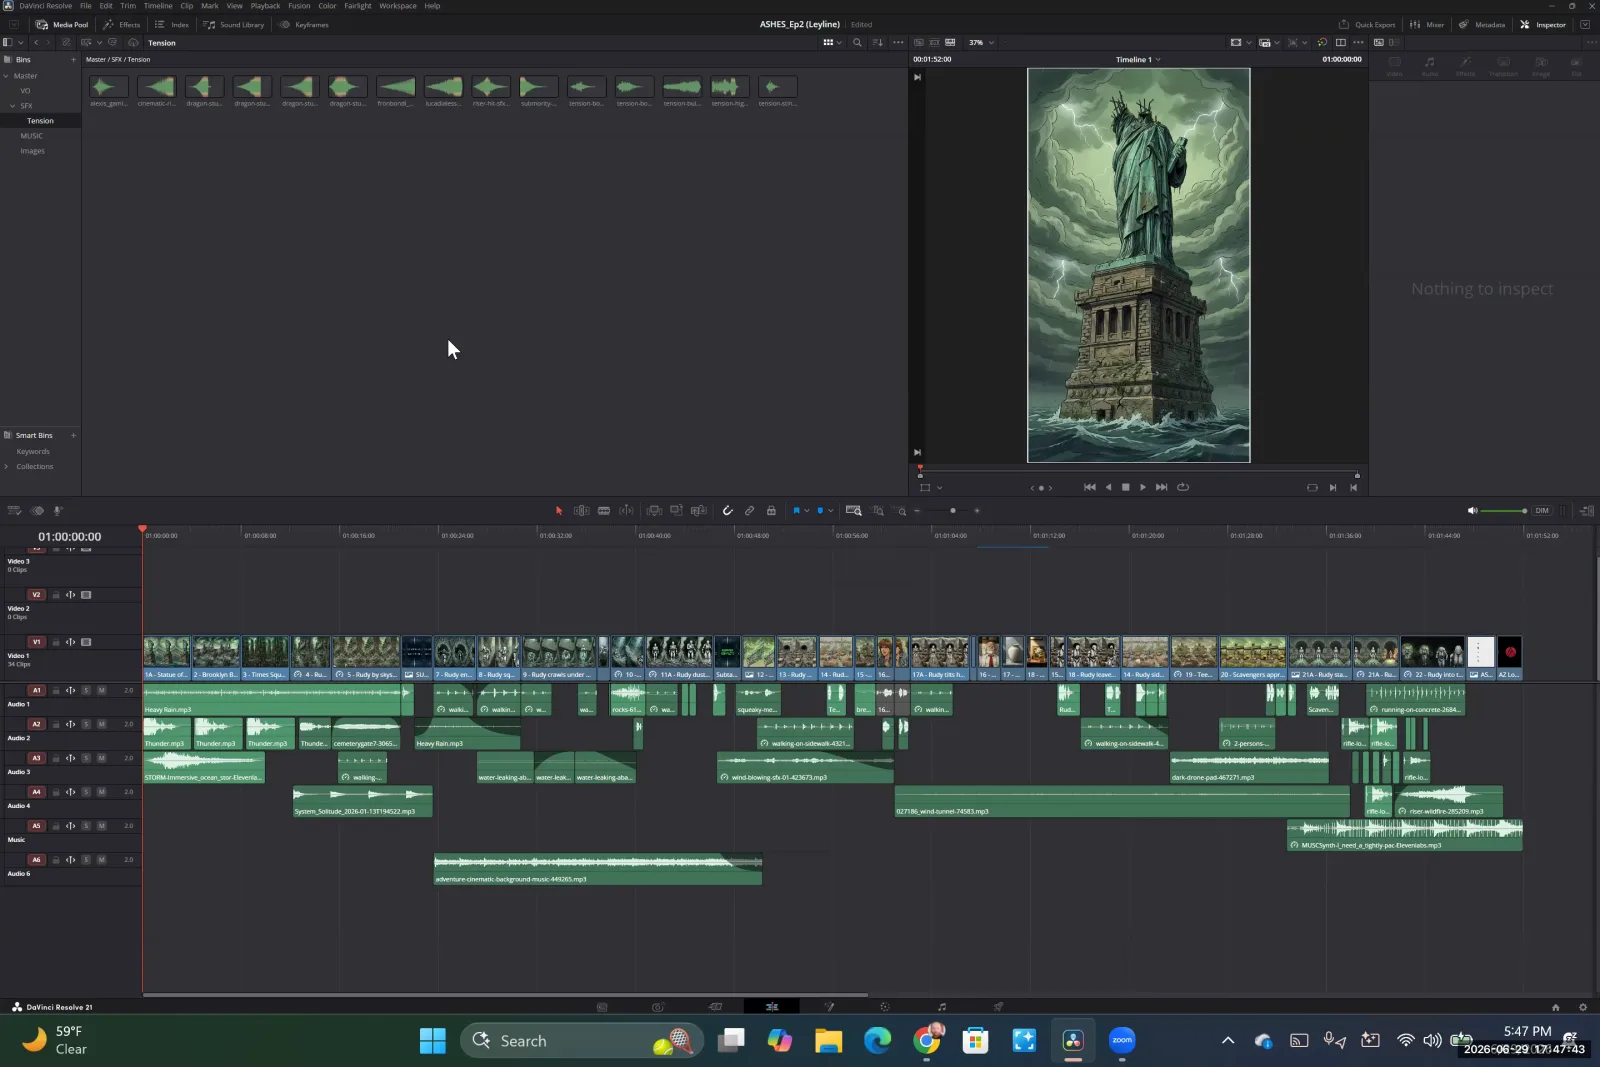
Assemble your visual story by placing your generated images or clips in order on the timeline's video tracks.
Step 2. Add all character dialogue and voiceover to a dedicated audio track, ensuring it's the highest priority.
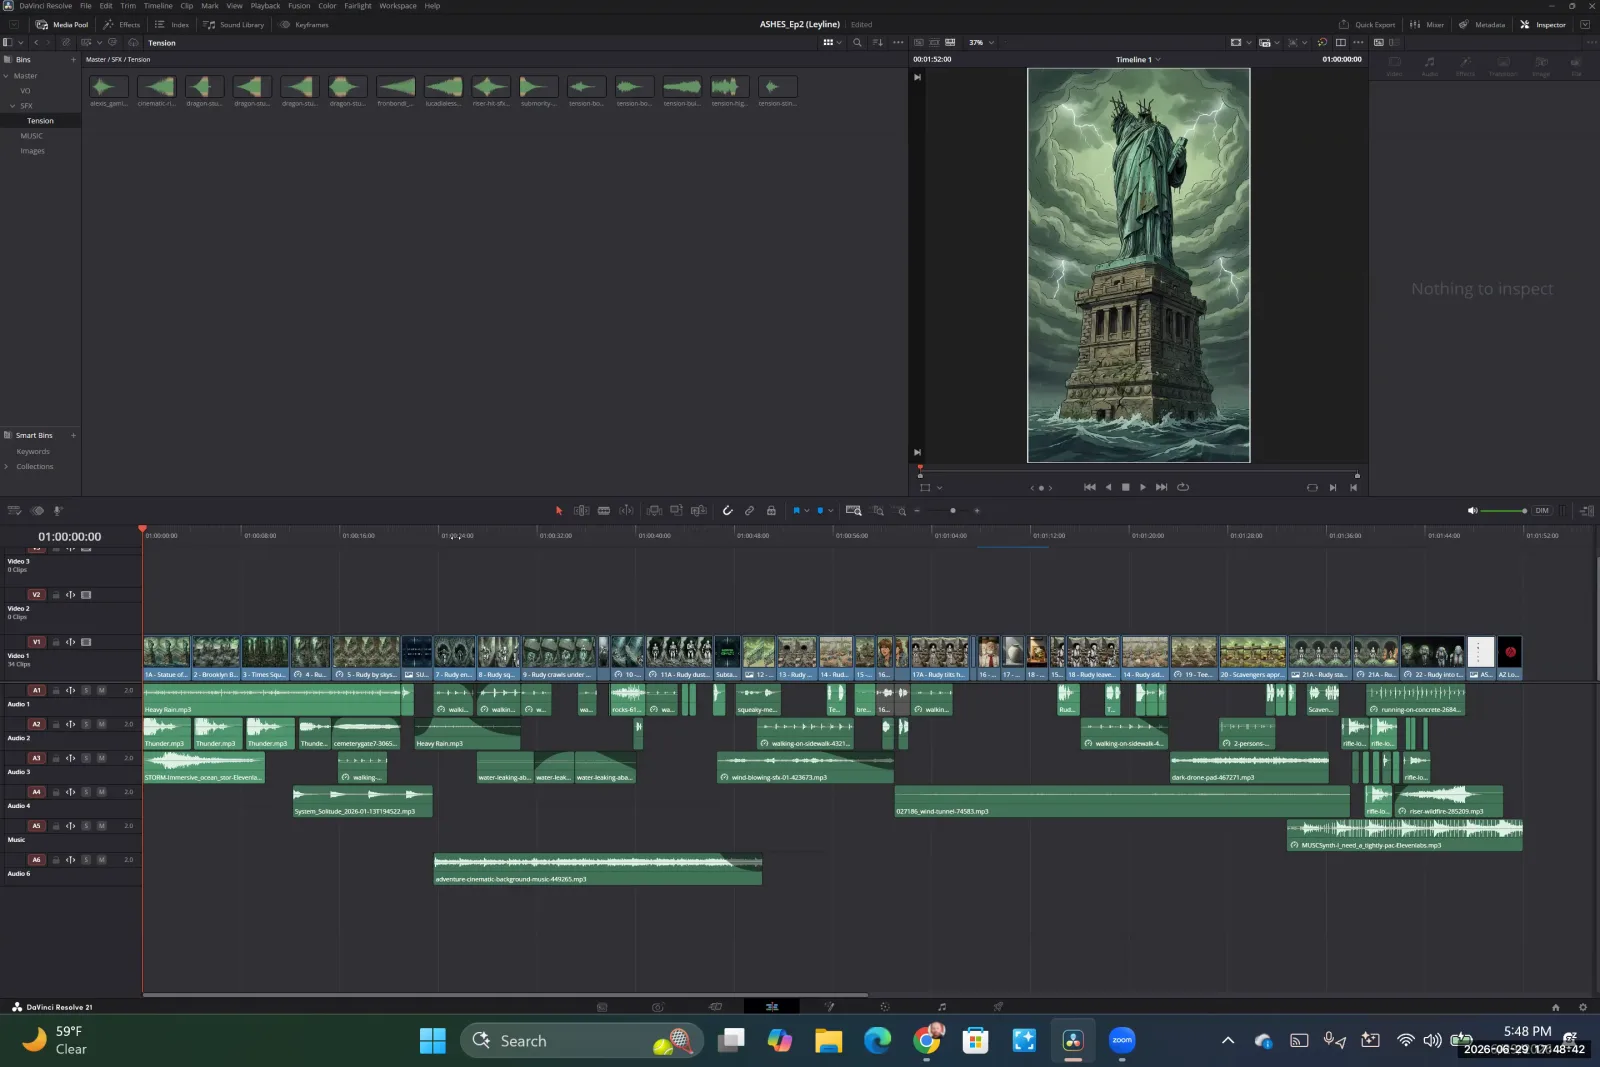
Place all AI-generated dialogue and voiceover clips onto their own dedicated audio track in the timeline.
Step 3. On a separate audio track, add diegetic sound effects that match on-screen visuals like rain or footsteps.
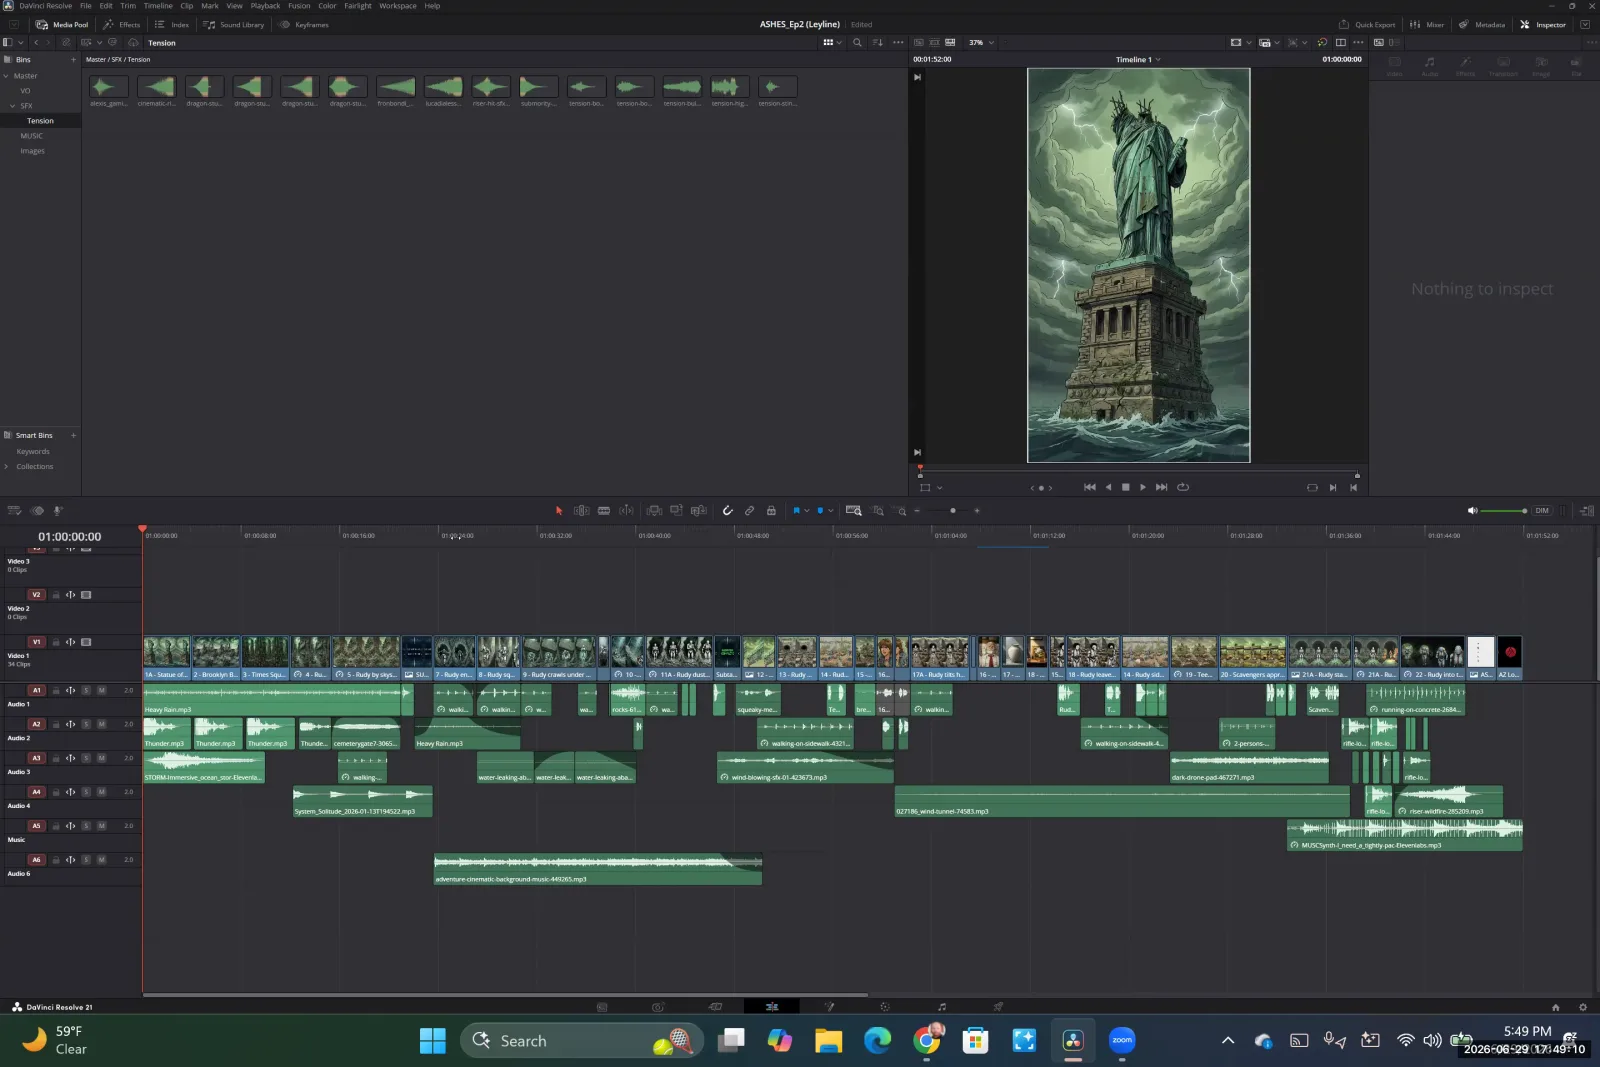
Place diegetic sound effects like rain, thunder, and footsteps on dedicated audio tracks to align with the visuals in your timeline.
Step 4. Add atmospheric sounds or 'room tone' to fill silence and make scenes feel more immersive.
Step 5. On another track, add non-diegetic sound effects like 'tension risers' to enhance emotion.
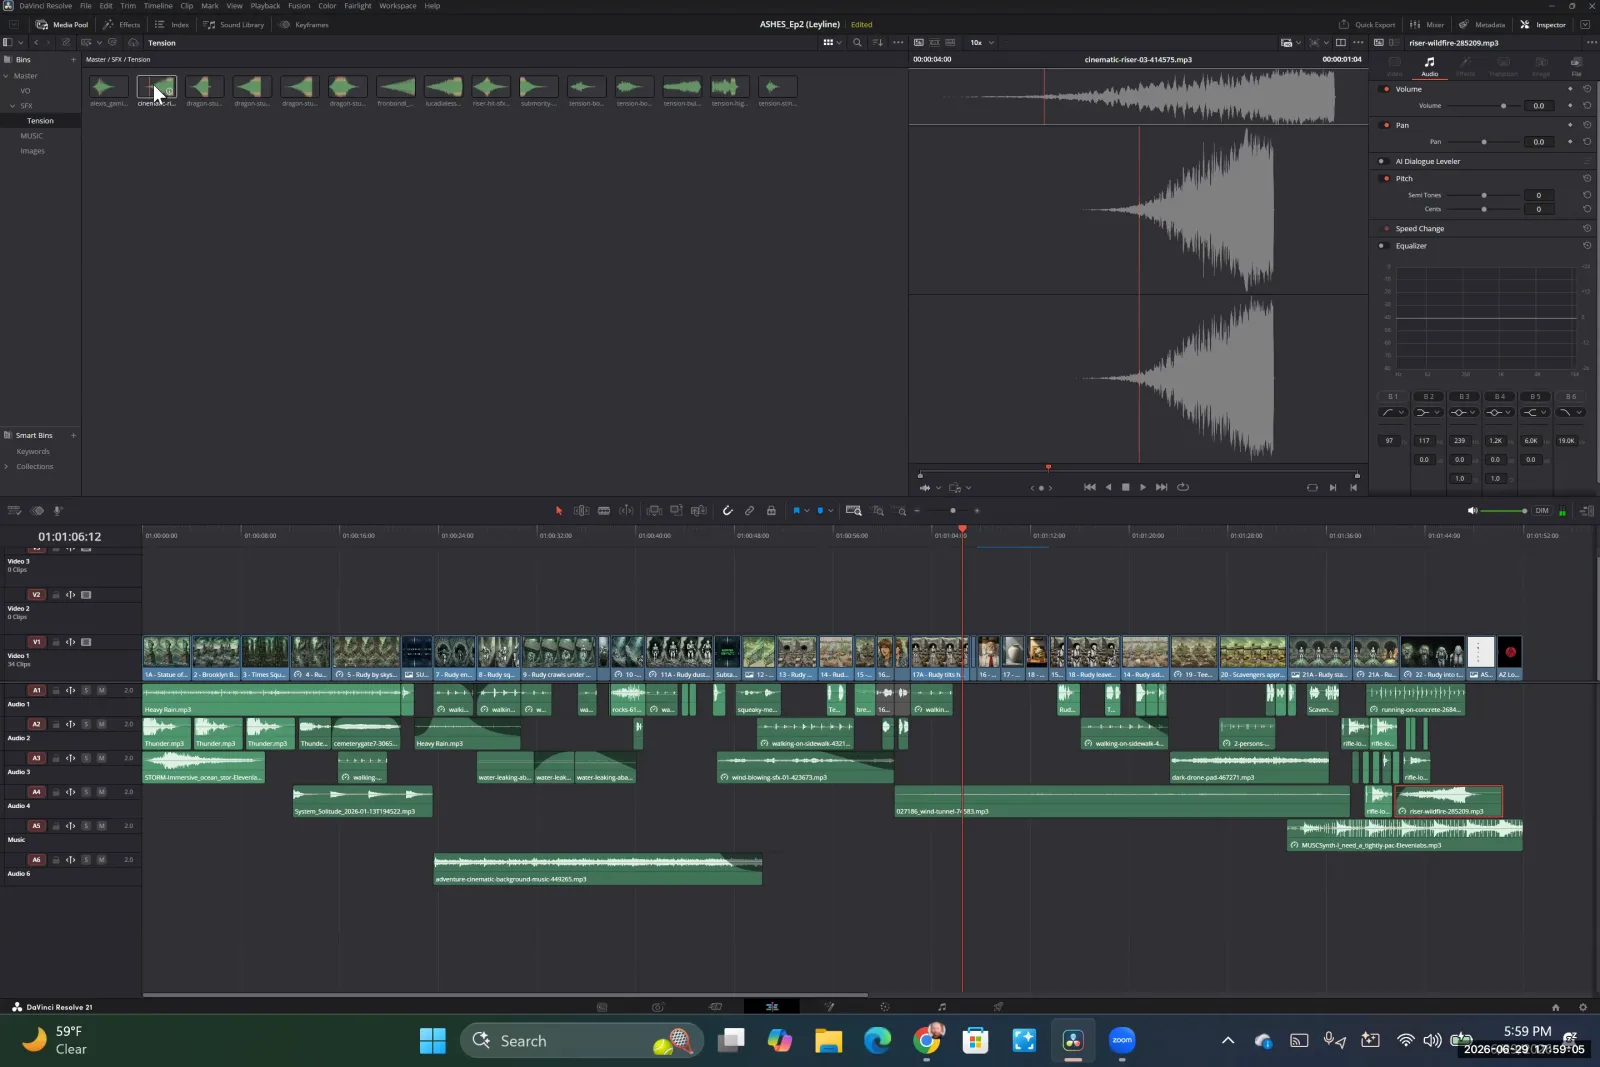
Place a tension riser sound effect on a dedicated audio track to build suspense in the scene.
Step 6. Finally, add a music track to score scenes and guide the audience's emotional response.
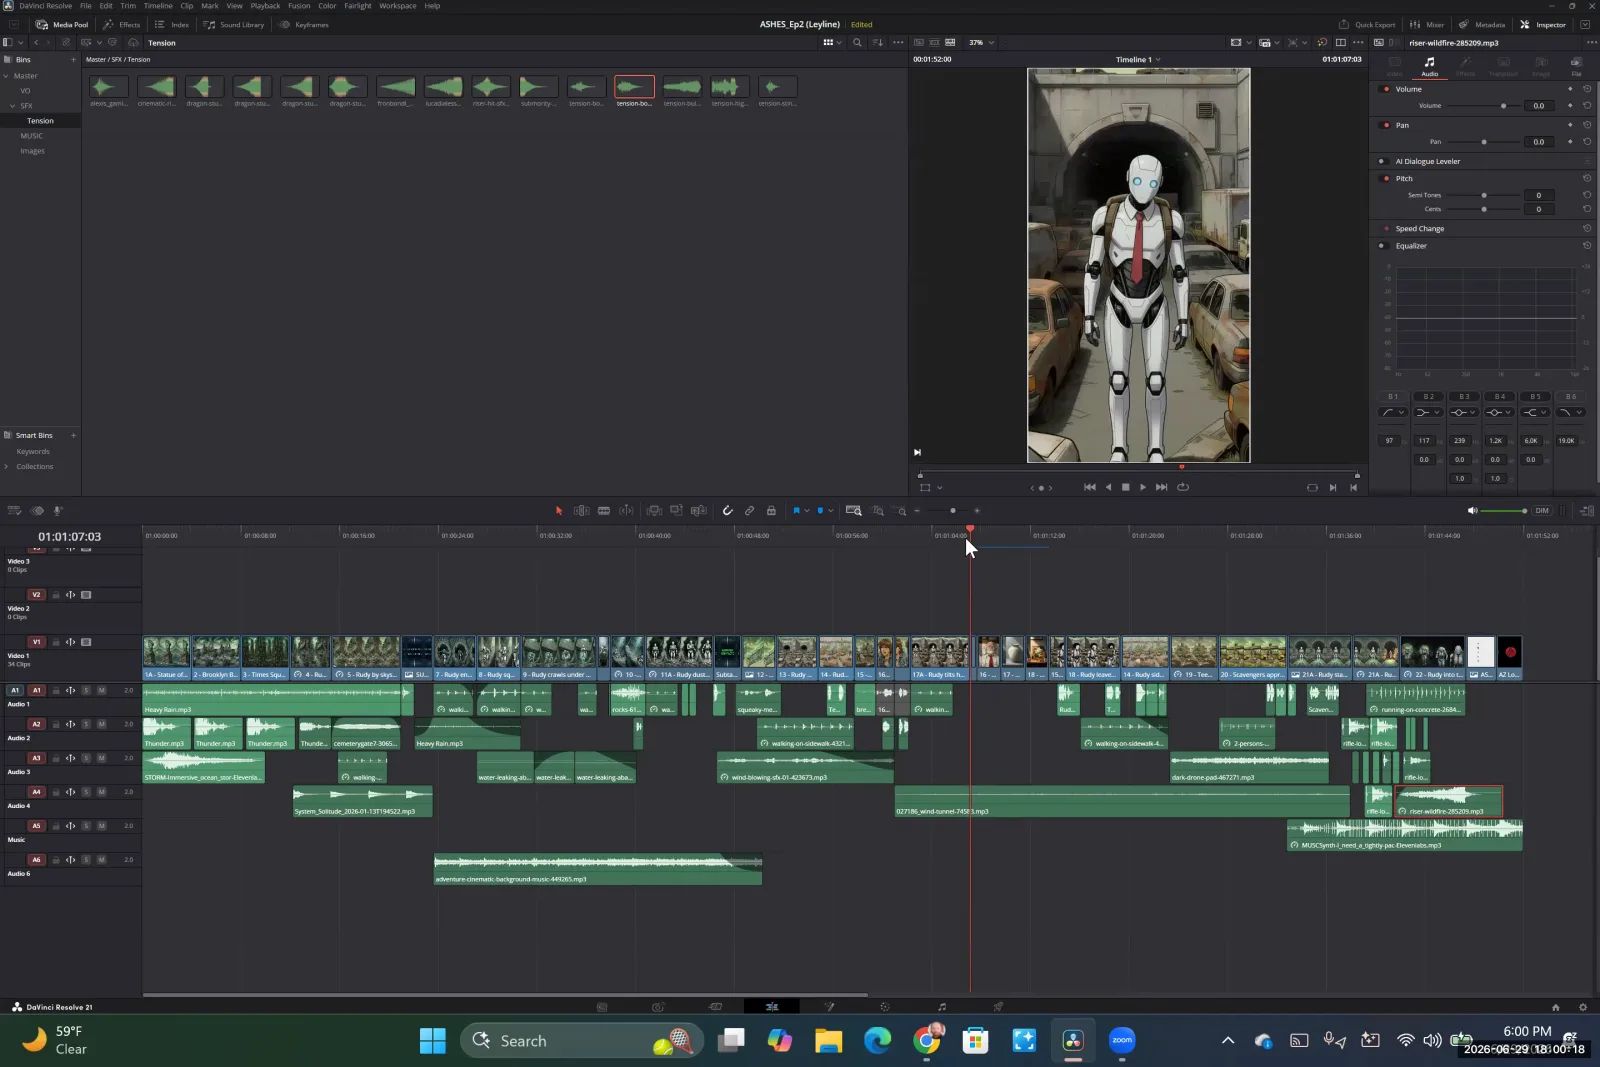
Place a music track on a separate audio layer to score the scene and enhance the emotional tone.
Step 7. Mix the audio levels of all tracks, keeping dialogue the loudest and adjusting SFX and music to support the scene.
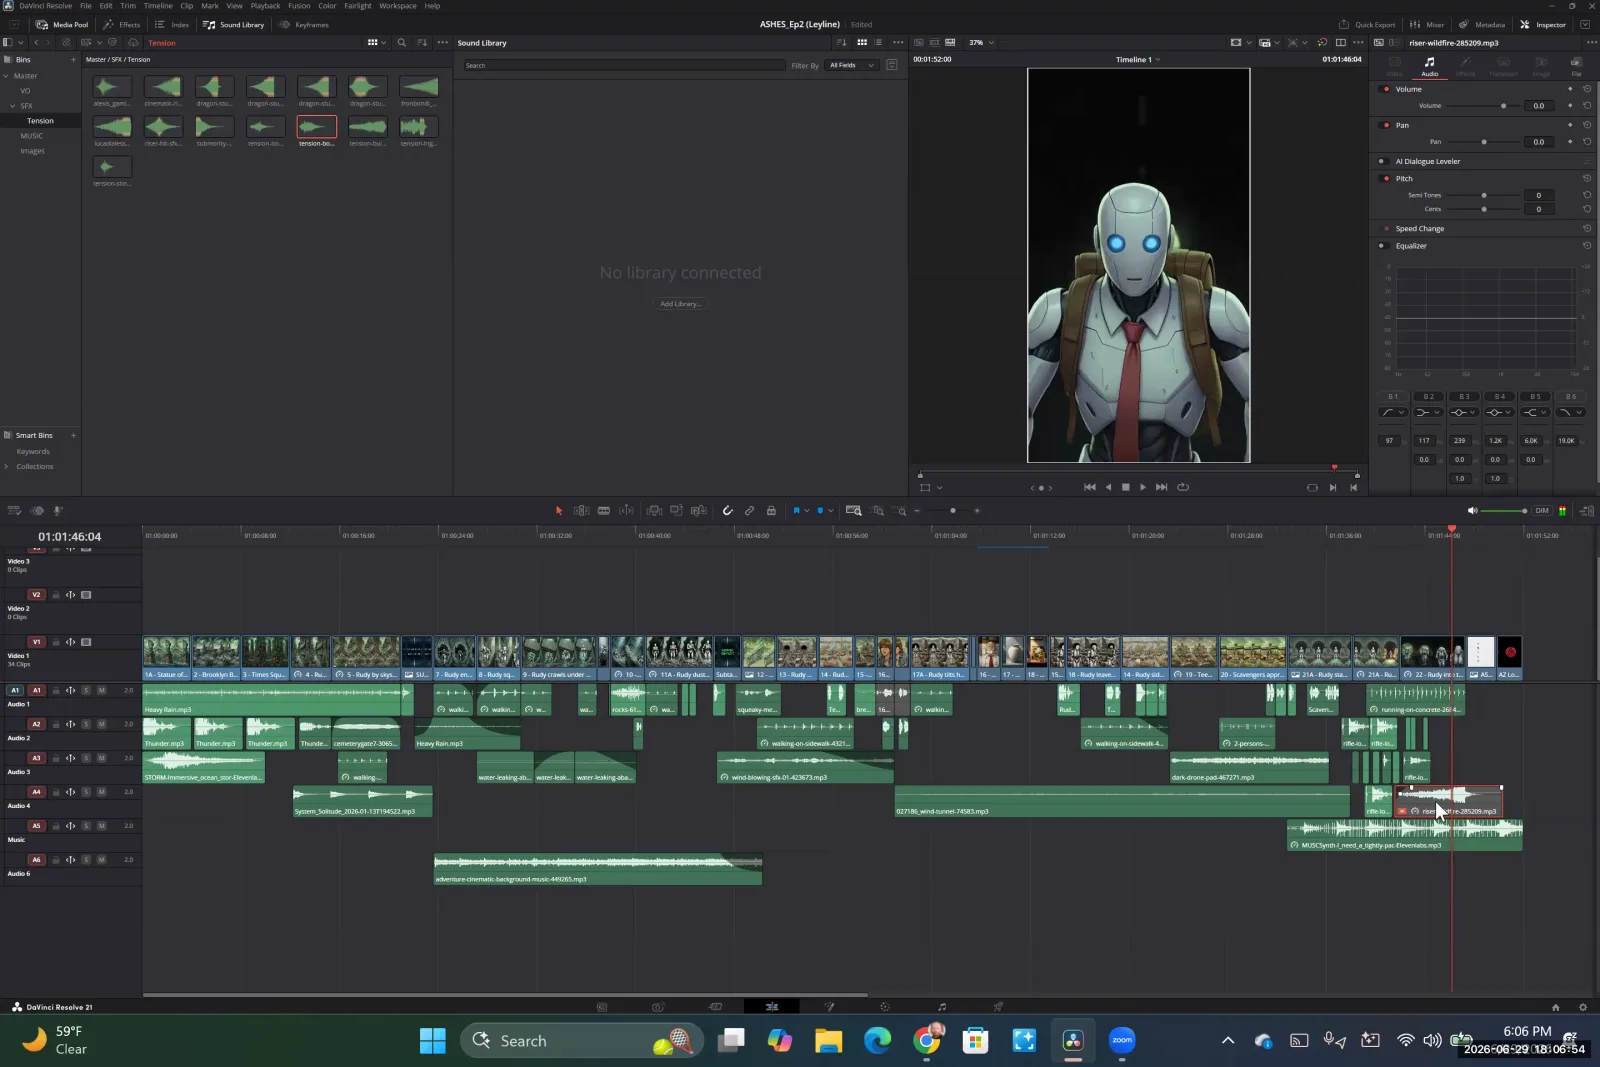
Balance the audio levels of all tracks in the timeline, using the Inspector to adjust volume for individual sound effects and music clips.
Generating Consistent Character Voices
To avoid inconsistent audio from clip to clip, use a dedicated voice generation tool like 11 Labs. This allows you to create a distinct, consistent voice for each character that can be used across your entire series.
Step 1. Go to a voice generation platform like 11 Labs and navigate to the voice creation section.
Step 2. Write a detailed prompt describing your character's voice, including gender, accent, tone, and age.
Step 3. Generate the voice and save it to your library.
Step 4. In the text-to-speech tool, select your custom voice and enter the line of dialogue you need.
Step 5. Generate and download the audio clip.
Step 6. Import the audio file into your editing software and place it on the timeline.
Replacing AI-Generated Dialogue for Lip Sync
If a generated clip has good visuals but poor audio, you can replace the dialogue. This workflow shows how to swap in your custom-generated voiceover while keeping the character's lip movements synchronized.
Step 1. Generate your video clip with the dialogue included in the prompt to ensure the character's mouth moves.
Step 2. Import the video clip into your editor; the original audio will appear on the timeline.
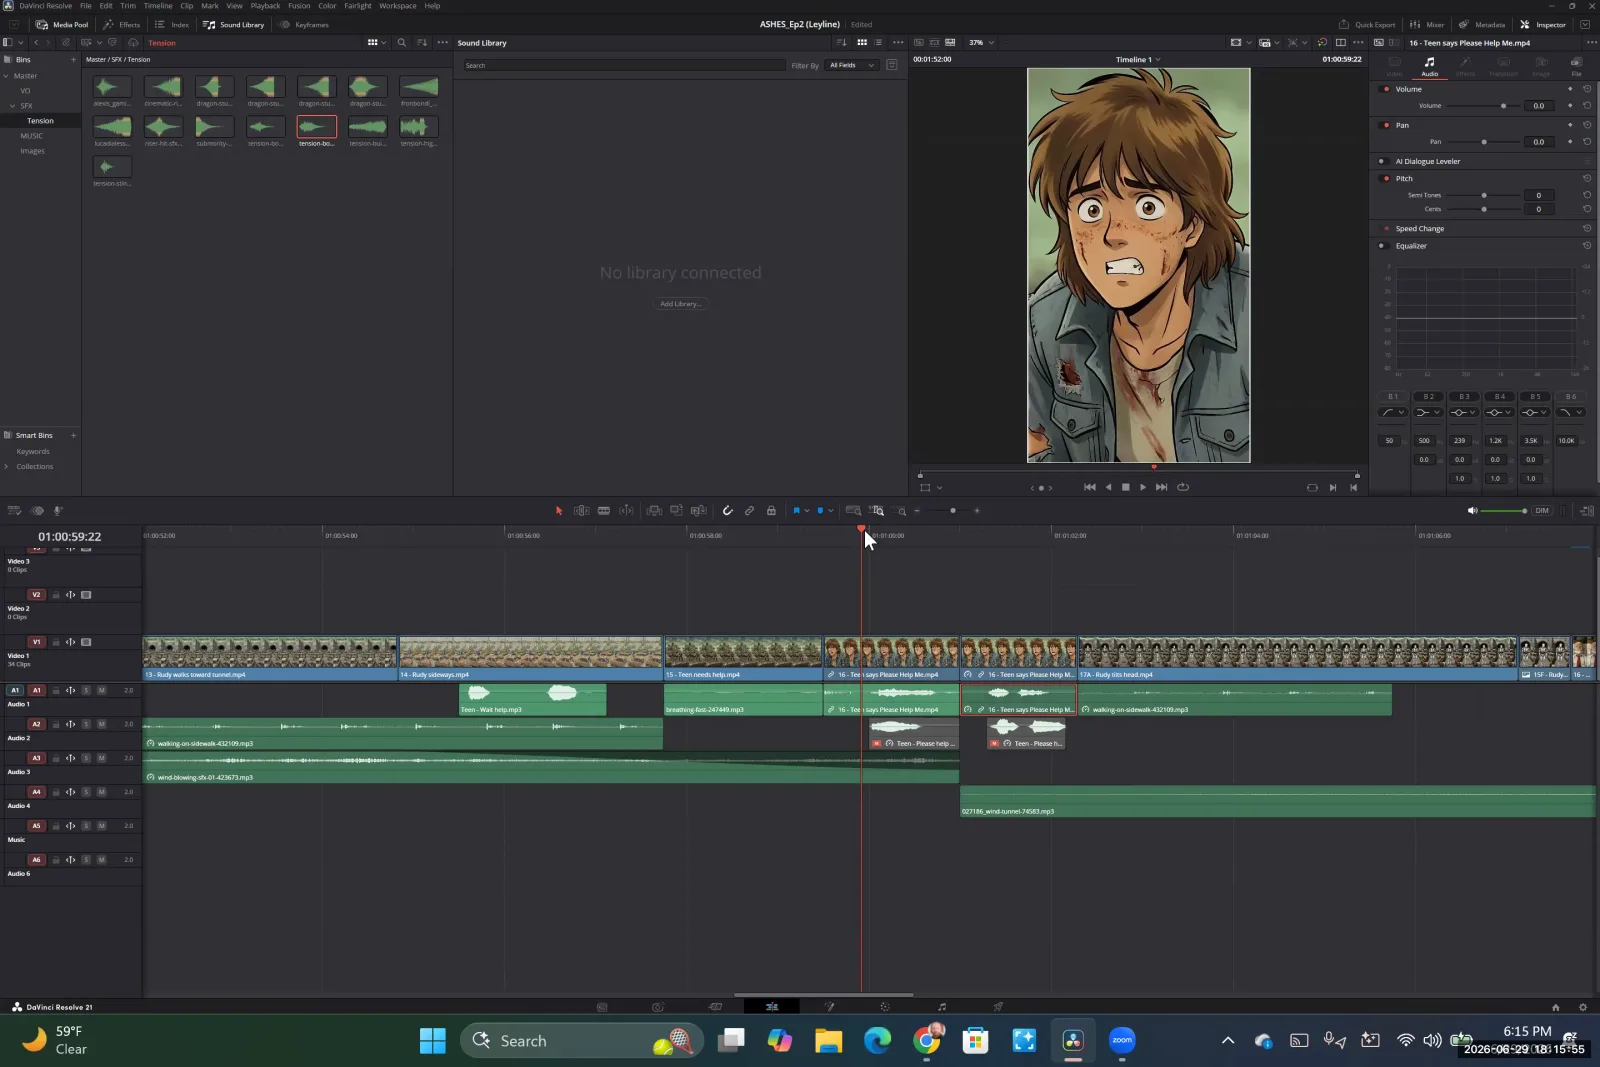
After importing the video clip, its corresponding audio track appears on the timeline below the video.
Step 3. Generate the same line of dialogue with your custom voice in a tool like 11 Labs and download it.
Step 4. Import the new custom audio clip and place it on a separate audio track below the original.
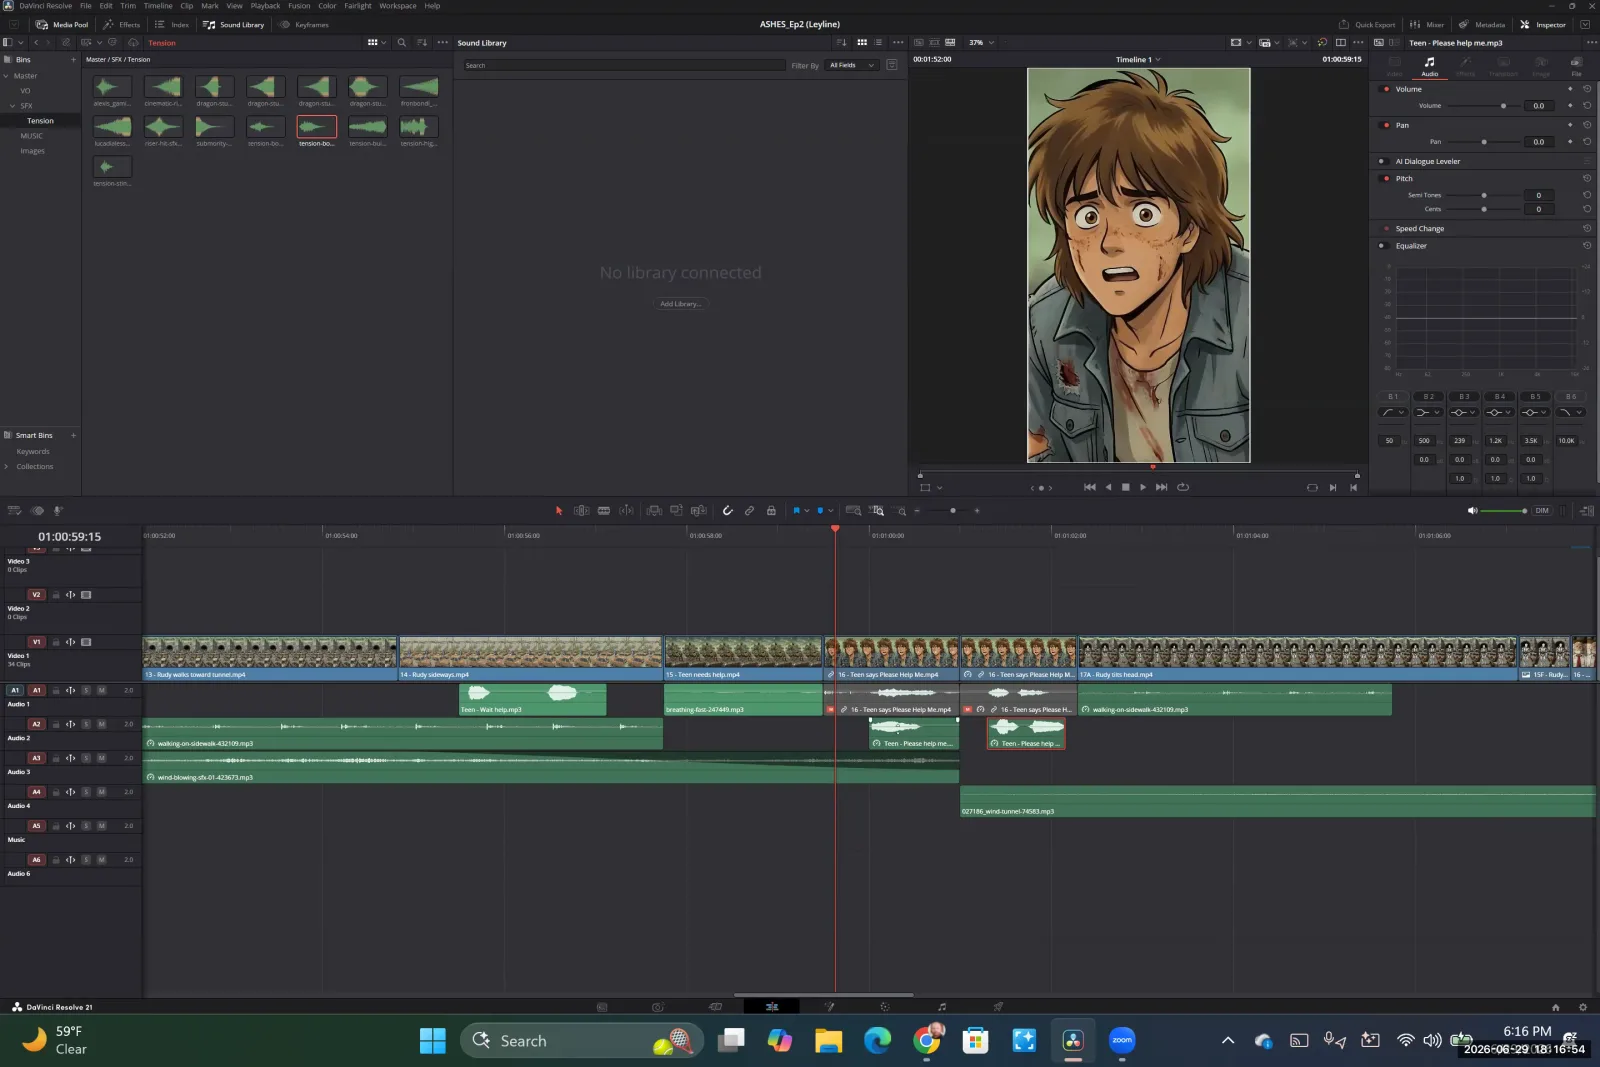
The new custom audio clip is placed on a separate audio track in the timeline, directly below the original.
Step 5. Visually align the waveform of the new audio with the waveform of the original audio.
Step 6. Adjust the speed of the new audio clip if necessary to match the length and cadence of the original.
Step 7. Mute or delete the original audio track that came with the video clip.
Key terms
Non-Linear Editor (NLE). A program or a platform that allows you to assemble assets on a timeline, giving you control over the arrangement of video and audio clips.
Timeline. The primary workspace in an NLE where video and audio clips are arranged sequentially over time.
Video Tracks. Horizontal layers on the upper portion of a timeline designated for video clips and images.
Audio Tracks. Horizontal layers on the lower portion of a timeline designated for sound effects, voiceover, and music.
Bin (Media Pool). The area in an editing program where you import and organize all your project assets, such as video clips, images, and audio files.
Inspector. A panel in an editing program that displays the properties of a selected clip and allows for manipulation, such as zooming, cropping, and positioning.
Trimming. The process of shortening or lengthening a clip on the timeline to adjust its duration and select the desired portion.
Cutting on Action. An editing technique where the cut between two shots occurs during a moment of action, creating a smoother and more continuous feel.
Start Frame / End Frame Matching. The technique of ensuring the last frame of one clip is identical to the first frame of the next clip to create a seamless, continuous shot without a jump cut.
DaVinci Resolve. A professional-grade, free non-linear editing software with extensive features for editing, color correction, visual effects, and audio post-production.
CapCut. A user-friendly and lightweight video editing program, popular with new users, that includes built-in generative AI features.
Dreamina. CapCut's proprietary generative AI model for creating and extending video clips within the application.
Camera Shake Effect. A digital effect that can be applied to a static image or video clip to simulate the movement of a handheld camera, adding energy or impact.
CCTV Effect. A visual effect that mimics the look of a closed-circuit television camera, often including scan lines and a timestamp, to suggest surveillance or a memory.
Sound Design. The art of creating the overall audio landscape of a film, which includes three main layers: voiceover, sound effects, and music.
Room Tone. The subtle, ambient sound of a space when there is no dialogue or major sound effects. It's used to prevent unnatural silence and make scenes feel more immersive.
Tension Risers. A type of sound effect designed to build suspense, tension, or dread, often used during thrilling moments or transitions.
Audio Mixing. The process of balancing the volume levels of all audio tracks (dialogue, music, sound effects) to ensure clarity and achieve the desired emotional impact.
11 Labs. A popular AI platform specializing in high-quality voice generation, sound effects, and music, known for its ability to create consistent custom voices.
Pixabay. A website that offers a large library of royalty-free images, videos, music, and sound effects that can be used in projects, though some assets may have usage restrictions.
Content ID. A digital fingerprinting system used by platforms like YouTube to identify and manage copyrighted content, which can lead to videos being flagged or blocked if they use protected music.
License Certificate. A document provided by royalty-free asset sites like Pixabay that proves you have the right to use a specific piece of content, which can be used to appeal Content ID claims.
Vertical Formula. The emerging format for mobile-first dramas, characterized by serialized, cinematic, and high-quality content designed for vertical viewing.
Paywall Placement. The strategic point in a serialized story, often around episode 10, where viewers are required to pay to continue watching.
Common mistakes to avoid
- Trying to generate overly complex shots with multiple actions or camera movements in a single clip.
- Not ensuring the end frame of one clip perfectly matches the start frame of the next, causing jumpy cuts.
- Neglecting sound design, resulting in a flat, emotionless video.
- Having inconsistent character voices from clip to clip by relying on the video model's generated audio.
- Using music with copyright restrictions (Content ID) that can get your video blocked on platforms like YouTube.
- Creating audio mixes where music or sound effects drown out the essential character dialogue.
- Relying solely on a generation platform's built-in timeline for complex projects, which lacks advanced features and can be unstable.
Frequently asked questions
How to fix jumpy cuts and continuity errors in AI video?
To fix continuity errors between two AI-generated clips, use a frame grab. Take the last frame of the first clip and use it as the starting image for the prompt of the second clip. This ensures the start and end frames match perfectly, creating a seamless transition and eliminating jumpy cuts.
How to create consistent character voices for an AI series?
Create consistent character voices using a dedicated AI voice generator like 11 Labs. Relying on a video model's built-in audio can result in inconsistent voices from one clip to the next. Using a separate tool allows you to design a unique voice that remains the same across all episodes.
What are the key elements of sound design for AI films?
The key elements of sound design are layered audio tracks including character dialogue, room tone for ambiance, specific sound effects that align with on-screen actions, and music to build emotion. Proper audio mixing ensures dialogue remains clear and the overall experience is immersive and emotionally resonant.
How to deal with YouTube Content ID claims for music in my videos?
To avoid YouTube Content ID claims, use music from royalty-free sources like Pixabay that provide a license certificate. This document proves you have the right to use the music in your video. Using copyrighted music without a license can result in your video being blocked on the platform.
In the instructor’s words
“Learning how to do the basics with both of those areas [editing and sound design] will take a lot of the pressure of needing to feel like you have to generate perfect clips.”
“It's very empowering using editing programs once you get through the rough learning period for it.”
“You generated a 10-second clip, but only like three seconds in the middle are useful. And it's like, okay, well, you can keep those three seconds.”
This tutorial was produced from the Leyline Masterclass recording (Cohort 1, Session 5, 2026-06-29). Screenshots are captured directly from the session.