AI Video Generation and Rough Cuts
Cohort 1, Session 4 — taught by Austin Zartman, creator of the AI short-film series ASHES.
To make a film with AI, you start with static keyframes and use text-to-video models to animate them into short clips. This involves writing clear, descriptive prompts for discrete actions and selecting an appropriate model, like Seed Dance or Cling. You can refine clips by providing start and end frames, then chain them together to create longer sequences, eventually assembling them on a timeline into a rough cut.
What you will learn
- Understand best practices for prompting AI video models to achieve desired actions and camera movements.
- Learn to use Layline's render stage to generate video clips from keyframes.
- Compare the capabilities, costs, and use cases for different video models (Seed Dance, Cling, VO).
- Master techniques for maintaining consistency between shots, such as chaining clips.
- Assemble generated clips into a rough cut on the timeline to preview the visual story.
- Troubleshoot common video generation problems using techniques like negative prompting and clip editing.
Generate a Video Clip from a Keyframe
The fundamental step in AI filmmaking is animating a static image. Here, you'll provide a keyframe and a text prompt to generate a short video clip.
Step 1. Navigate to the 'Render' stage in your Layline project.
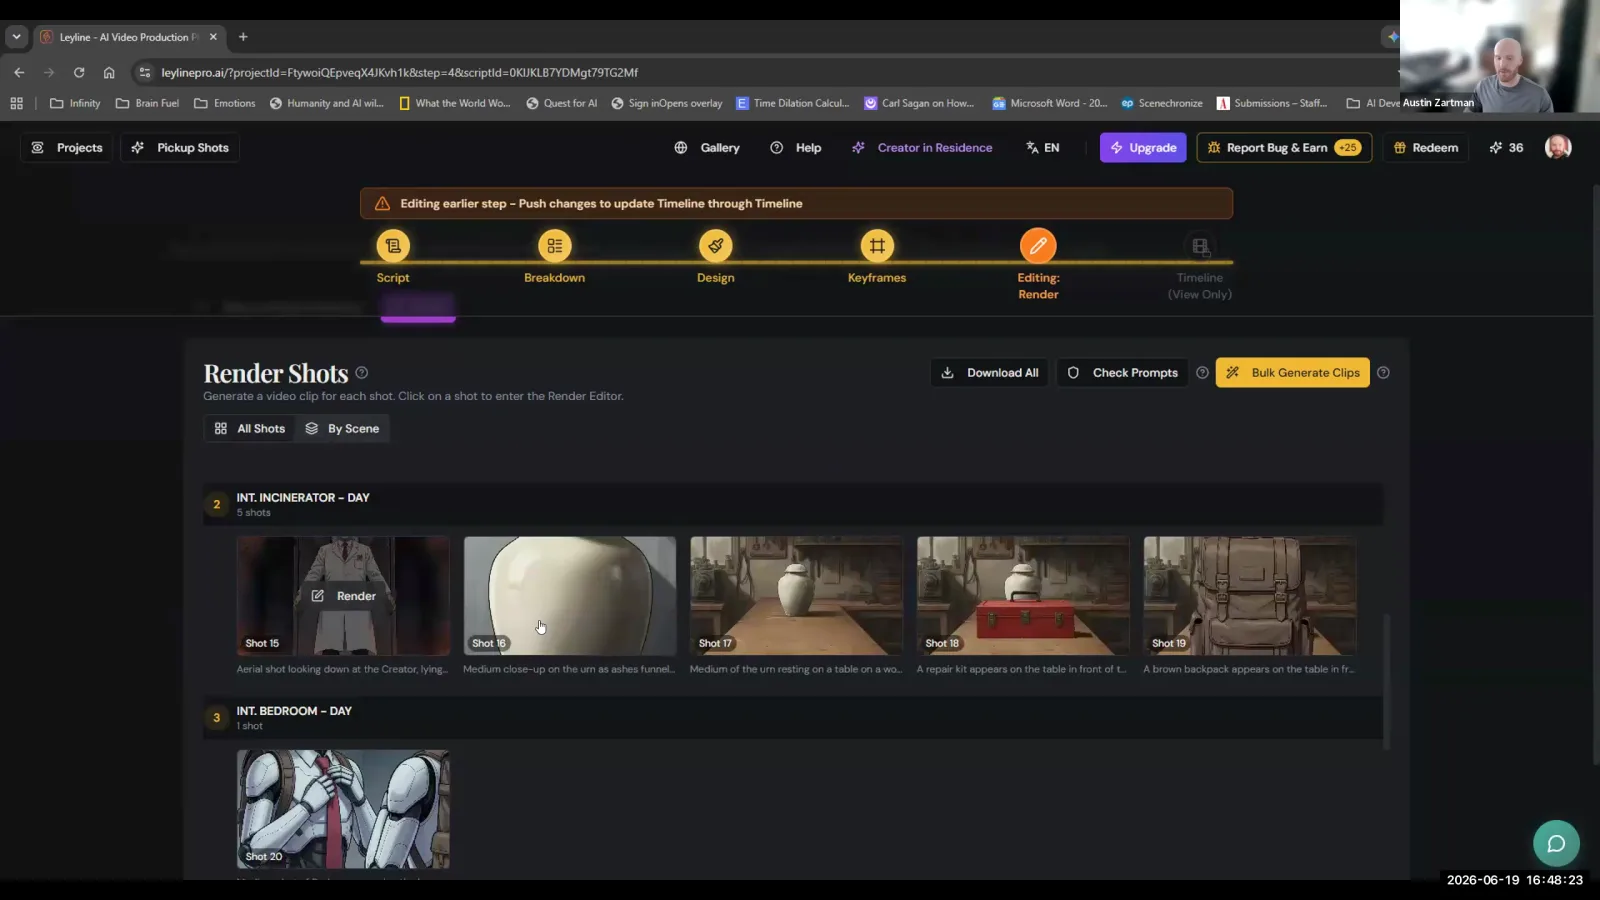
The 'Render' stage displays all the shots from your project, ready for video clip generation.
Step 2. Select the keyframe you want to animate. The script line, shot description, and a default video prompt will be pre-populated.
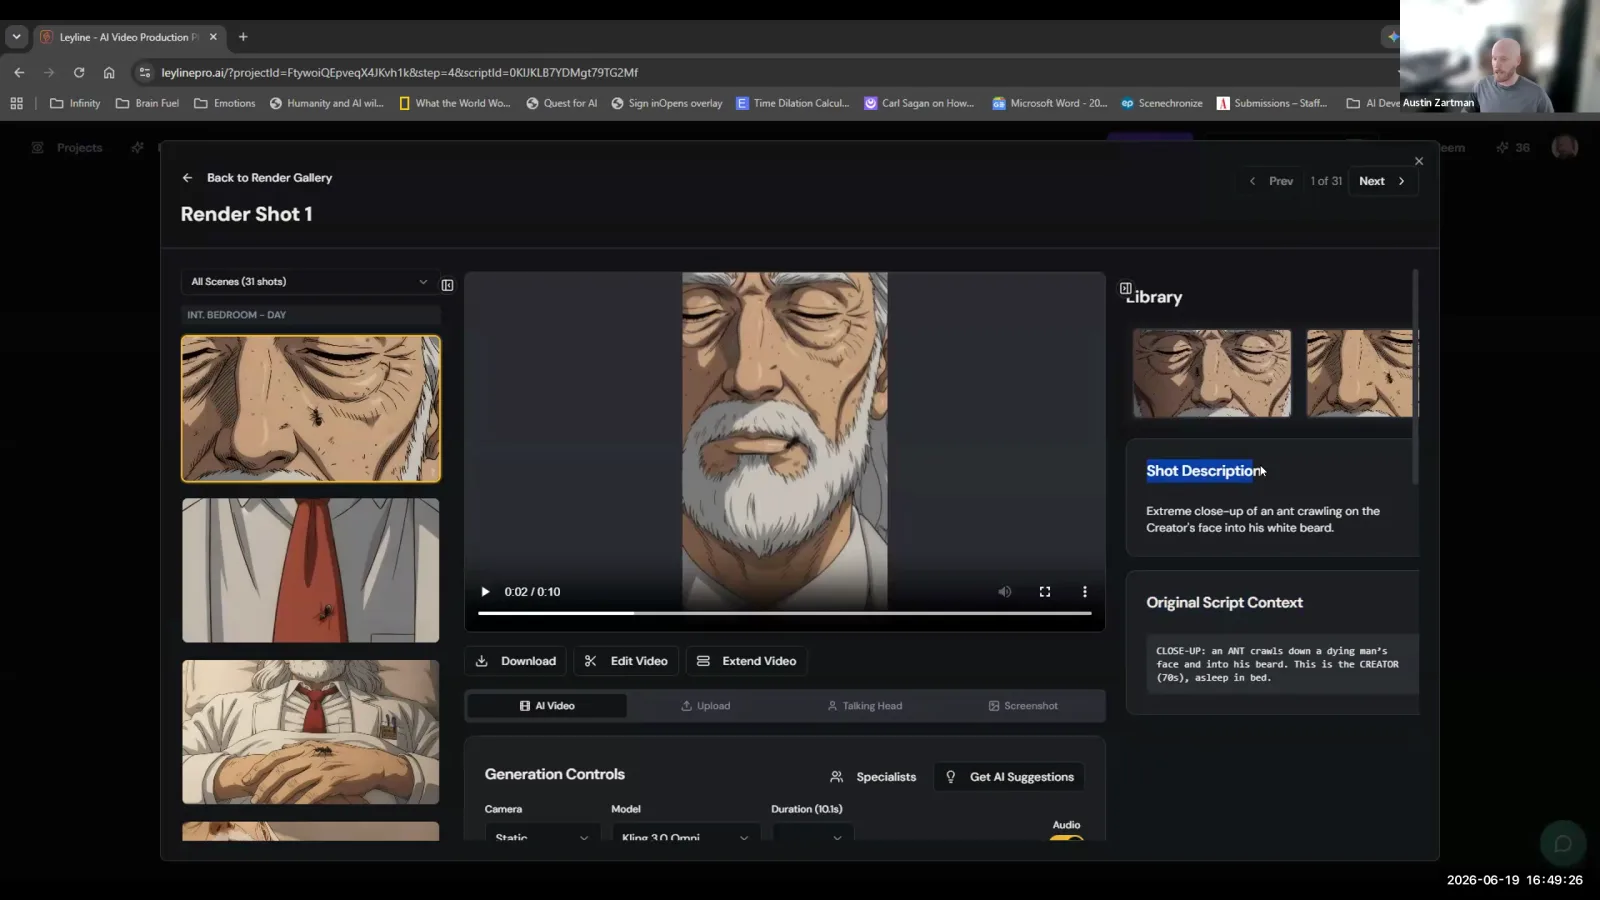
Selecting a shot automatically populates the relevant fields with the shot description and original script context.
Step 3. Refine the video prompt to describe a single, simple, and clear action.
For example, instead of 'The robot starts to walk but stops,' use 'The robot walks down the street.' You can cut the action short in editing later.
Step 4. Choose a video model from the dropdown menu, such as the Cling family for general use or Seed Dance 2.0 for complex shots.
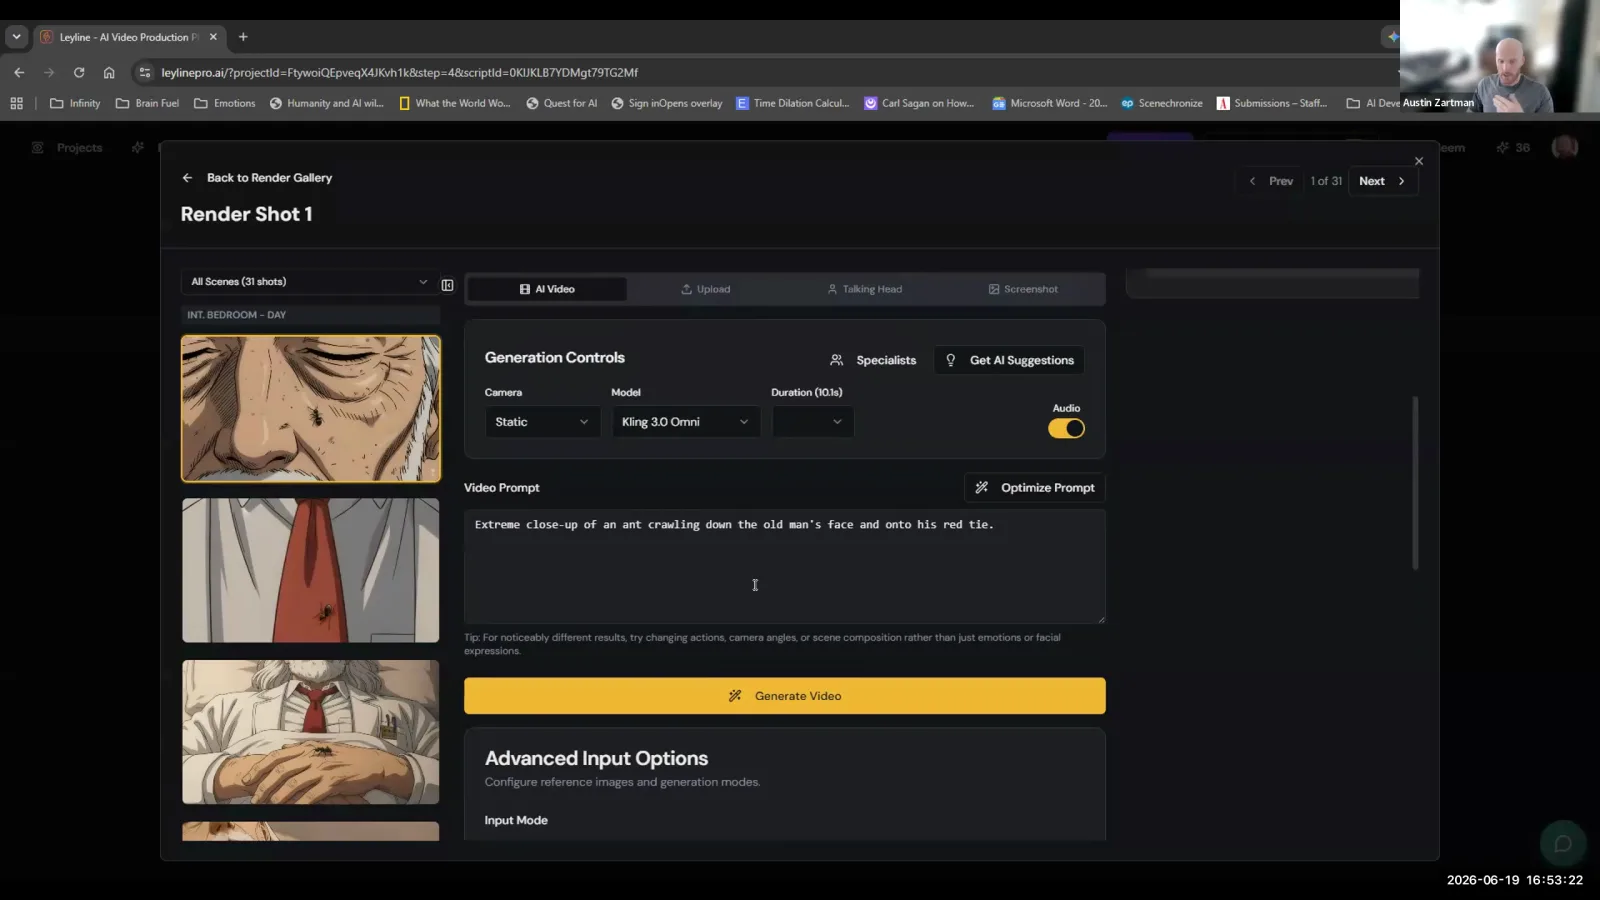
Under Generation Controls, select a video model like 'Kling 3.0 Omni' from the dropdown menu.
Step 5. Set the video quality (720p minimum recommended), duration, and camera movement. Start with a 'Static' camera movement and a short duration to save credits.
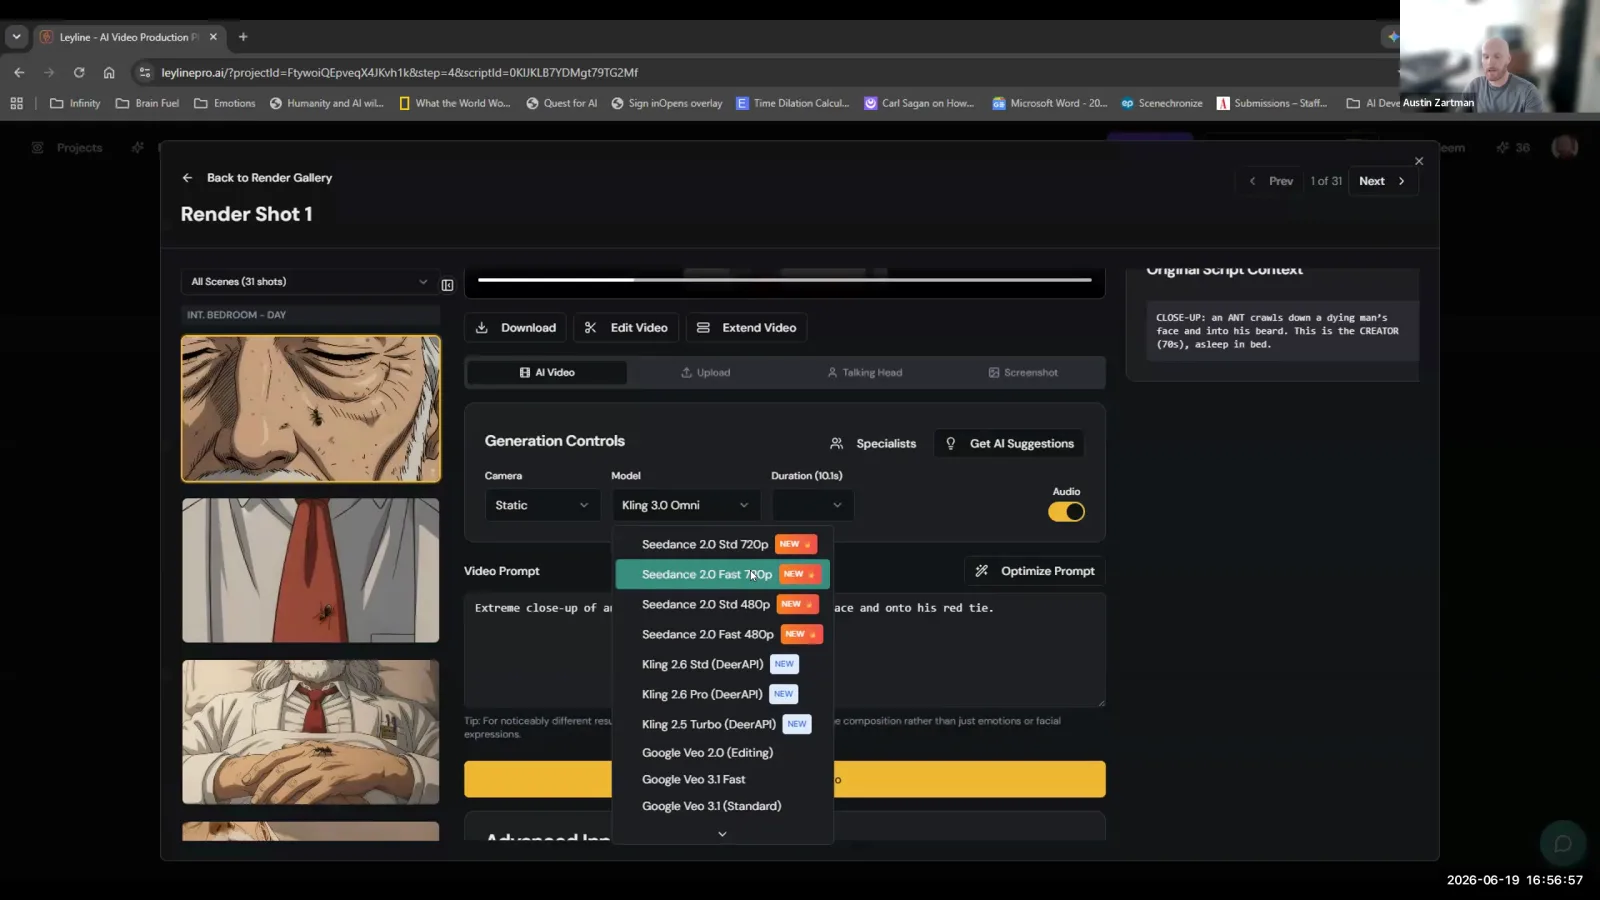
Under Generation Controls, select a video model with at least 720p quality and set the camera movement to 'Static'.
Step 6. Click 'Generate Clip' and wait for the video to be created.
Step 7. Review the generated clip. If it's not quite right, try generating it 1-2 more times with the exact same settings before making changes.
Generate a Video with a Start and End Frame
For more precise control over motion, you can provide the AI with both a starting and an ending image. This guides the model along a specific trajectory, defining the clip's beginning and end.
Step 1. In the Render stage, select your starting keyframe.
Step 2. Under the 'Reference' section, choose the 'First and last frame' option.
Step 3. Click 'Add last frame' and select the keyframe that represents the desired end point of your action from your library.
This is useful for actions that cover a specific distance, like an ant crawling from a man's face to his tie.
Step 4. Select a model that supports end frames, such as Cling 3.0 Omni or Google VO.
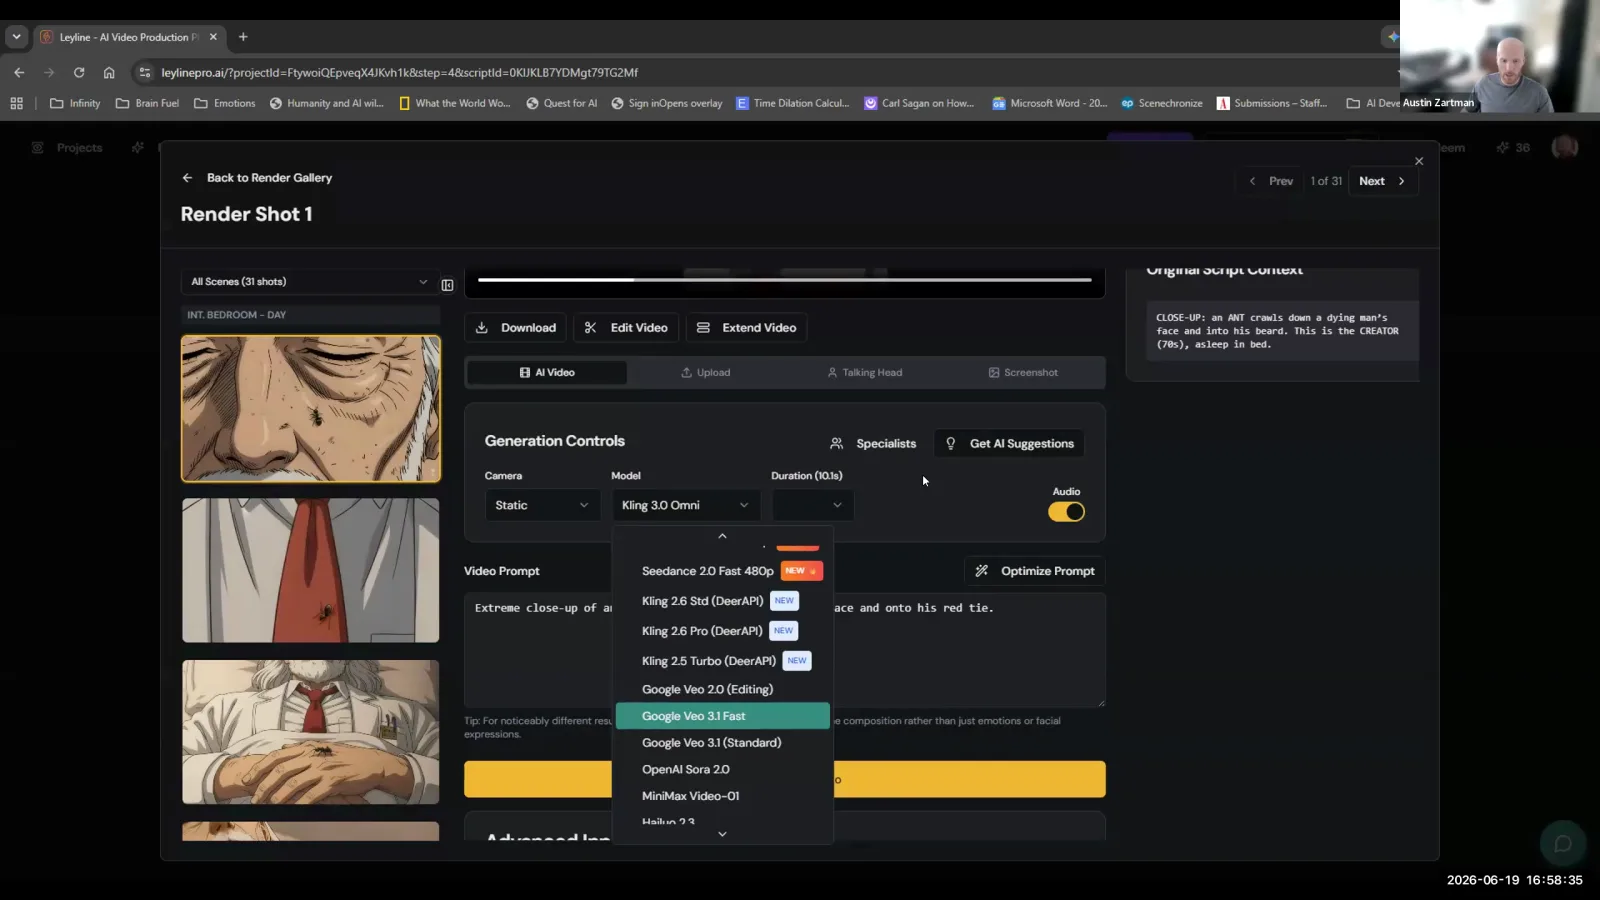
Select a model like Google Veo from the Generation Controls panel to generate the shot.
Step 5. Write a simple prompt describing the action and click 'Generate Clip'.
Chain Video Clips for a Seamless Sequence
To create a continuous action that lasts longer than a single clip, you can generate multiple clips and chain them together. This technique allows you to build complex, multi-part sequences.
Step 1. Generate the first clip in your sequence, ideally using a start and end frame for control.
Step 2. For the second clip, navigate to its corresponding keyframe slot in the Render stage.
Step 3. Instead of using its original keyframe as the start frame, select the option to use the final frame from the previous clip.
This ensures the new clip begins exactly where the last one ended, creating a seamless transition.
Step 4. Provide a prompt for the action in the second clip and generate it.
Generate a Clip with Lip-Synced Dialogue
Bring your characters to life by generating video clips with synchronized dialogue. This process uses AI to match a character's mouth movements to a provided line of text.
Step 1. In the Render stage, select the keyframe of the character who will be speaking.
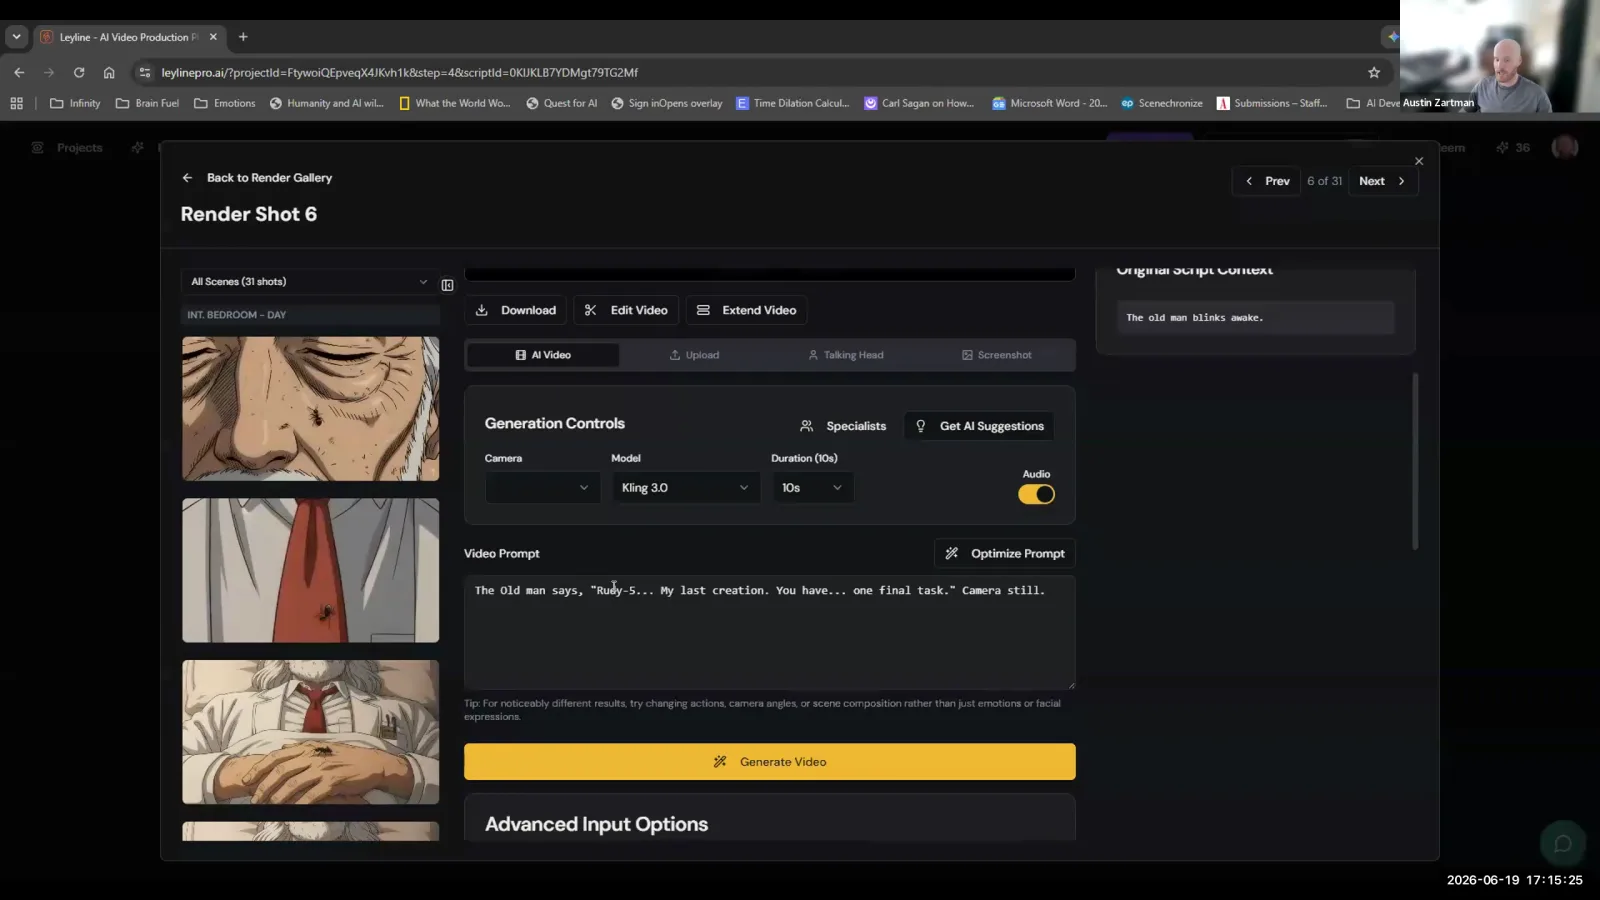
Enter the character's dialogue and desired action into the Video Prompt field.
Step 2. In the video prompt box, describe the action and include the character's dialogue verbatim. For example: 'The old man says, Rudy 5, my last creation, you have one final task.'
Step 3. Choose a high-quality model that supports lip-sync, such as Cling 3.0 Omni, Seed Dance 2.0, or Google VO.
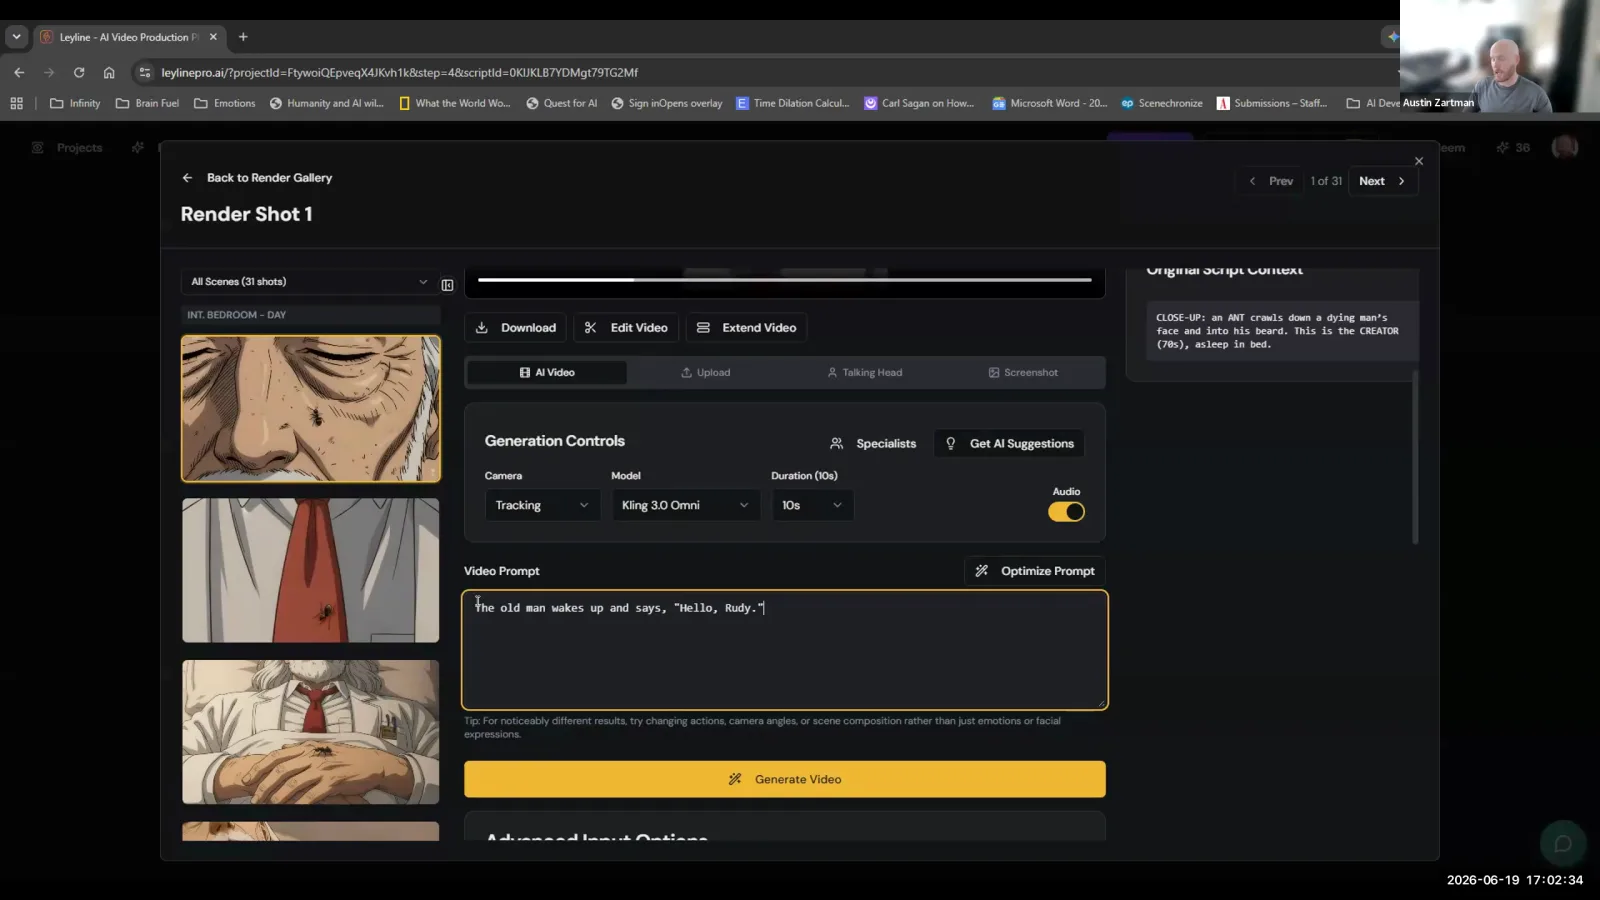
Select a model like Kling 3.0 Omni that supports lip-sync for video prompts that include dialogue.
Step 4. Ensure the 'Audio' toggle is enabled.
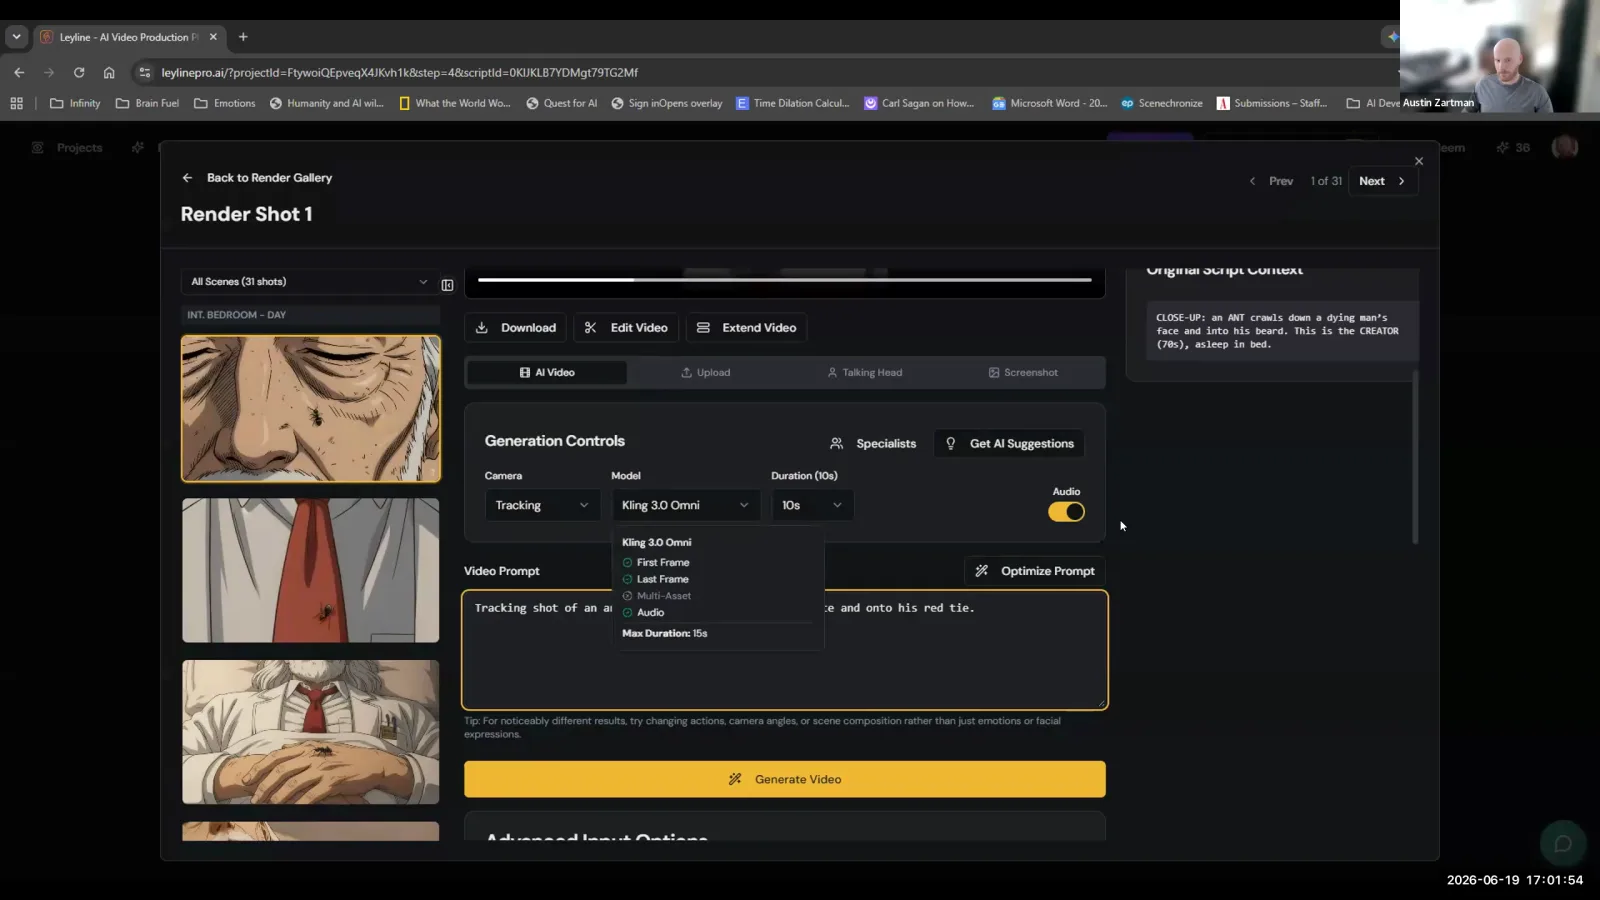
Enable the Audio toggle to ensure your video generation includes sound.
Step 5. Generate the clip. Don't worry if the voice sounds inconsistent with other clips; this can be fixed in post-production.
Fix a Keyframe Image Using 'Edit with AI'
Before animating a keyframe, you can correct errors like incorrect scale or details using an AI editing tool. This ensures your source image is accurate before you commit to generating video.
Step 1. In the Keyframes stage, select the image you need to fix.
Step 2. Click the 'Edit with AI' button.
Step 3. Select a colored pencil tool and draw a circle around the area you want to change.
Step 4. In the corresponding text box for that color, type a command describing the change, such as 'Make this character 20% bigger' or 'Remove the green lines'.
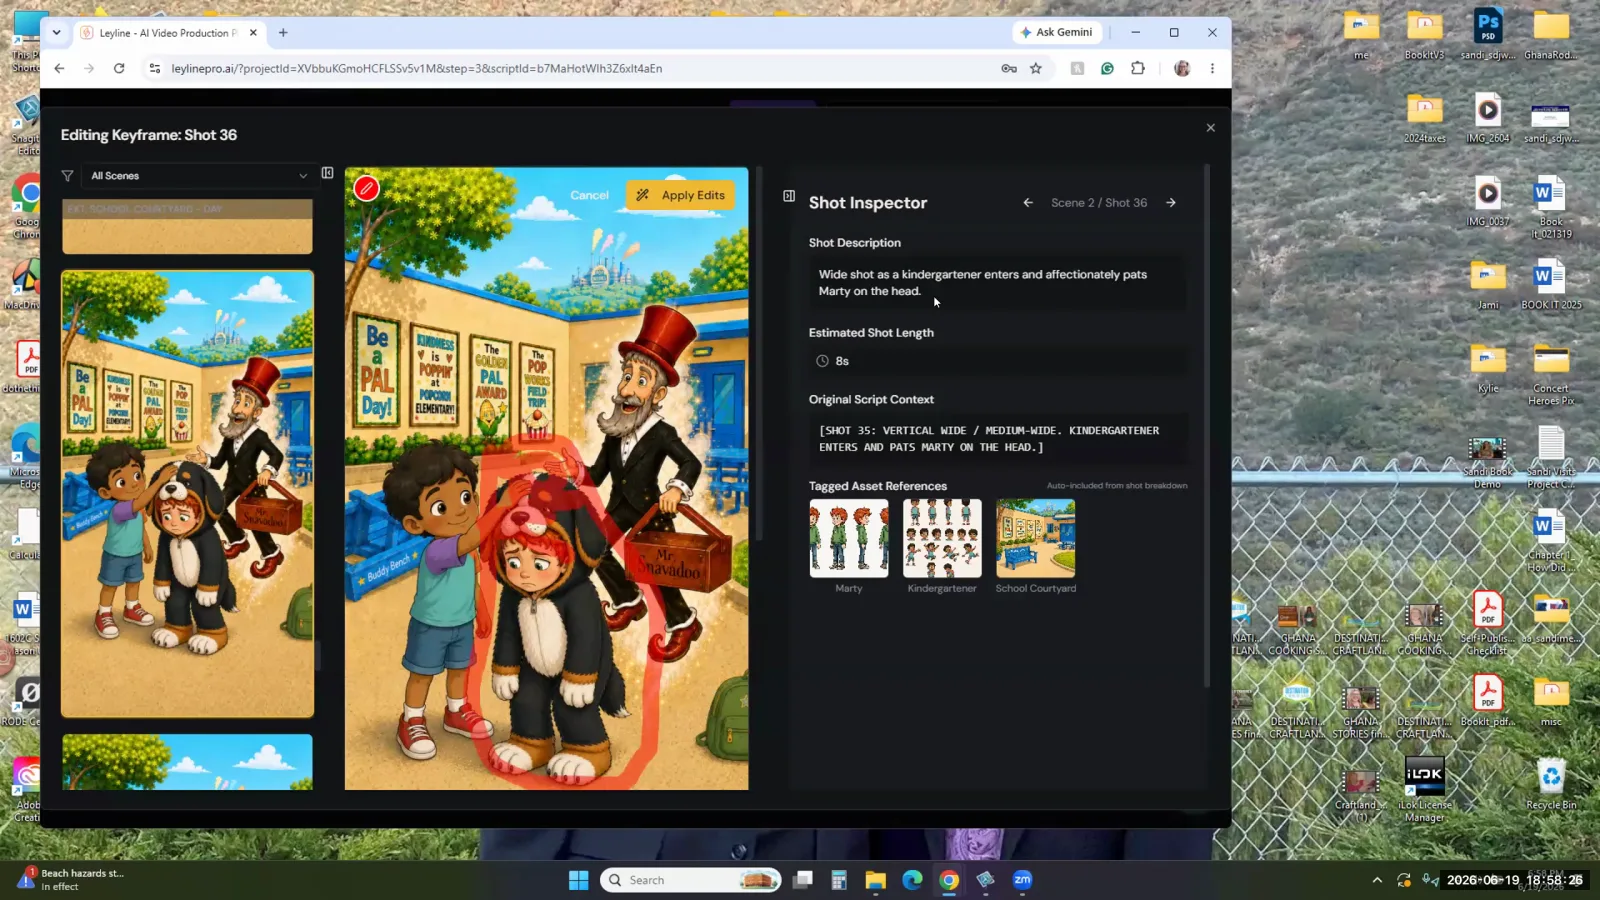
A character is selected for editing, indicated by the red outline and the corresponding red icon.
Step 5. If you need to make a second, separate edit on the same image, select a different colored pencil, draw another circle, and type a new command.
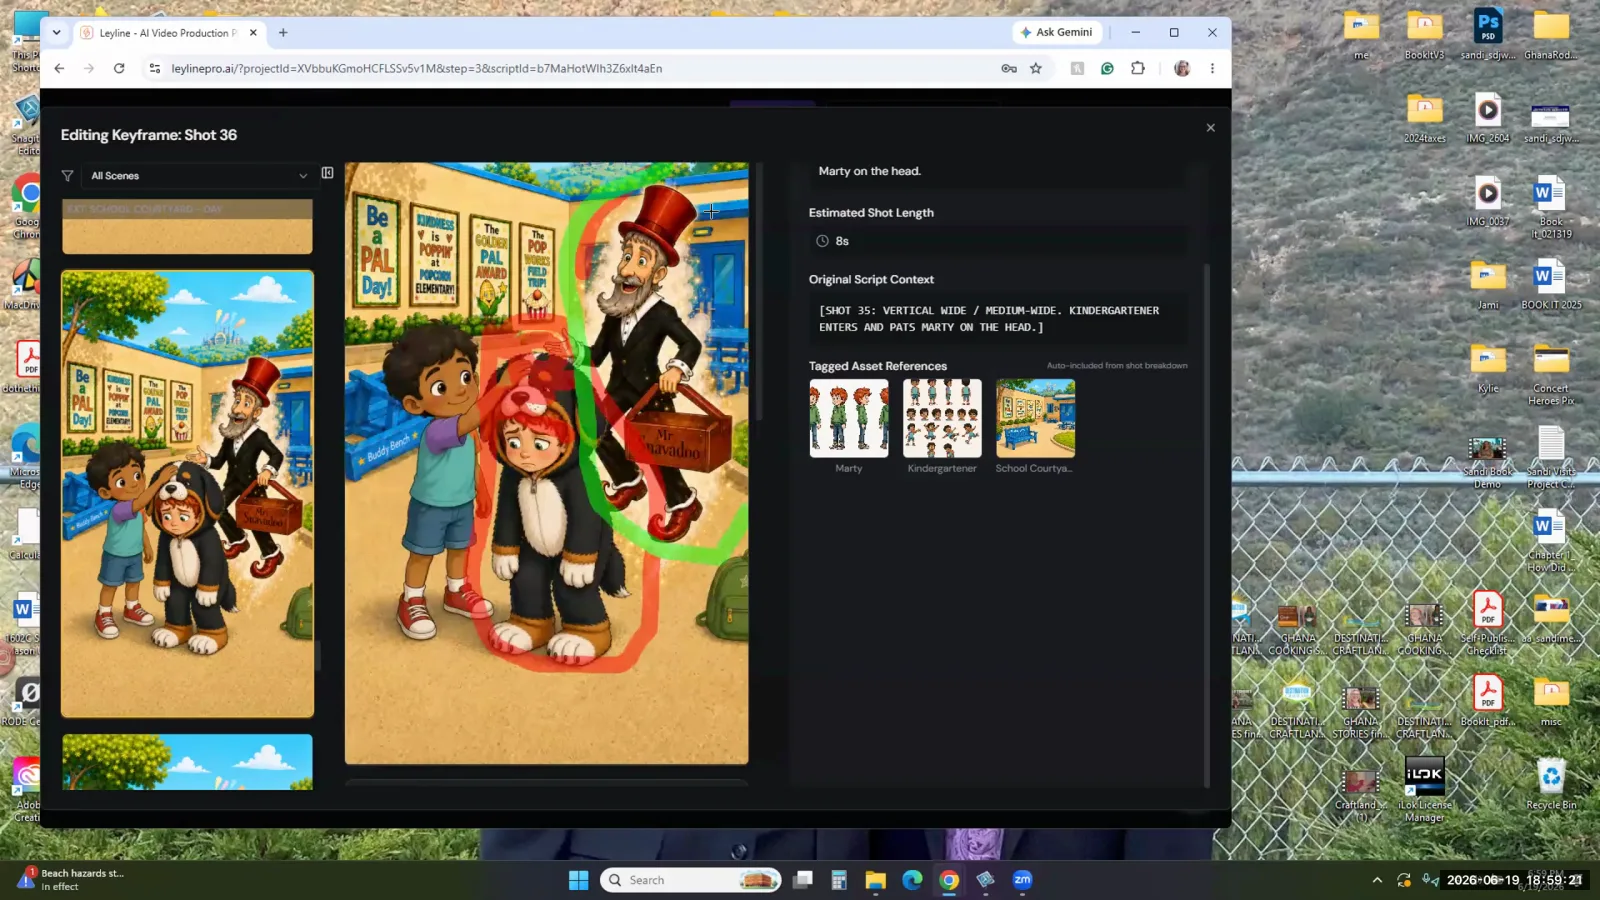
Apply multiple edits to one image by drawing separate, color-coded circles for each command.
Step 6. Click 'Apply Edits' and review the new version generated in the library.
Assemble a Rough Cut on the Timeline
Once your clips are generated, the next step is to arrange them on a timeline. This allows you to preview the sequence, check the story's flow, and create a rough cut of your episode.
Step 1. After generating all clips in the Render stage, push the changes to the 'Timeline' phase.
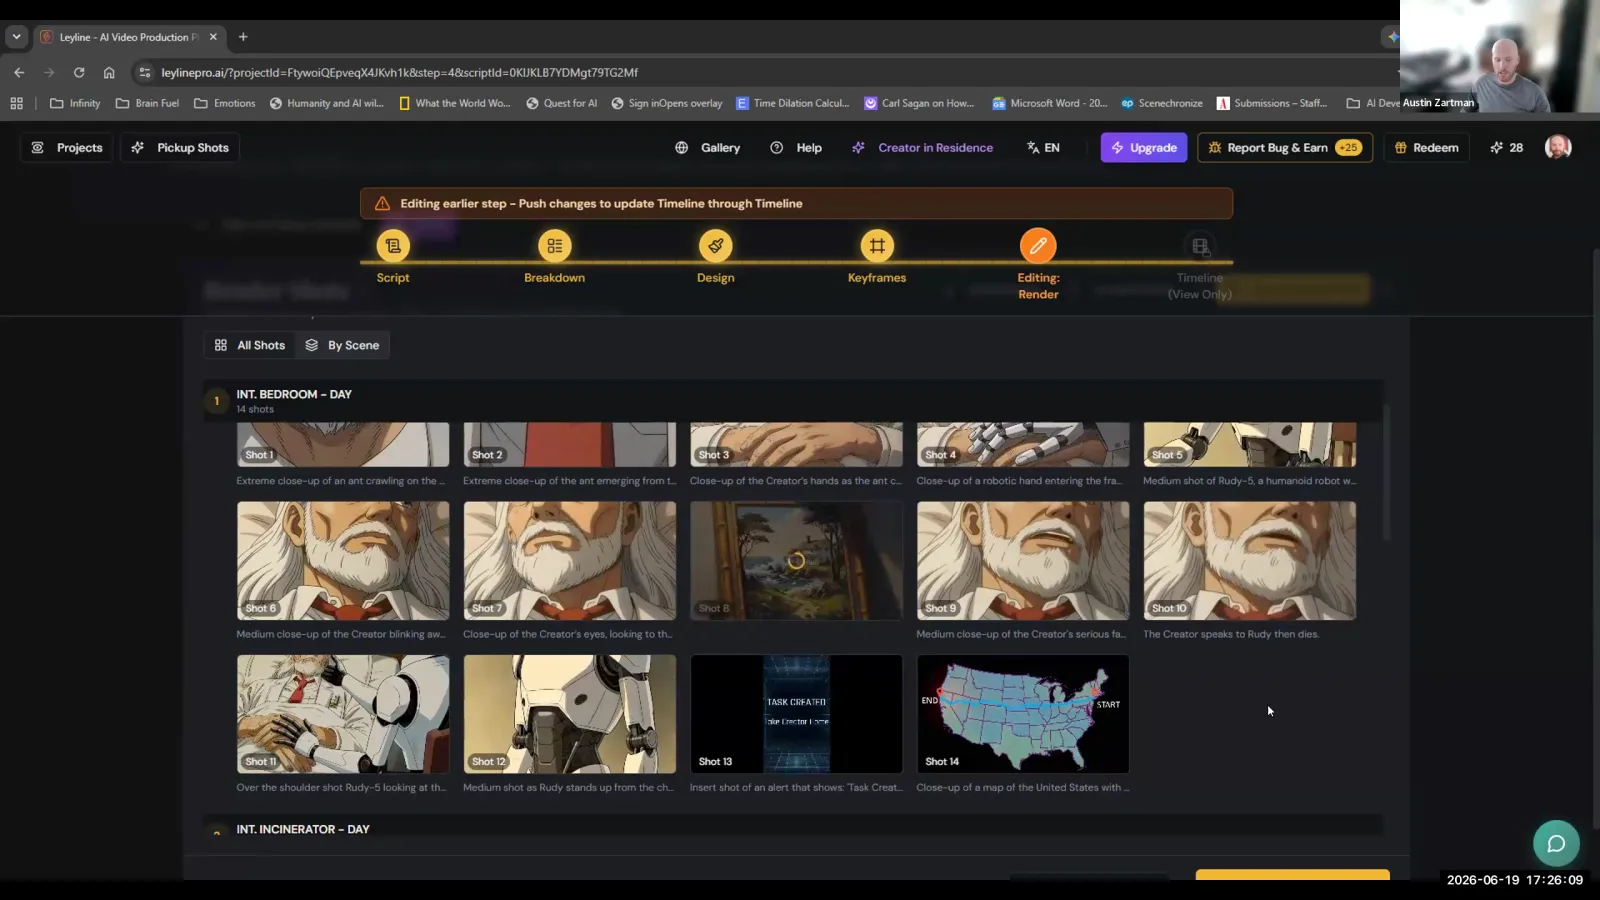
After rendering, a banner prompts you to push the changes to the timeline to view the final video.
Step 2. The timeline will automatically populate with all your generated clips in order.
Step 3. Click the preview button to watch the stitched-together sequence.
The main goal here is to see if the visual story is understandable, not to perfect the edits.
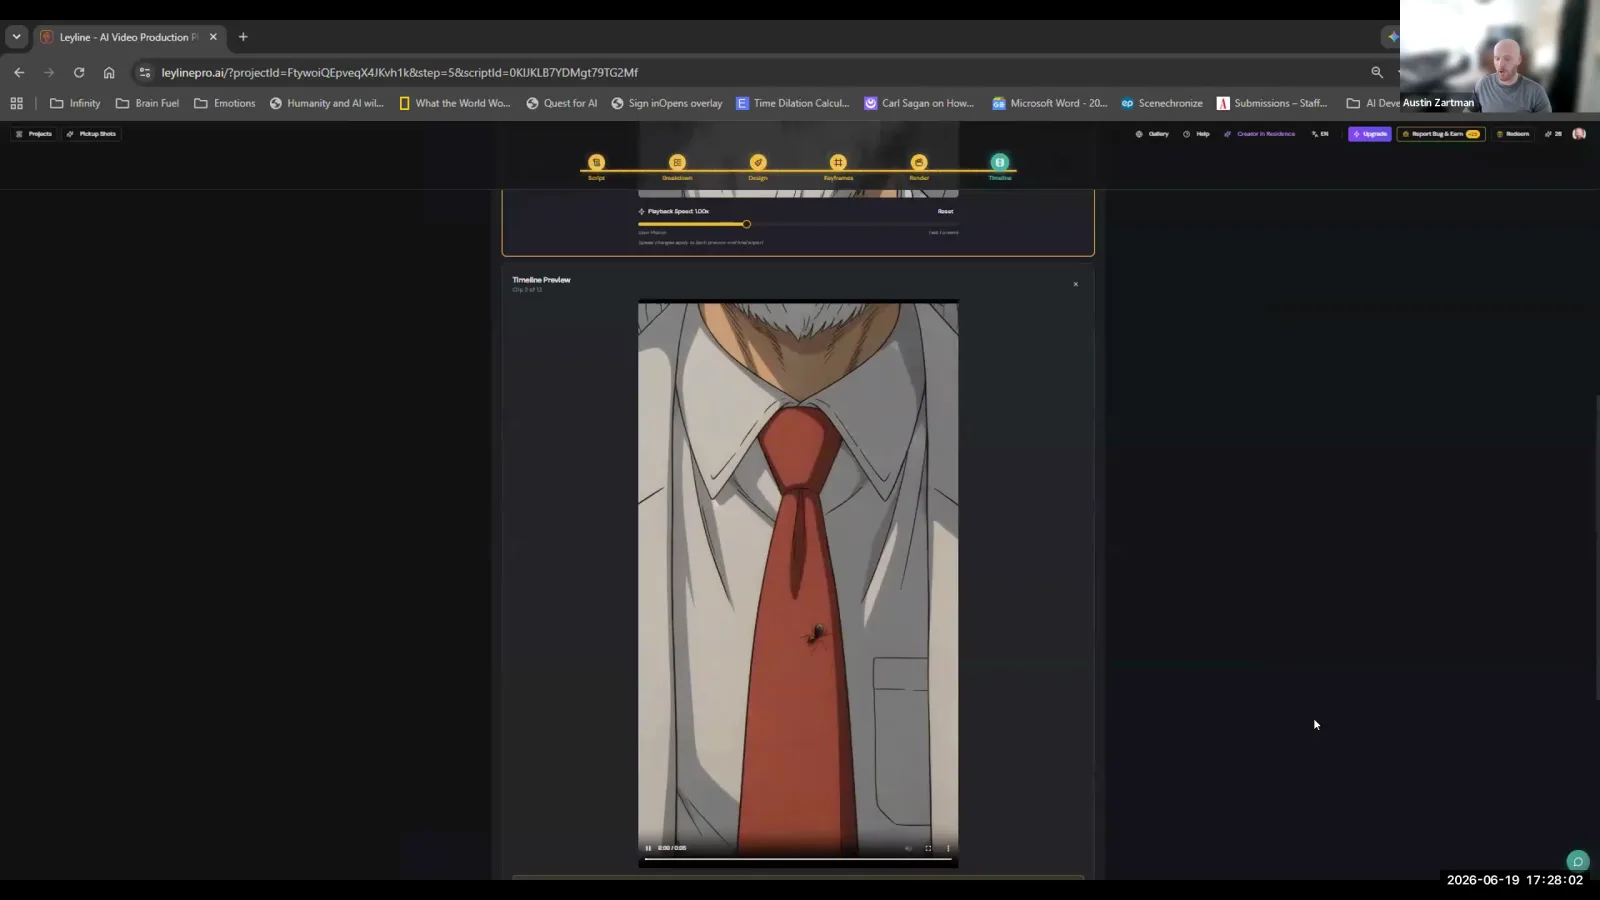
The Timeline Preview player shows the full sequence of generated clips.
Step 4. Use the handles on each clip to make simple trims if needed.
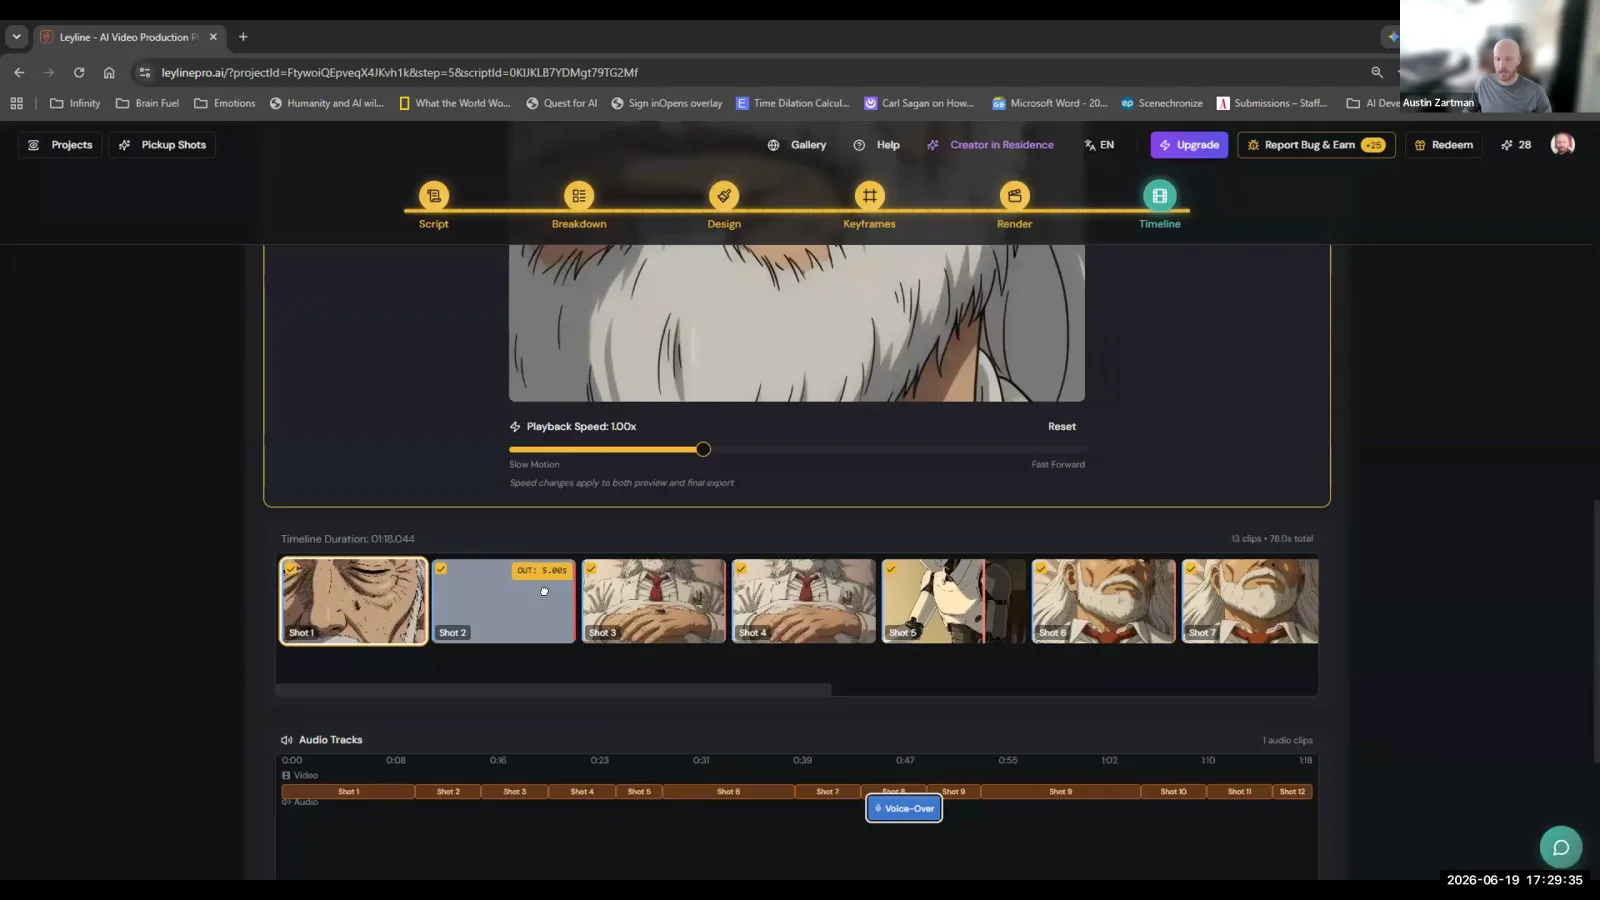
Trim the duration of any clip by dragging the handles at its beginning or end.
Step 5. Optionally, use the 'Download All' button in the Render stage to save your clips for more advanced editing in an external program.
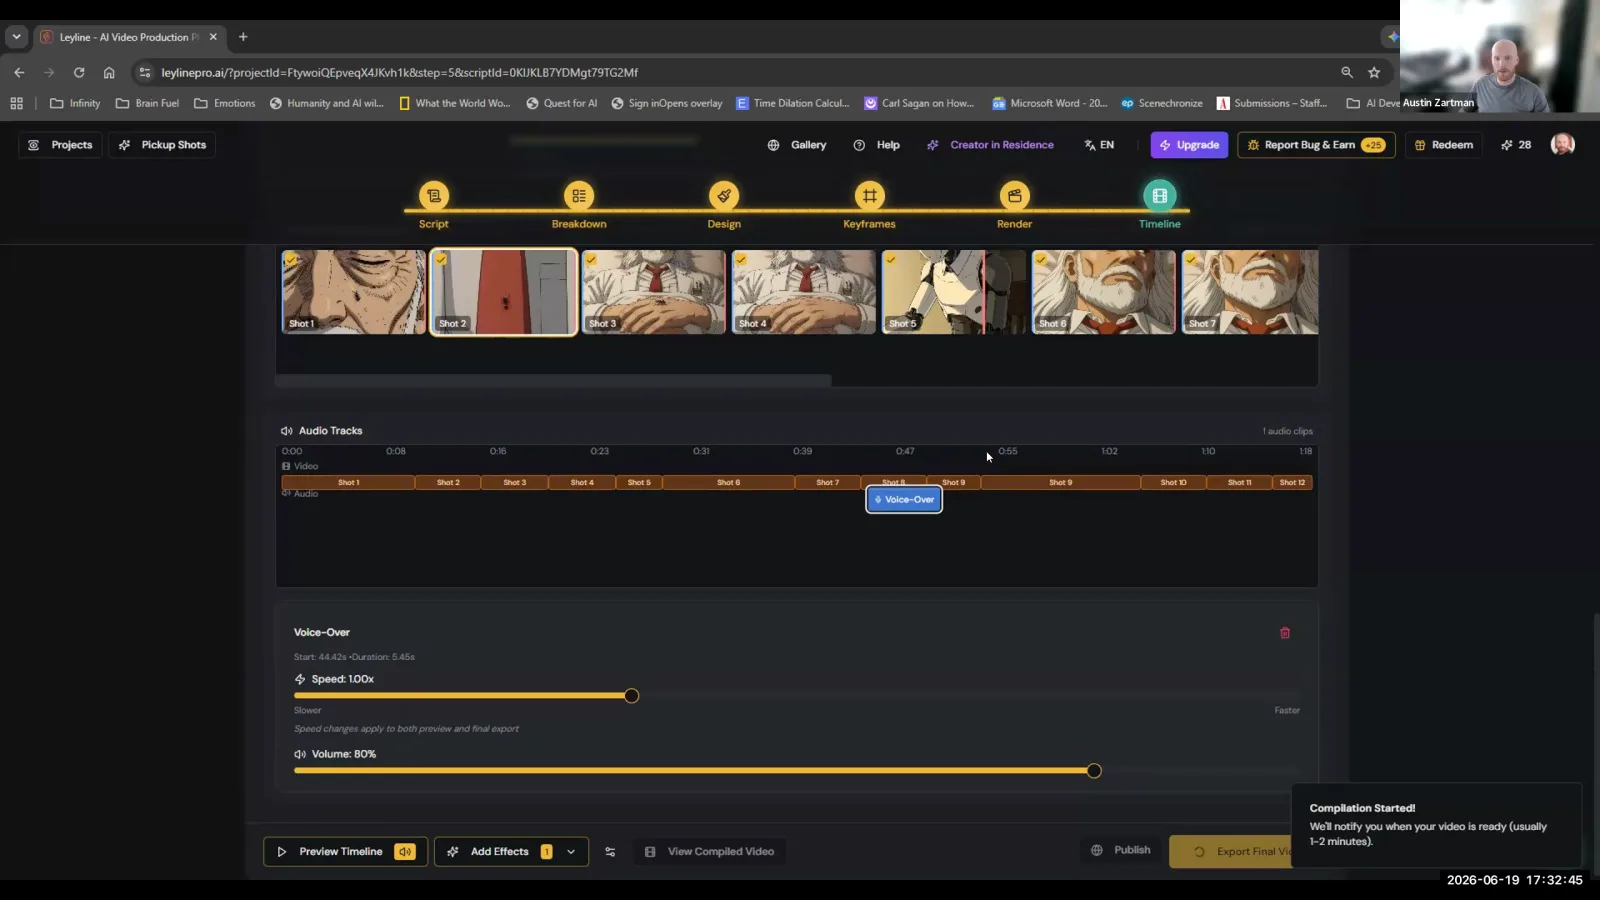
This screenshot shows the Timeline stage, which is for final exports, not the Render stage for downloading individual clips.
Key terms
Keyframes. The starting images for video clips, which are meticulously generated to ensure character and style consistency before the more time-consuming and expensive video generation phase.
Video Prompt Components. A simple, clear video prompt consists of three core parts: the subject (e.g., 'a slim humanoid robot'), the action (e.g., 'is walking down the street'), and technical specifications (e.g., 'tracking shot').
Discrete Actions. The principle of breaking down complex sequences into single, complete actions for each video prompt. AI models handle simple, clear actions (e.g., 'character gets out of bed') better than multiple or interrupted actions.
Start Frame. The initial image (or keyframe) provided to a video generation model, which dictates the starting point, style, composition, and characters for the resulting clip.
End Frame. An optional final image provided to a video model. The model will then generate the motion required to transition from the start frame to this specified end frame, offering more control over the clip's outcome.
Text-to-Video. A generation method where a video clip is created based solely on a text prompt without a starting reference image. This approach is not recommended for narrative series as it lacks visual consistency.
Seed Dance 2.0. Considered the highest-quality and most expensive video model available in the platform. It can sometimes handle multiple actions and can generate clips up to 15 seconds, but does not support using an end frame.
Cling Models (e.g., 3.0). A family of very capable and reliable video models that generally follow prompts well. They are a good default choice for most shots and support features like using an end frame.
Google VO 3.1. A video model that is good for environmental shots but can be 'loose with the rules,' sometimes ignoring the start frame or adding unexpected elements. It can lead to happy accidents or frustrating lack of control.
Video Quality (720p). The resolution of the generated video. 720p is recommended as the minimum quality for vertical videos on phones to avoid a grainy appearance.
Lip Sync. The feature in advanced video models (like Seed Dance 2.0, Cling 3.0, and VO) that animates a character's mouth to match spoken dialogue included in the prompt.
Safety Violations. Content filters in AI models that can block generation of prompts containing perceived violence, weapons, blood, or sometimes even innocuous content involving children.
80/20 Rule. A principle for evaluating AI-generated clips, suggesting that if a clip is 80% of what you want, it's often usable. Minor imperfections or unwanted sections can frequently be fixed or removed in the editing process.
Chaining Clips. A technique for creating seamless, longer sequences by using the final frame of one generated clip as the starting frame for the next clip. This is one of the best ways to maintain consistency across shots.
Extend Video. A feature that attempts to continue a video clip from its last frame based on a new prompt. Its utility is limited because it cannot incorporate a new reference image for elements not present in the original clip.
Rough Cut. The first assembly of video clips in sequence, put together to check the visual storytelling, pacing, and flow before detailed editing, sound design, and color correction.
11 Labs. An external program used for creating consistent character voices. You can use the audio track from a lip-synced clip generated in Layline as a reference to create a new, consistent voice track in 11 Labs.
Negative Prompting. A technique used to fix recurring errors in generations by explicitly telling the model what to avoid. For example, adding 'the man's hands do not move' to prevent unwanted motion.
Creative Bible. The master-level repository in Layline for a series' core assets, such as main characters, recurring locations, and key props. Assets defined here are available across all episodes.
Hero Shot. A primary, high-quality reference image of a character that clearly defines their appearance, costume, and style for the AI models.
Character Sheet. A reference image showing a character from multiple angles (front, back, side) to help the AI generate them consistently from different perspectives.
Sprite Sheet. A reference image showing a character in various poses or expressing different emotions, used to guide the AI in generating a range of actions and expressions.
Edit with AI. An in-platform image editing tool that allows users to draw a circle around a part of an image and use a text prompt to modify only that specific area, for tasks like changing scale or fixing details.
Common mistakes to avoid
- Writing complex video prompts with multiple actions or camera movements, which increases the chance of failure.
- Trying to generate 'interrupted' actions (e.g., 'starts to talk but stops') instead of generating the full action and cutting it in the edit.
- Using character names in prompts instead of descriptive phrases like 'the old man' or 'the woman in the red dress,' which the AI understands better.
- Relying on text-to-video without a strong keyframe, which leads to stylistic inconsistency.
- Wasting credits by using the most expensive models (like Seed Dance 2.0) for simple, static shots.
- Giving up on a prompt after one bad generation; it's best to try the same prompt 2-3 times before changing it.
- Forgetting that you can salvage a clip by cutting out the usable first few seconds before it glitches.
- Expecting consistent voices for a character when generating multiple dialogue clips; this requires post-production work with tools like 11 Labs.
- Using the 'Extend Video' feature to introduce new characters or major objects, as it can't use a new reference image and will invent the new element's appearance.
- Treating the Layline timeline as a final editing suite instead of a tool for previewing a rough cut.
- Uploading reference images to the general 'Visual References' section instead of assigning them to specific character or asset slots in the Creative Bible.
- Pressing 'Generate' in the asset design phase when you only intend to upload a pre-made image, which causes the AI to create a new, unwanted version.
Frequently asked questions
What are the best practices for writing AI video generation prompts?
Write prompts for single, discrete actions and avoid complex camera movements. Use descriptive phrases like 'the old man' instead of character names, as the AI understands these better. If a generation fails, try the same prompt two or three times before rewriting it, as results can vary.
How to maintain character consistency in an AI-animated series?
Maintain character consistency by using a 'Creative Bible' to store character sheets and sprite sheets. When prompting, use descriptive phrases instead of character names. For voice, generate dialogue clips and then use a separate tool like 11 Labs in post-production to create a single, consistent voice for the character.
How can I save money and credits when using AI video generators?
To save credits, apply the 80/20 rule: use expensive, high-quality models like Seed Dance 2.0 only for the most important 'hero shots.' For simpler, more static shots, use less expensive models. Avoid wasting credits by re-running failed prompts a few times before changing them completely.
What is the workflow for creating a rough cut of an AI-generated film?
The workflow begins with generating video clips from keyframes using text prompts. After generating and refining individual clips, including any with lip-synced dialogue, you assemble them in sequence on a timeline. This allows you to preview the story's flow and check the overall pacing before final editing.
In the instructor’s words
“The video generation stage is significantly more expensive in terms of the credits that it's going to use, and it's significantly more time consuming.”
“Video generation, the high-level note is that it rewards simplicity and clarity.”
“It is a best practice to have one action per prompt and at most one camera movement.”
This tutorial was produced from the Leyline Masterclass recording (Cohort 1, Session 4, 2026-06-19). Screenshots are captured directly from the session.