Troubleshooting Character and Asset Workflow
Cohort 9, Session 2 — taught by Austin Zartman, creator of the AI short-film series ASHES.
To make a film with AI, you manage assets for consistency across shots. This involves creating characters with specific reference images, saving them to a central 'Creative Bible' for reuse, and importing them into different scripts. From there, you generate static keyframes for each shot based on your script's descriptions. The process requires iteration to maintain visual and directional continuity.
What you will learn
- How to correctly assign reference images to specific character assets instead of the general project library.
- How to use the 'Creative Bible' to store and manage reusable characters and props.
- The process of promoting a designed character to the Creative Bible.
- How to sync the Creative Bible and import characters into a new script.
- How to generate static keyframes for individual shots.
- Understand the difference between navigating the UI and pushing changes to the next stage.
- How to use keyframes to establish and maintain directional consistency in a scene.
Promoting a Character to the Creative Bible
To reuse a character design in other scripts, you must first save it to your project's 'Creative Bible'. This workflow shows how to promote a character asset card so it becomes a reusable project-level reference.
Step 1. Navigate to the script containing the designed character and enter the 'Design' phase.
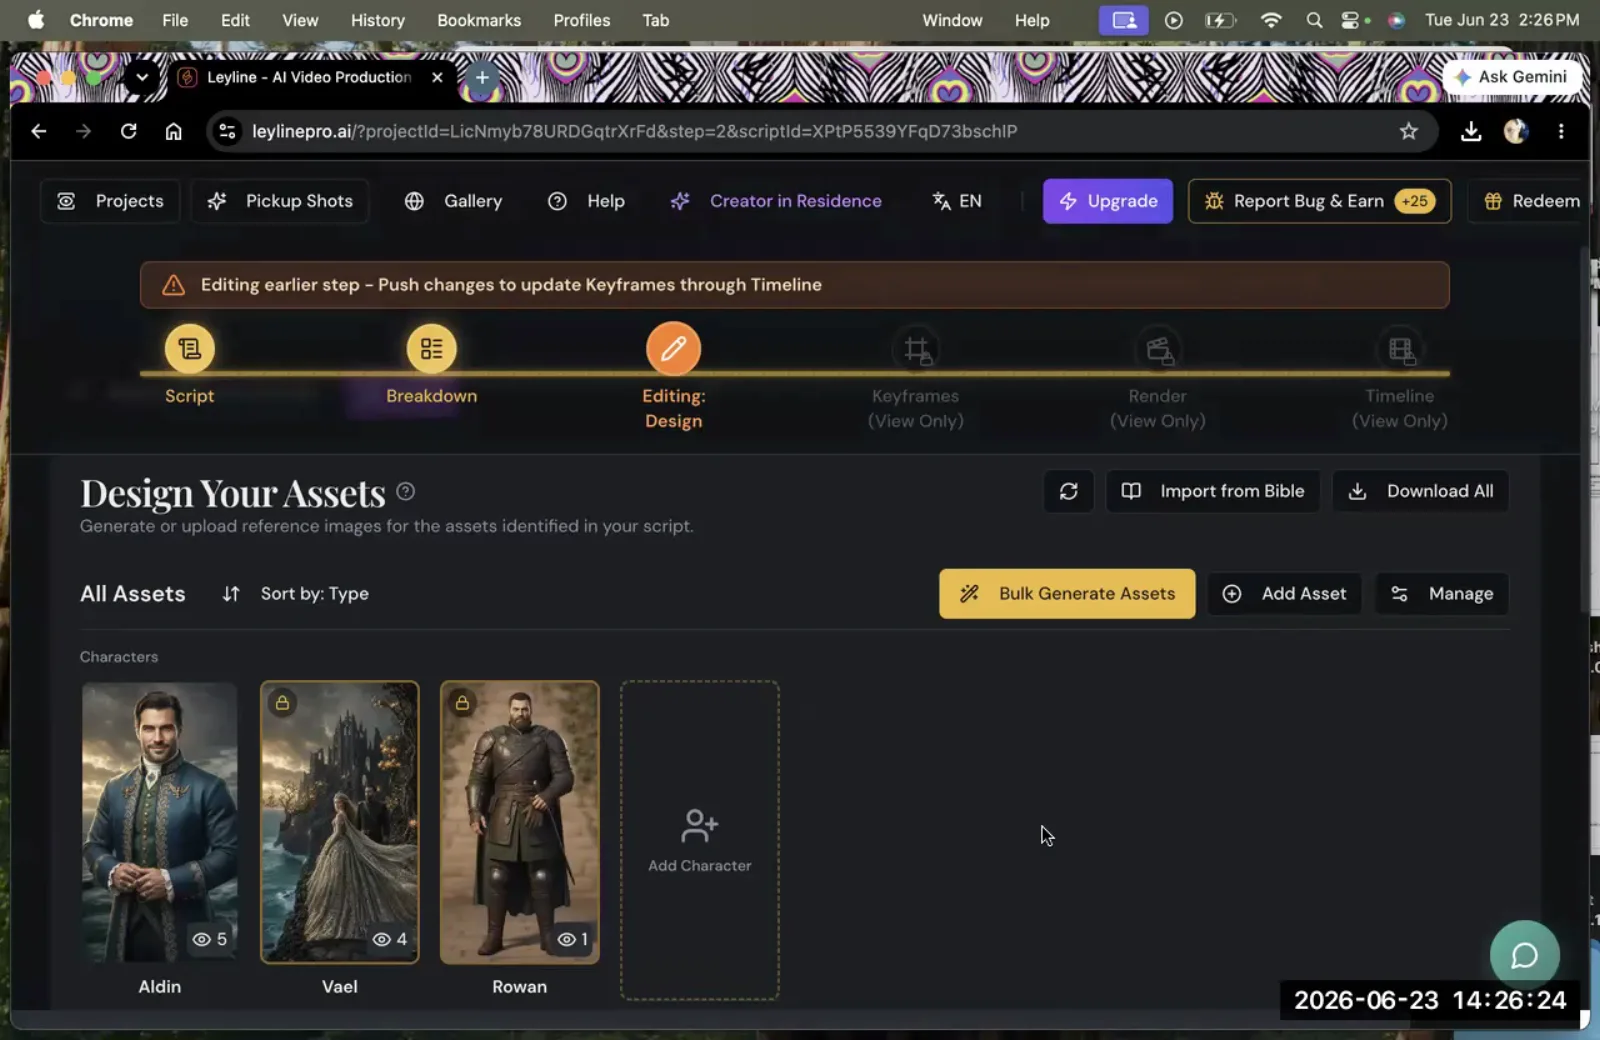
The 'Design' tab shows all the generated assets for your script, organized by type.
Step 2. Locate the character's asset card and click the three-dot menu in its upper-right corner.
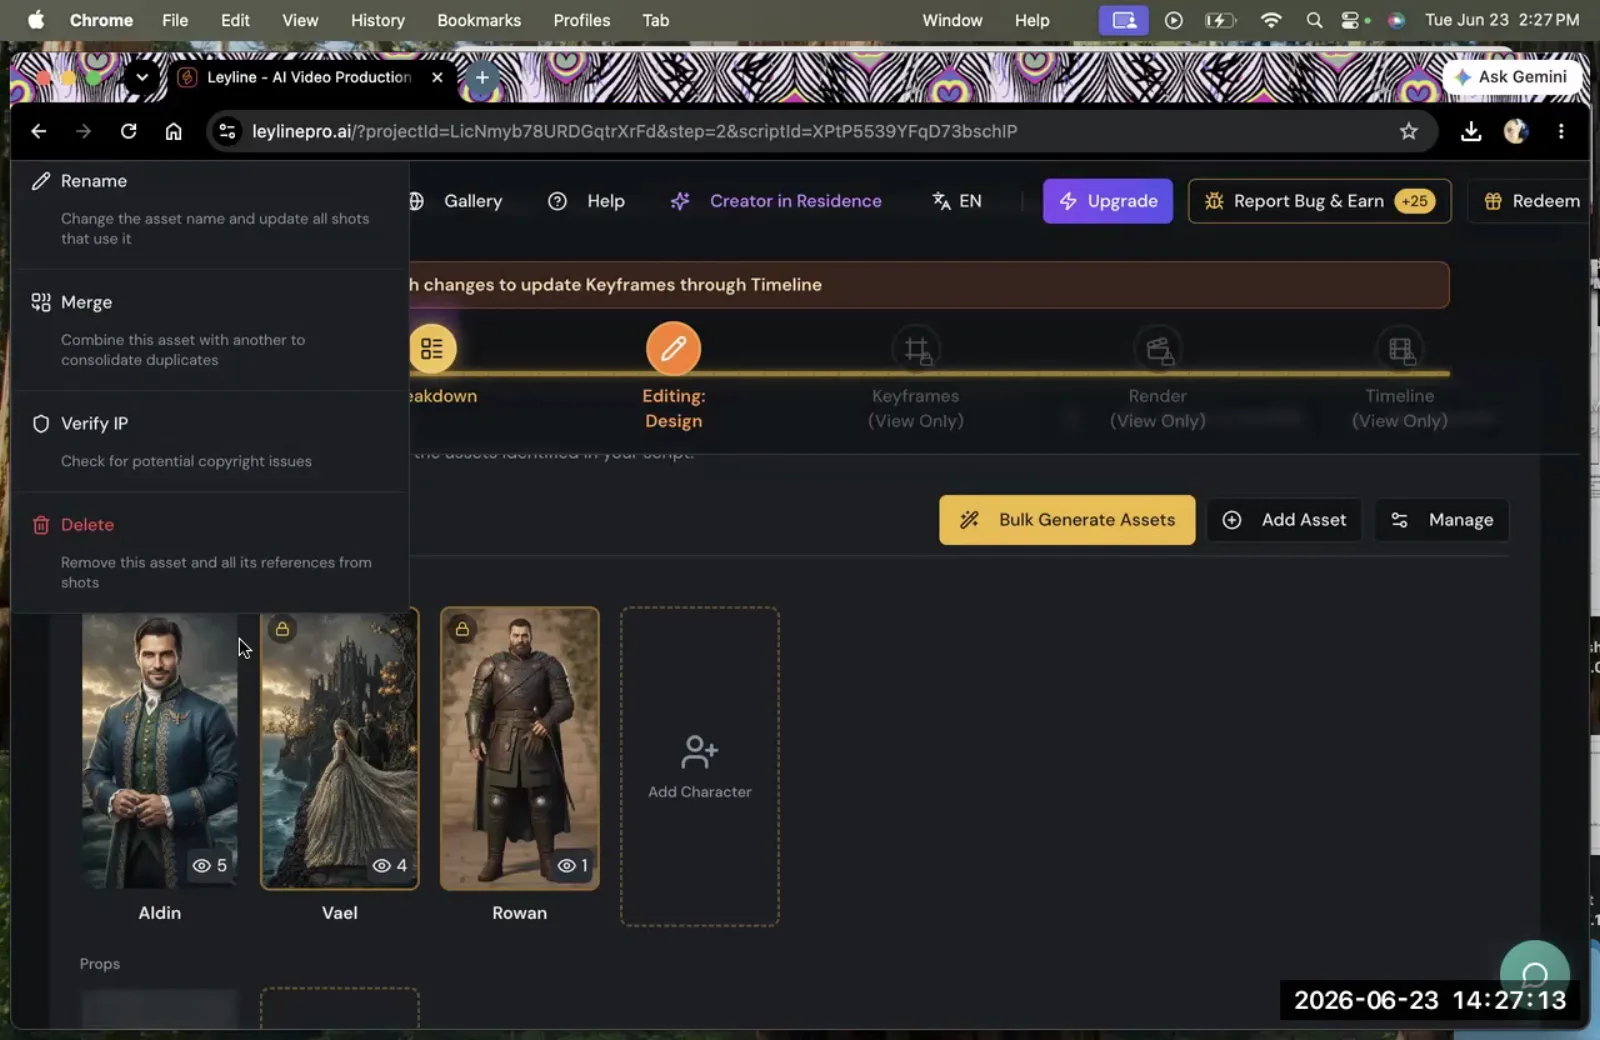
Clicking the three-dot menu on a character's asset card opens a list of options.
Step 3. Select 'Promote to Creative Bible' from the dropdown menu.
This saves the character's design at the project level for future use.
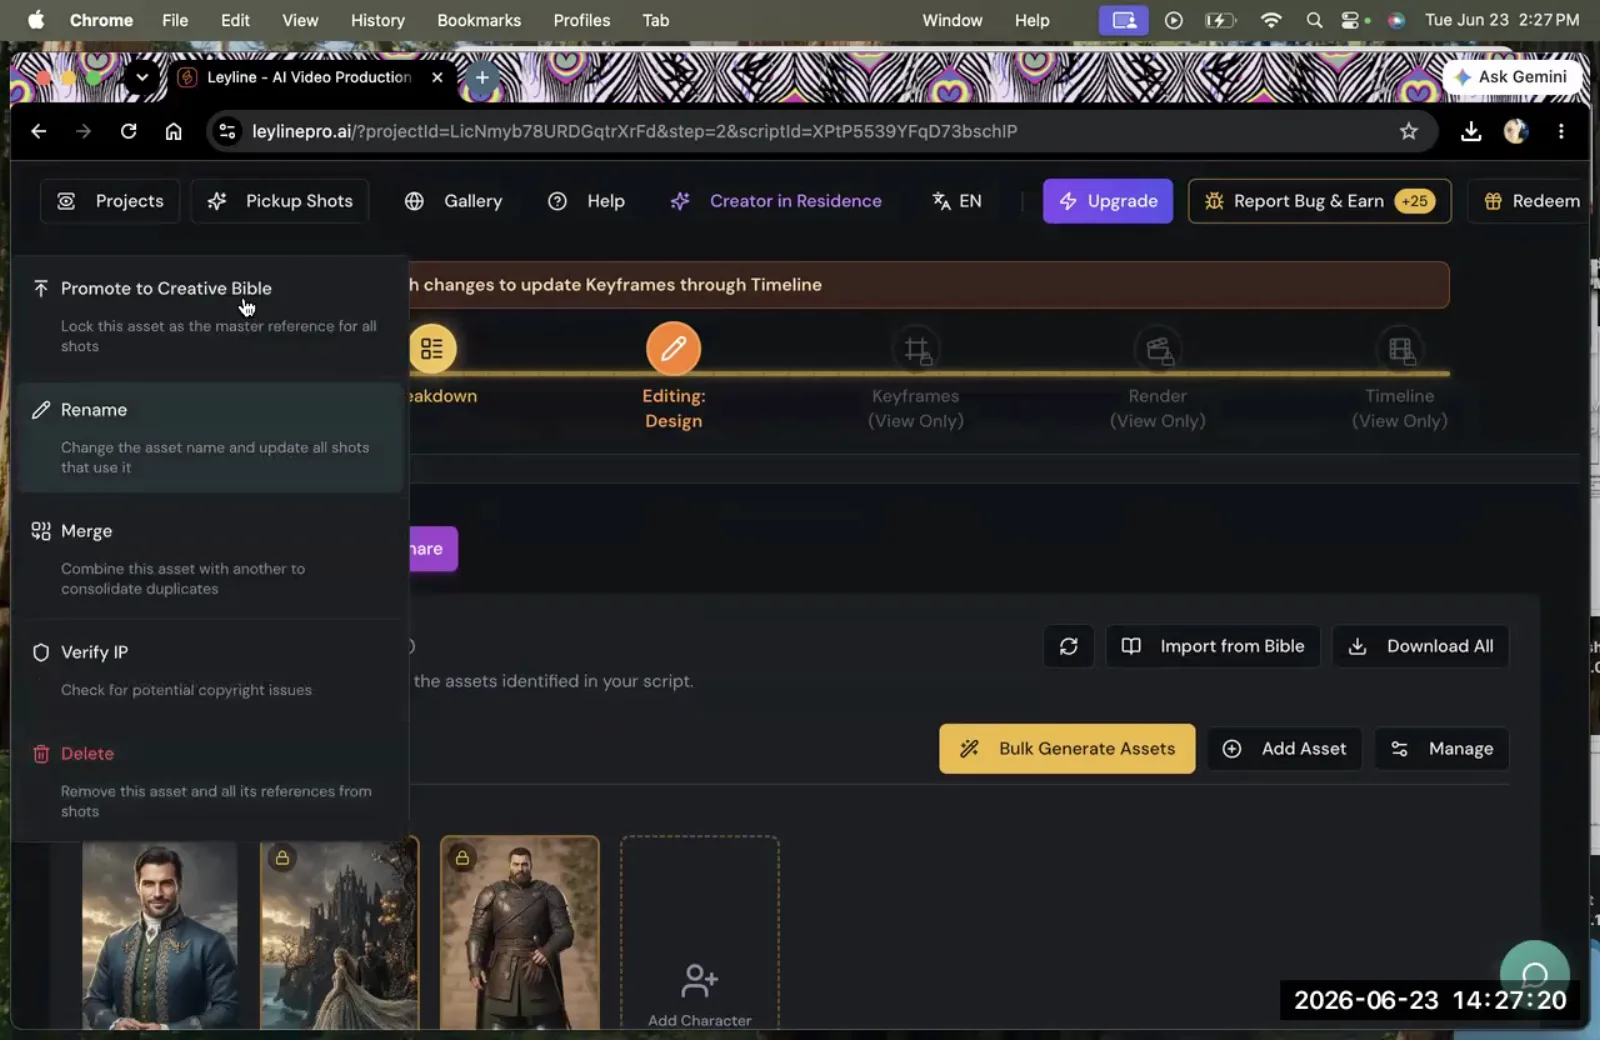
Select 'Promote to Creative Bible' to save the asset as a master reference for all shots.
Using a Bible Character in a New Script
Once a character is in your Creative Bible, you can import it into any other script within the same project. This process ensures design consistency across different scenes or episodes.
Step 1. Return to the 'Project Overview' and select the new script you want to work on.
Step 2. In the Project Overview, click 'Sync Bible' to ensure the project is updated with the latest assets.
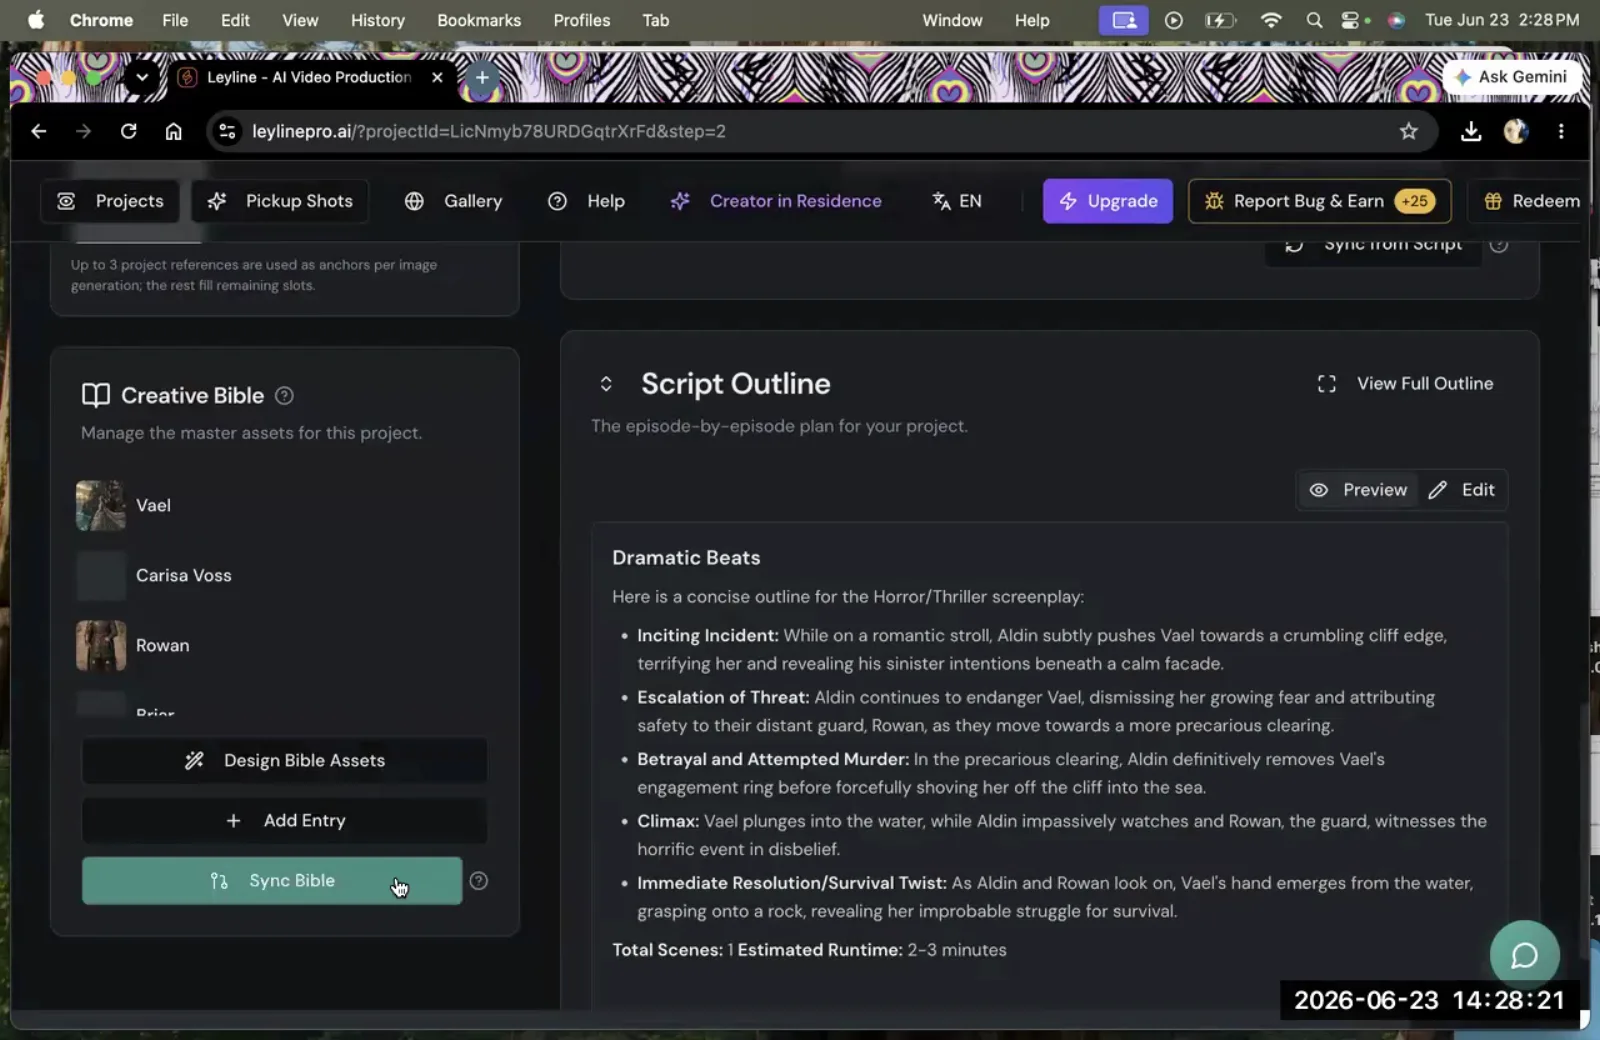
Click the 'Sync Bible' button to update the project with the latest creative assets.
Step 3. Enter the 'Design' phase for the new script.
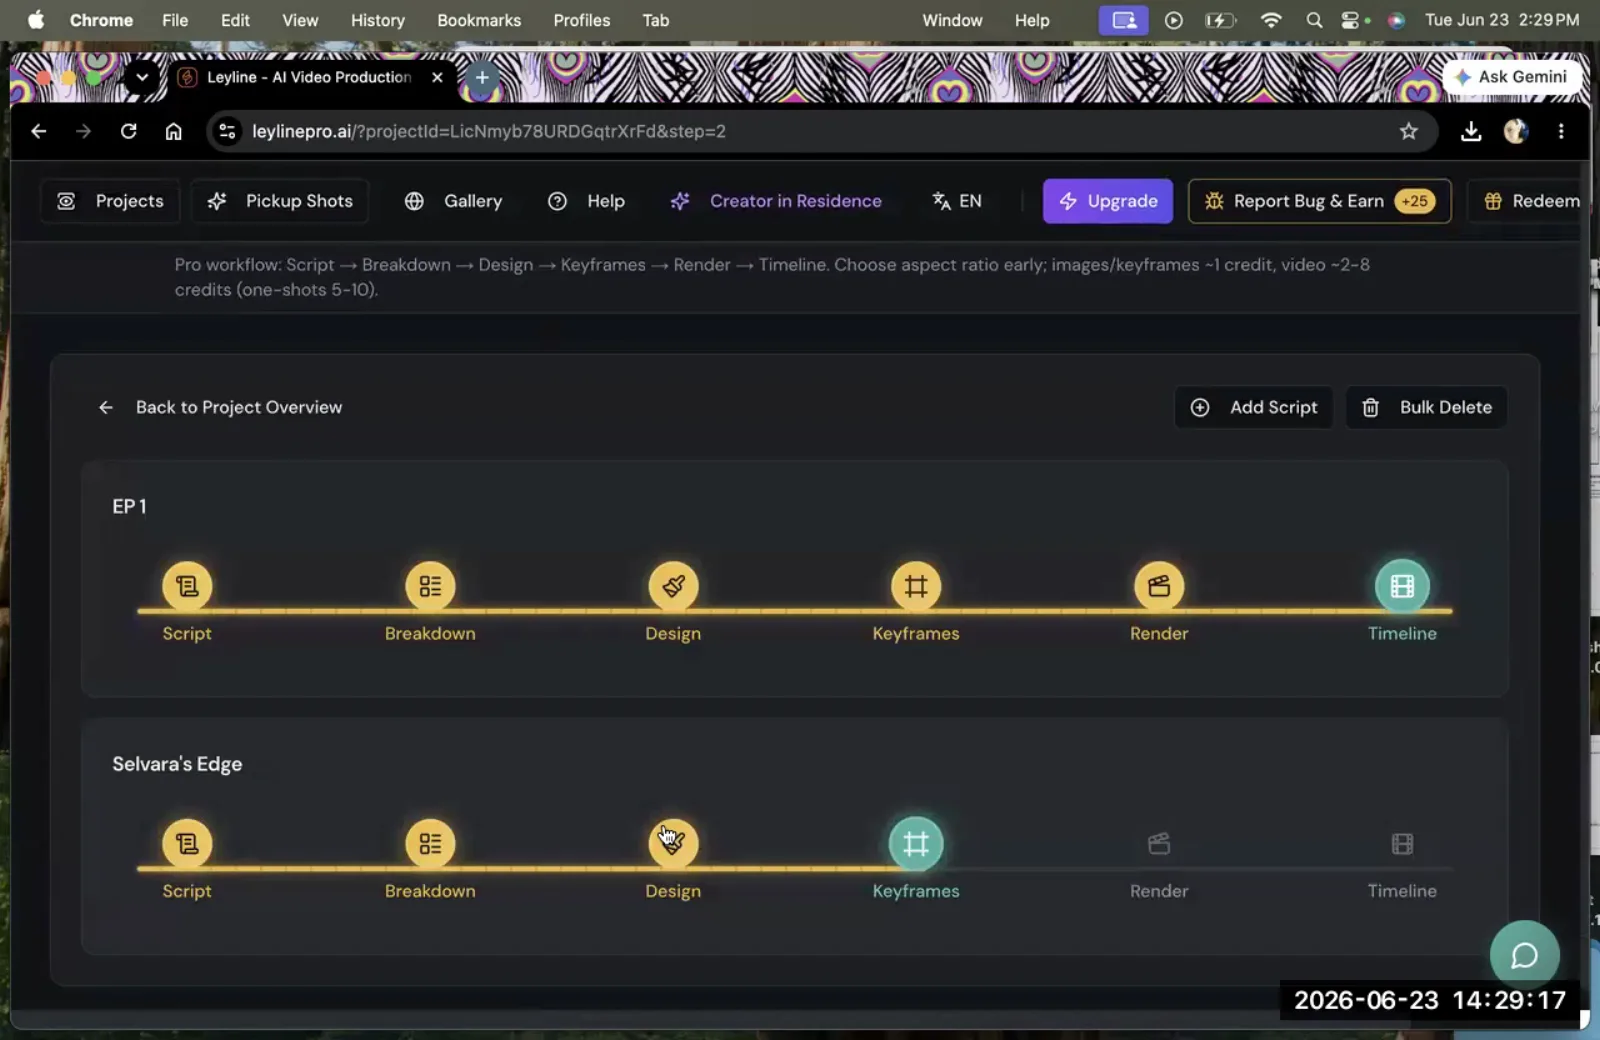
The user clicks on the 'Design' step in the workflow to begin designing the shots.
Step 4. Click 'Import from Bible' in the upper-right corner of the screen.
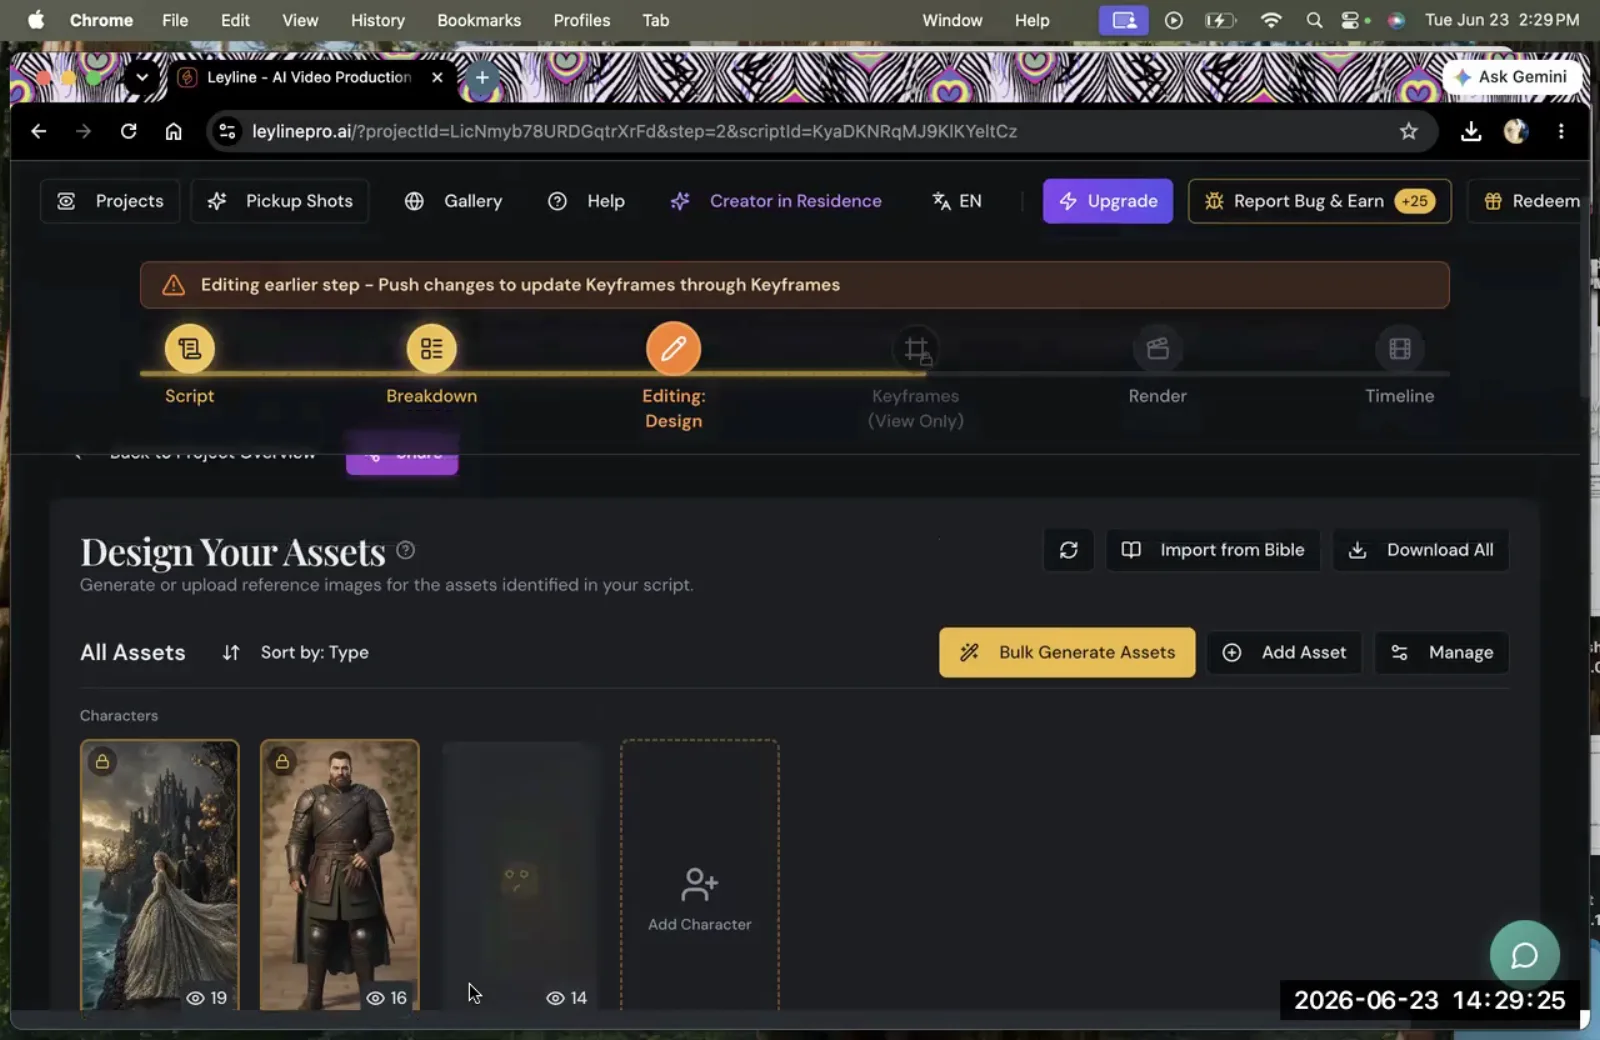
Click the 'Import from Bible' button to bring in assets from your project's bible.
Step 5. Select the desired character from the list of Bible assets and confirm the import.
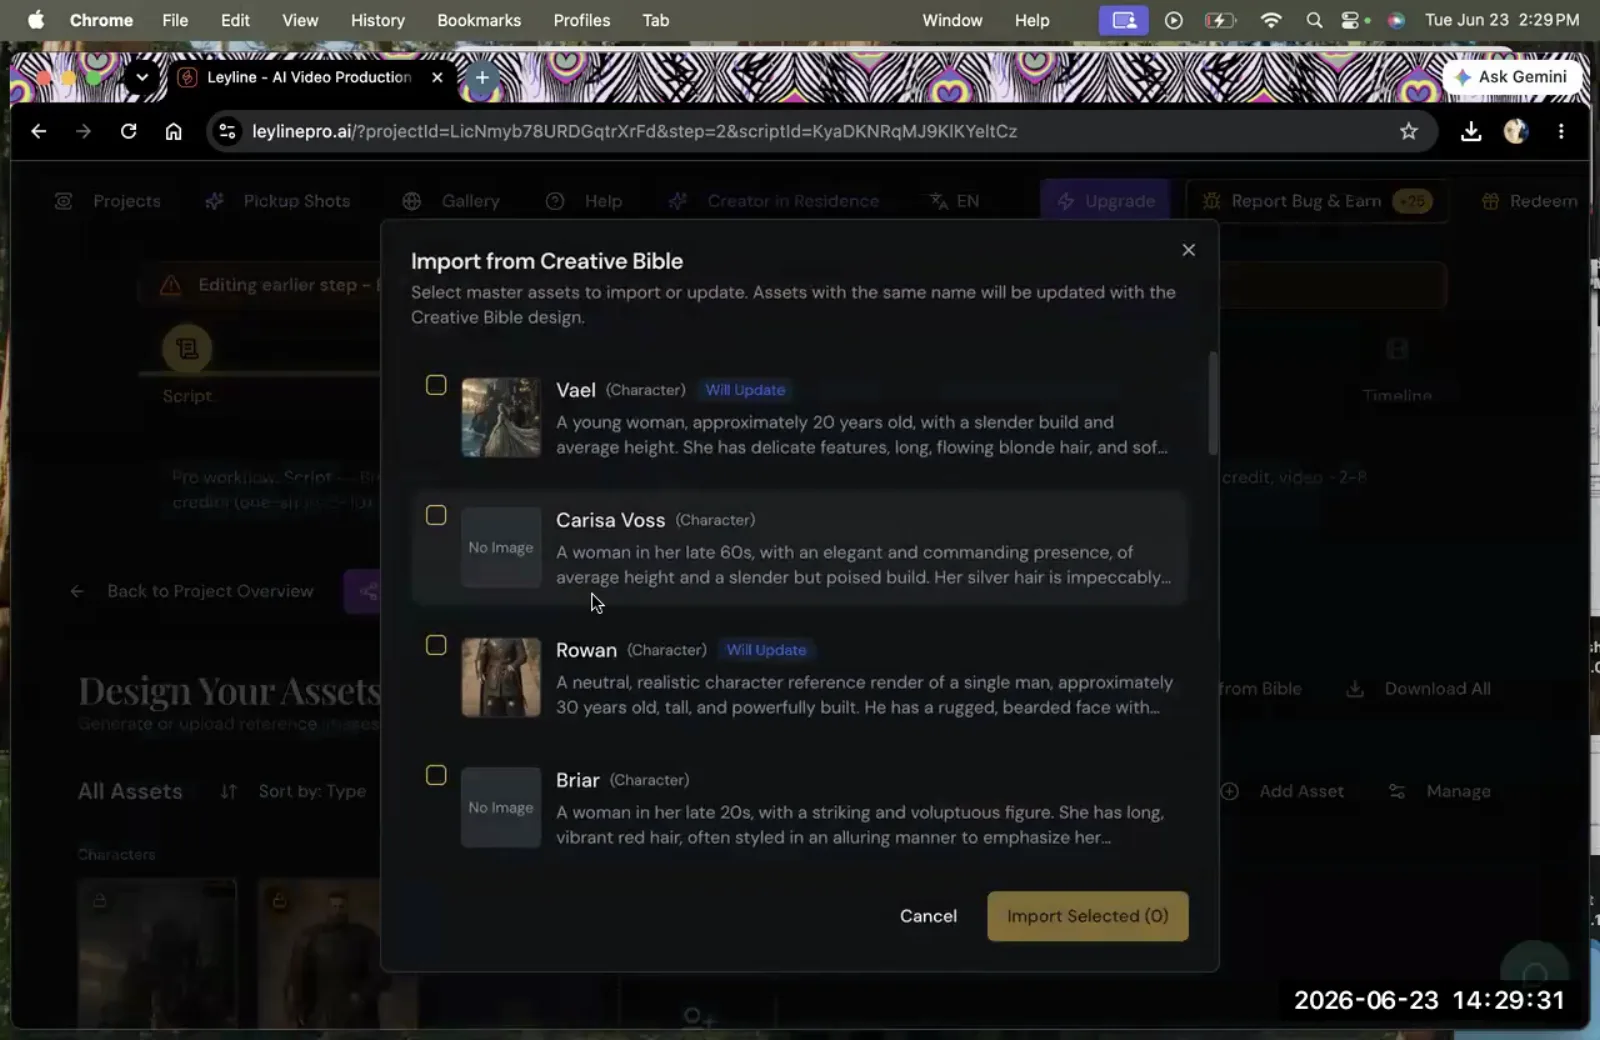
Choose which characters to import from your Creative Bible into the project assets.
Generating a Keyframe for a Shot
Keyframes are the static images that serve as the starting point for each animated shot. This workflow covers how to generate these images directly from your script's shot cards.
Step 1. Navigate to the 'Keyframe' section from the top navigation bar.
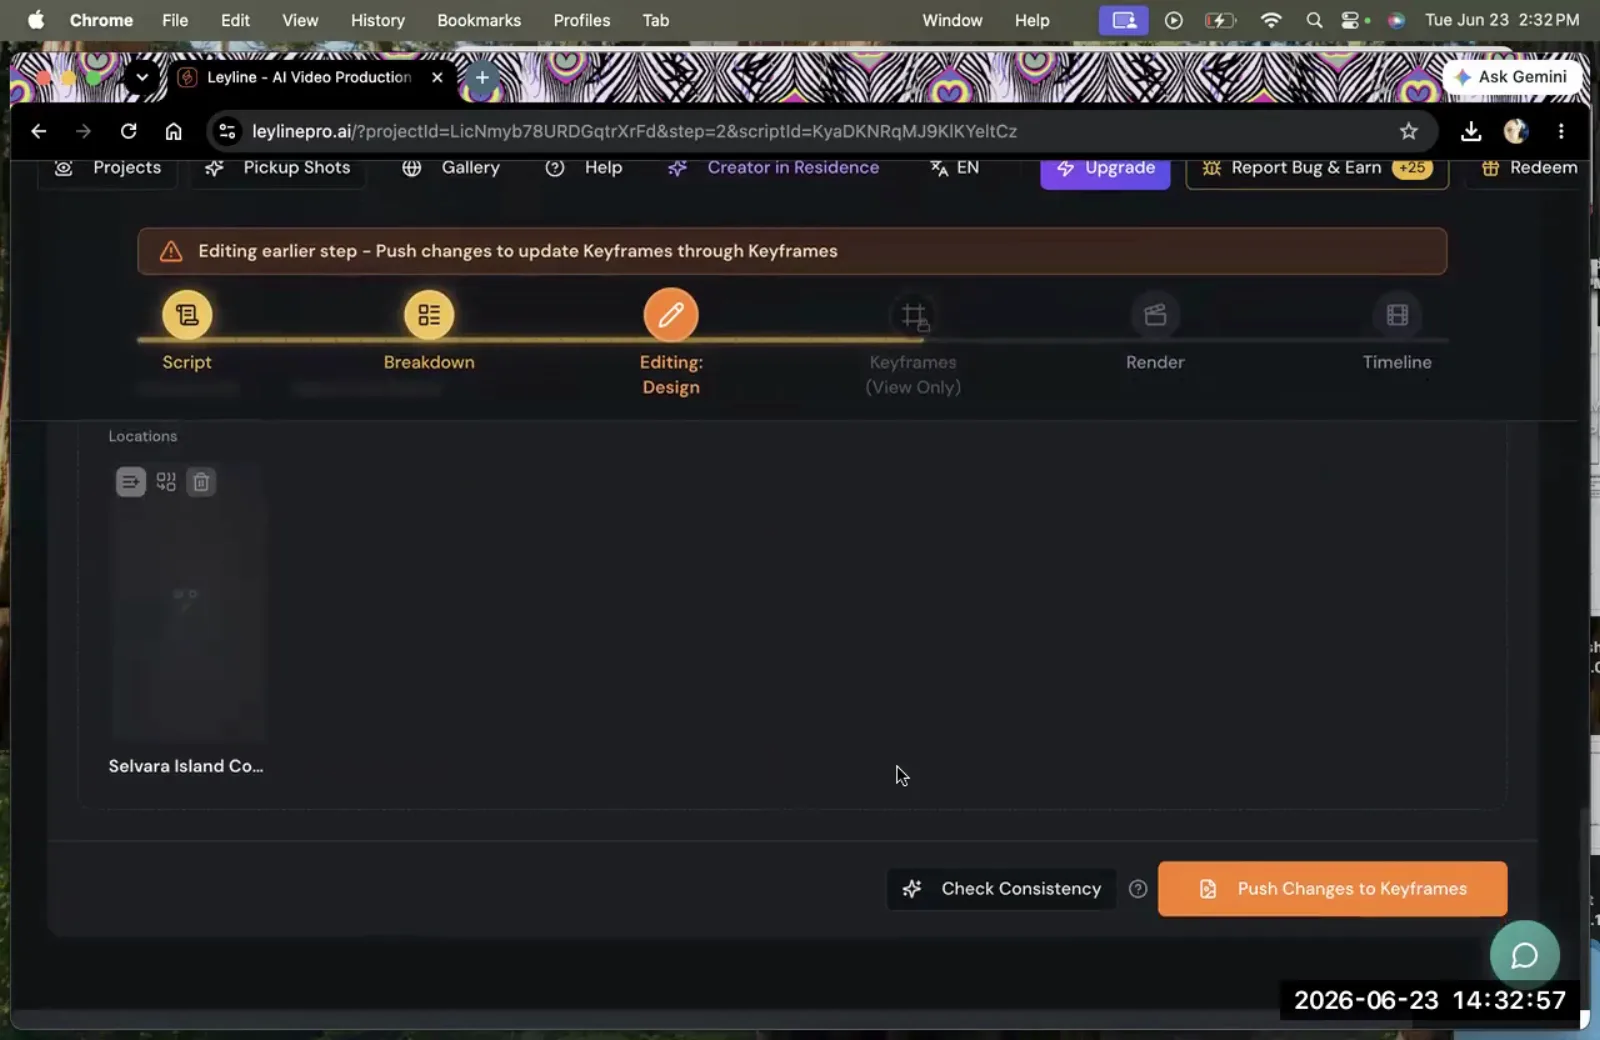
The next step in the workflow is 'Keyframes', located in the top navigation bar.
Step 2. Find the shot card for the scene you want to generate and click 'Edit'.
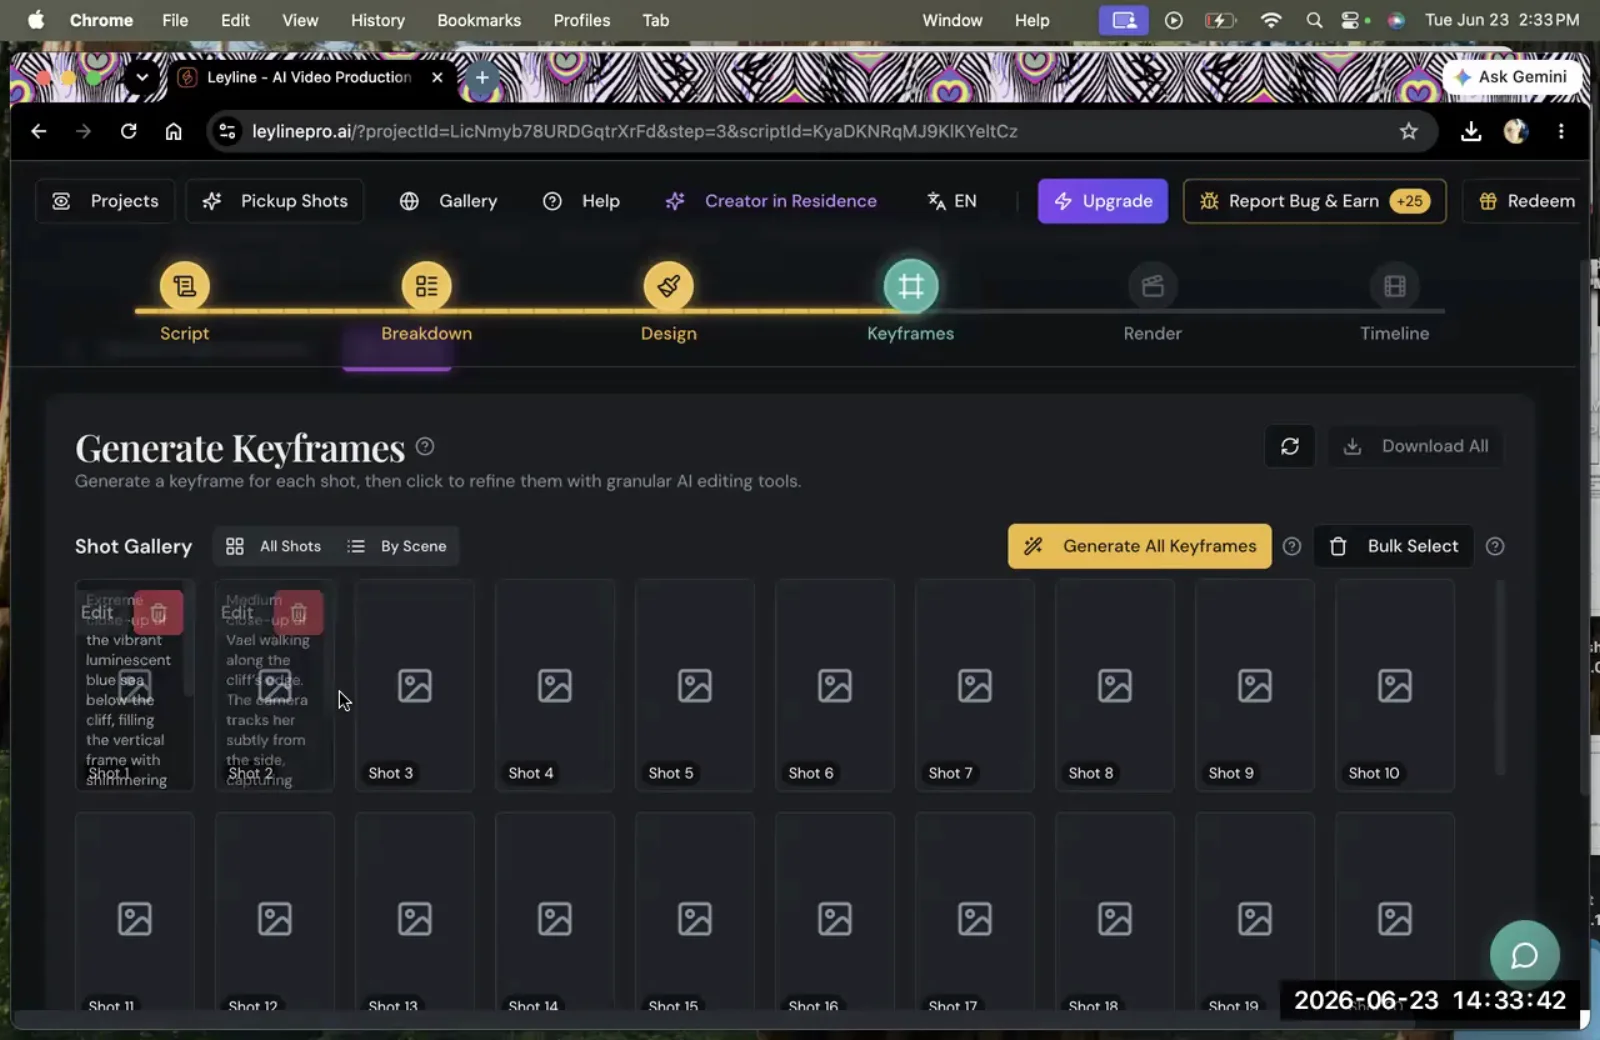
Find the shot card for the scene you want to generate and click the 'Edit' button.
Step 3. Review the auto-generated prompt, select an image model, and make any necessary adjustments.
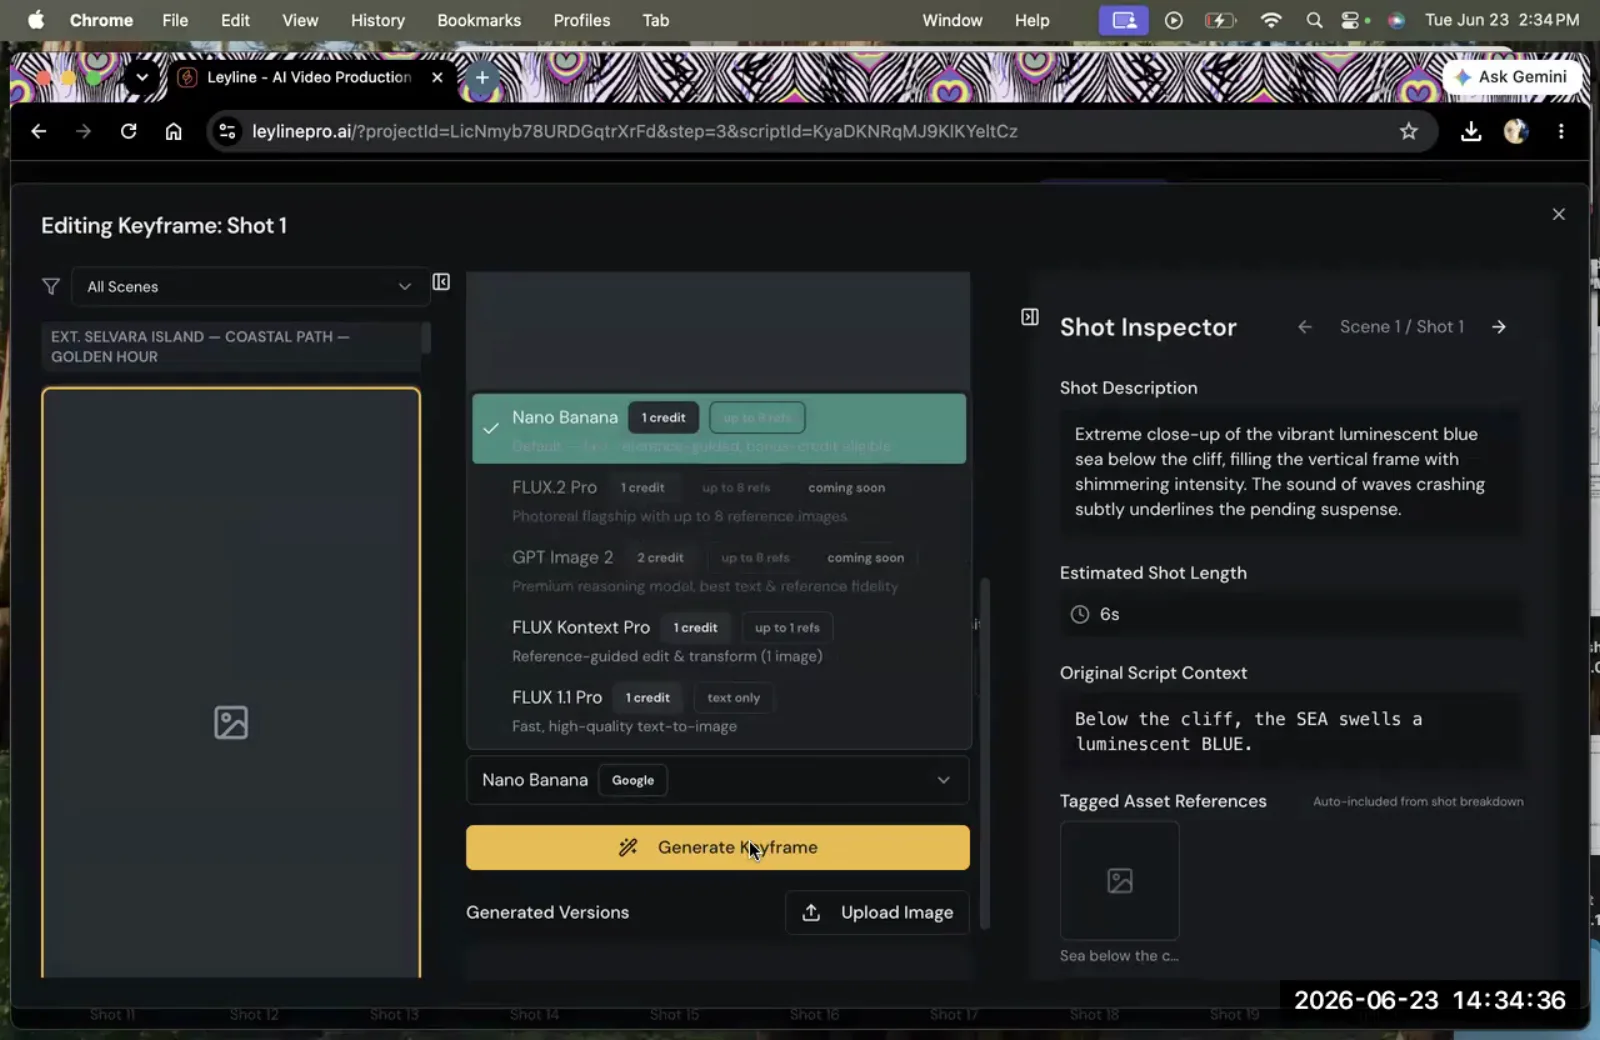
Review the auto-generated shot description in the Shot Inspector and select an image generation model.
Step 4. Click the generate button to create the static keyframe image.
Step 5. Review the generated image to ensure it matches your vision for the shot's composition and style.
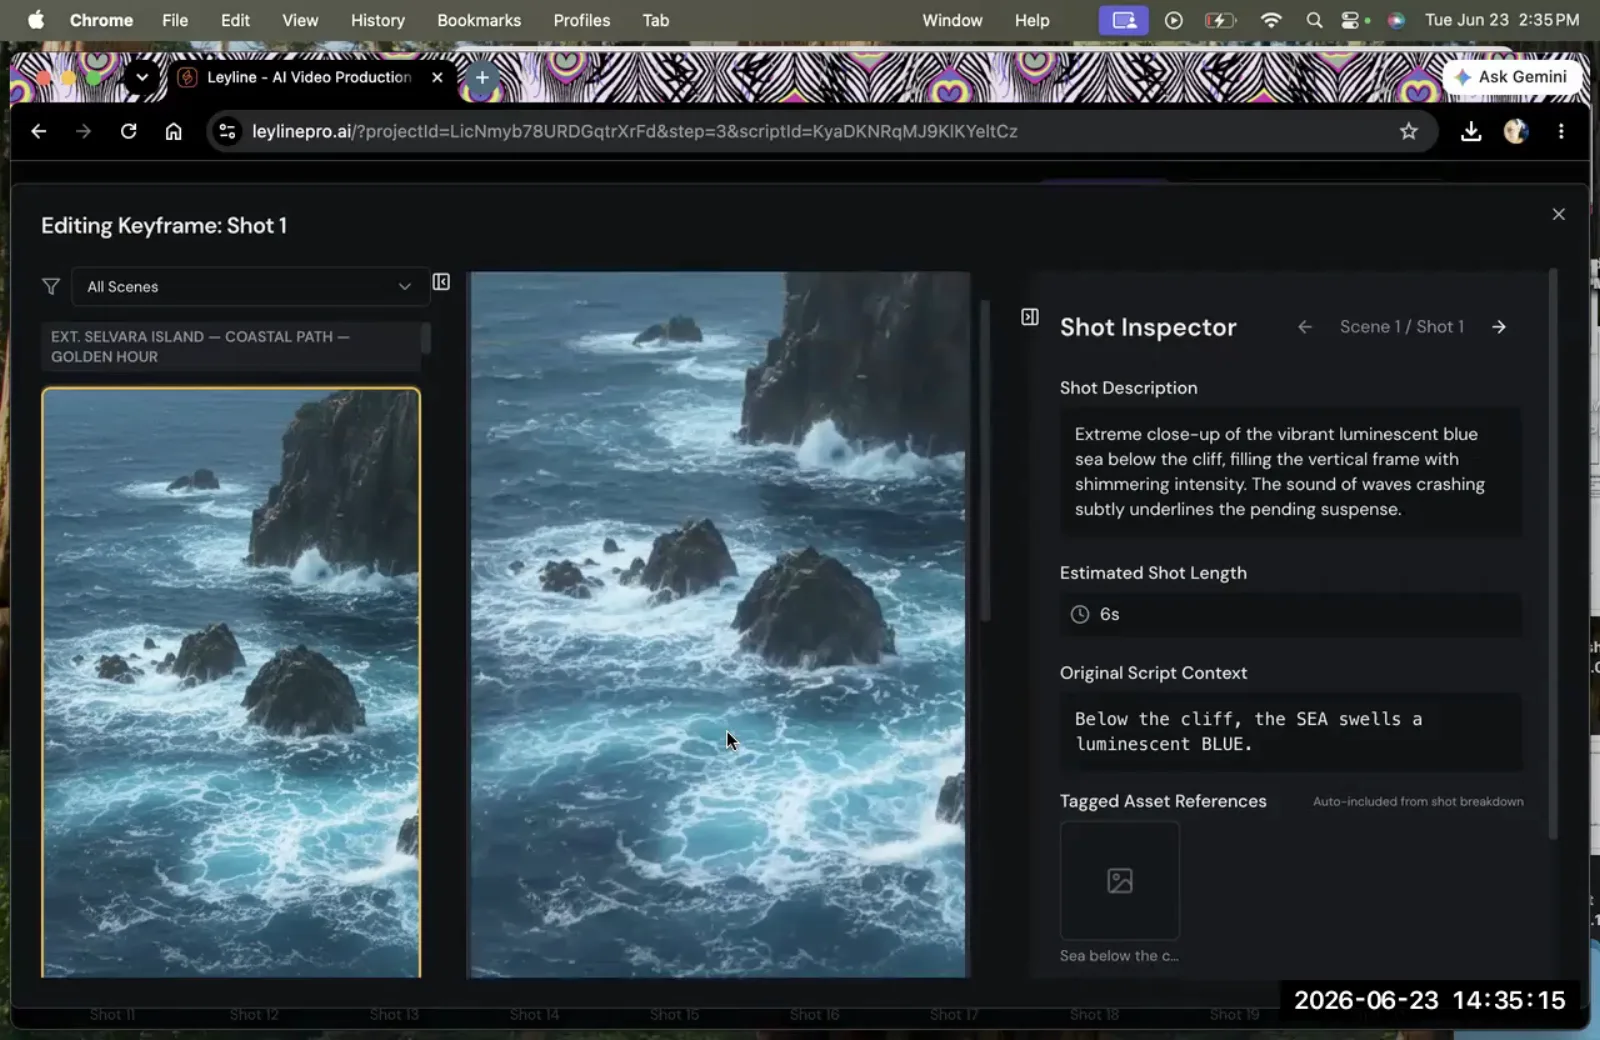
Check the generated keyframe against the shot description in the Shot Inspector to see if it aligns with your creative intent.
Key terms
Project Level References. General reference images uploaded to a project that are not specifically assigned to any one character or asset. This is a common point of confusion for new users.
Creative Bible. A centralized repository within a project for storing and managing core creative assets like characters, props, and locations, allowing them to be consistently reused across multiple scripts or episodes.
Asset Cards. The specific UI elements for individual assets (like a character named 'Odin') where you should upload their dedicated reference images for proper generation.
Promote to Creative Bible. The action of saving a finalized asset design from a specific script to the project's central Creative Bible, making it available for all other scripts in that project.
Sync Bible. An action that updates the project with the latest assets from the Creative Bible, ensuring that newly promoted characters are available to be imported into other scripts.
Import from Bible. The process of pulling an existing character or asset from the Creative Bible into the design phase of a new script.
Keyframe. The static starting image of a video shot. It is generated first to establish composition, character placement, and visual style before rendering the full video motion.
Shot Cards. The individual user interface elements that represent each shot in the script during the keyframe and video generation stages.
Directional Consistency. The filmmaking principle of maintaining correct spatial relationships between characters and their environment, often by adhering to the 180-degree rule. This is controlled in the keyframe stage.
Nano / Nano Banana. An image generation model available in the platform, noted by the instructor as being particularly effective for editing and changing existing images.
Seed Dance. A video generation model or feature mentioned by the user, which they plan to use for high-resolution rendering after confirming the motion is correct.
Bulk Generate. A feature that allows a user to generate all keyframes or video shots for a script at once, rather than one by one.
Common mistakes to avoid
- Uploading character reference images to the general project library instead of the specific character's asset card.
- Forgetting to 'Promote to Creative Bible' after designing a recurring character, making it unavailable in other scripts.
- Neglecting to 'Sync Bible' after promoting an asset, which prevents it from appearing as an import option.
- Confusing the top navigation tabs (for viewing a stage) with the bottom buttons (for pushing changes to the next stage).
- Assuming keyframes are generated per-character instead of per-shot.
- Trying to achieve perfect consistency on the first try, rather than accepting that iteration is a necessary part of the current AI video process.
Frequently asked questions
How do I keep my character's appearance consistent in AI video?
Maintain character consistency by creating a character asset card with specific reference images. Then, promote this character to your project's 'Creative Bible' to reuse the exact design across different scripts. Iteration is a necessary part of the process, as perfect consistency on the first attempt is uncommon.
What is a 'Creative Bible' in AI filmmaking platforms?
A 'Creative Bible' is a central library for a project where you store reusable assets like character designs. By promoting a character to the Bible, you can easily import and sync that same character across multiple scripts, which is essential for maintaining visual continuity throughout your film.
How to reuse the same character across multiple AI-generated scenes or episodes?
To reuse a character, first finalize their design within one script. Use the 'Promote to Creative Bible' feature to save their asset card to the project's central library. In a new script, you can then use the 'Import from Bible' and 'Sync Bible' functions to load the character.
Why aren't my Creative Bible assets showing up in my new script?
If your assets are not appearing, you likely missed a step. After you 'Promote to Creative Bible' in the source script, you must navigate to the new script and explicitly use the 'Sync Bible' function. This action pulls the updated library information into your current workspace, making assets available.
In the instructor’s words
“If you have any confusions or anything, it means the product can be improved.”
“This is where a lot of people are getting confused. So this is the project reference image. You need to upload the image for Odin. Not in the project, but here in the specific asset cards or in the Bible.”
“If this character is going to be reappearing in multiple episodes, always promote it to Bible once you've designed it.”
This tutorial was produced from the Leyline Masterclass recording (Cohort 9, Session 2, 2026-06-23). Screenshots are captured directly from the session.